


Strapi is a popular open-source headless CMS that lets developers build flexible APIs quickly while keeping full control over their content structure. By default, it runs on SQLite, which works well for prototyping, but production deployments call for a more robust database like PostgreSQL.
PostgreSQL adds the performance, scalability, and reliability that production applications need. Paired with a Kamatera VPS, you get full control over your infrastructure, from server sizing to database configuration.
This guide walks through the complete process of setting up Strapi with PostgreSQL on a Kamatera VPS. Like our other guides, it’s entirely command-driven, so you can follow along directly from your terminal without screenshots.
By the end, you’ll have:
- A configured Kamatera VPS
- PostgreSQL installed and secured
- A Strapi application connected to PostgreSQL
- A working development environment ready for further deployment or scaling
We’ll also cover optional steps for production use, including basic security and process management.
Prerequisites
Before you start, make sure you have:
- A Kamatera VPS running Ubuntu 20.04 or later
- Root access to the server
- Your server’s public IP address
- A local machine with a terminal for SSH access
- Basic familiarity with Linux commands
Set up your Kamatera VPS
You can access your Kamatera server in two ways:
Option A: Using Kamatera web console
- Open your server from the Kamatera dashboard
- Click “Open in new window”
- Log in using your root credentials
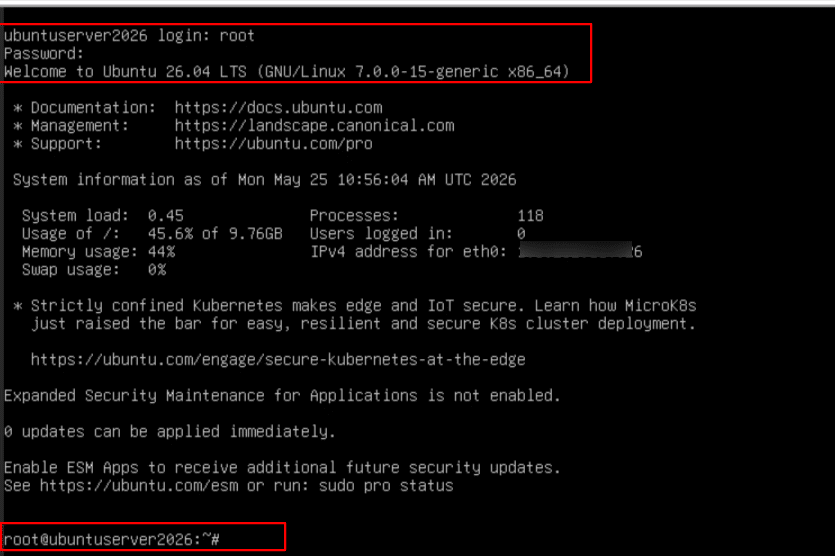
Option B: Using SSH
From your local machine terminal, connect using:
ssh root@your_server_ip
Replace your_server_ip with your VPS public IP.
SSH is the preferred method for ongoing development as it allows faster command execution, scripting, and better workflow control.
Update the system
Once logged in, update the package lists and upgrade existing packages:
apt update && apt upgrade -y
This ensures your system is running the latest security patches and software versions.
Install essential packages
Install basic utilities required for development and package management:
apt install -y curl wget git unzip build-essential
These tools are commonly used for:
- Downloading dependencies (curl, wget)
- Version control (git)
- Extracting files (unzip)
- Compiling native modules (build-essential)
Verify installation (optional)
You can quickly verify installed tools:
git --version
curl --version
This completes the initial VPS setup.
Install Node.js and package manager
Strapi requires Node.js to run. It’s recommended to install the LTS (Long Term Support) version for stability.
Install Node.js (LTS Version)
First, add the NodeSource repository:
curl -fsSL https://deb.nodesource.com/setup_lts.x | bash -
Then install Node.js:
apt install -y nodejs
Verify installation
Check if Node.js and npm are installed correctly:
node -v
npm -v
You should see version numbers for both.
Install required build tools
Strapi dependencies may require native builds. If not installed earlier:
apt install -y build-essential
This completes the Node.js setup required for running Strapi.
Install and configure PostgreSQL
Install PostgreSQL and its contributed modules:
apt install -y postgresql postgresql-contrib
Start and enable PostgreSQL service
Ensure PostgreSQL is running and starts on boot:
systemctl start postgresql
systemctl enable postgresql
Verify status:
systemctl status postgresql
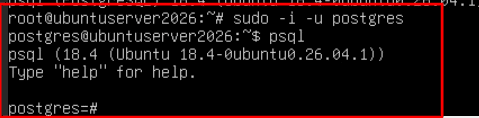
Switch to PostgreSQL user
PostgreSQL creates a default system user called postgres. Switch to it:
sudo -i -u postgres
Access PostgreSQL CLI
Enter the PostgreSQL interactive shell:
psql
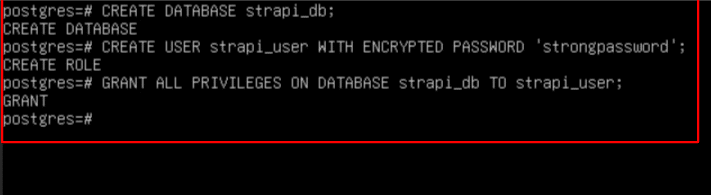
Create database and user
Run the following commands inside the PostgreSQL shell:
CREATE DATABASE strapi_db;
CREATE USER strapi_user WITH ENCRYPTED PASSWORD 'strongpassword';
ALTER ROLE strapi_user SET client_encoding TO 'utf8';
ALTER ROLE strapi_user SET default_transaction_isolation TO 'read committed';
ALTER ROLE strapi_user SET timezone TO 'UTC';
GRANT ALL PRIVILEGES ON DATABASE strapi_db TO strapi_user;
Exit PostgreSQL
\q
Then return to root user:
exit
Configure password authentication
PostgreSQL uses peer authentication by default for local connections, which does not work with Strapi. We need to enable password-based authentication.
Open the PostgreSQL configuration file:
nano /etc/postgresql/*/main/pg_hba.conf
Locate the following lines: (Press Ctrl+W in nano and search for word local)
local   all             postgres                    peer
local   all             all                         peer
Update them to:
local   all             postgres                          md5
local   all             all                                     md5

Then save and exit the file.
Note:
- peer authentication uses system user mapping
- md5 allows password-based login, which is required for Strapi
Restart PostgreSQL service
Apply the changes by restarting PostgreSQL:
systemctl restart postgresql
Verify database connection
Test the connection using the database credentials created earlier:
psql -U strapi_user -d strapi_db -h localhost -W
Enter the password when prompted. If the configuration is correct, you will successfully access the PostgreSQL shell.
Install Strapi
To create a new Strapi application, navigate to the directory where you want to set up your project (for example, /root or /var/www):
cd /root
Create a new Strapi app using:
npx create-strapi-app@latest my-strapi-app
Choose custom installation
During setup, you will be prompted with installation options. Select Custom (manual settings). This allows us to configure PostgreSQL instead of using the default SQLite database.
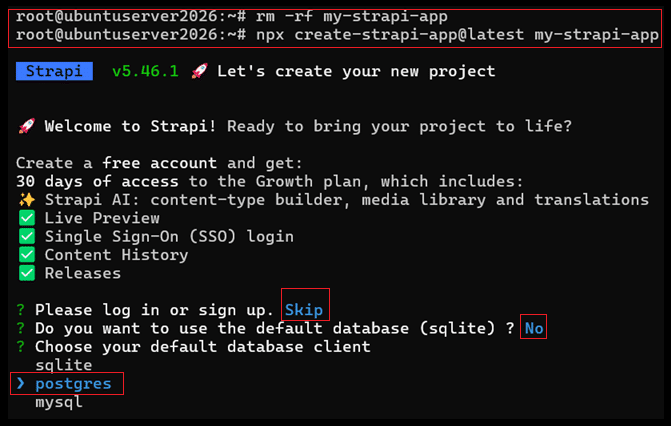
Skip database configuration (for now)
When prompted for database selection, you can either skip or provide placeholder values. We will configure PostgreSQL manually in the next step
Navigate to project directory
Once installation is complete, run:
cd my-strapi-app
Verify installation
This step ensures that Strapi is installed correctly before configuring PostgreSQL.
npm run develop
If everything is working, Strapi will start and display logs indicating the server is running. Stop the server for now using:
CTRL + C
Note:
- Strapi installs with SQLite by default for quick setup
- We will now replace it with PostgreSQL in the next step
Configure Strapi to use PostgreSQL
Strapi requires the pg package to connect to PostgreSQL.
Install PostgreSQL driver inside your project directory:
npm install pg
Update database configuration
Open the database configuration file:
nano config/database.js
Replace the existing configuration with:
module.exports = ({ env }) => ({
  connection: {
    client: 'postgres',
    connection: {
      host: '127.0.0.1',
      port: 5432,
      database: 'strapi_db',
      user: 'strapi_user',
      password: 'strongpassword',
      ssl: false,
    },
  },
});
Use environment variables (recommended)
Instead of hardcoding credentials, store them in a .env file.
Create or edit the file:
nano .env
Add:
DATABASE_CLIENT=postgres
DATABASE_HOST=127.0.0.1
DATABASE_PORT=5432
DATABASE_NAME=strapi_db
DATABASE_USERNAME=strapi_user
DATABASE_PASSWORD=strongpassword
DATABASE_SSL=false
Update config to use environment variables
Modify config/database.js:
module.exports = ({ env }) => ({
  connection: {
    client: env('DATABASE_CLIENT', 'postgres'),
    connection: {
      host: env('DATABASE_HOST', '127.0.0.1'),
      port: env.int('DATABASE_PORT', 5432),
      database: env('DATABASE_NAME', 'strapi_db'),
      user: env('DATABASE_USERNAME', 'strapi_user'),
      password: env('DATABASE_PASSWORD', 'strongpassword'),
      ssl: env.bool('DATABASE_SSL', false),
    },
  },
});
Start Strapi with PostgreSQL
Run the development server:
npm run develop
Verify connection
If everything is configured correctly:
- Strapi will start without database errors
- It will automatically create required tables in PostgreSQL
- You’ll see logs indicating successful connection
Note:
- Strapi automatically initializes database schemas on first run
- If the connection fails, check credentials and PostgreSQL authentication settings
Run and access Strapi admin panel
Now that Strapi is configured to use PostgreSQL, the next step is to start the application and verify that everything is working end-to-end.
Start the Strapi application
From inside your project directory, start Strapi:
npm run develop
This will launch the Strapi server and attempt to connect to the PostgreSQL database using the configuration we defined earlier. Next, we’ll verify whether the server has started correctly and the database connection is successful.
Confirm server and database connection
Observe the terminal output carefully. You should see:
- No database connection errors
- Logs indicating the server is running
- A local URL such as: http://localhost:1337
This confirms that Strapi is running and successfully connected to PostgreSQL. Now that the server is running locally, we need to make it accessible externally from your browser.
Configure Strapi for external access
By default, Strapi binds to localhost, which means it cannot be accessed from outside the server. Update the configuration to allow external access. Open the server configuration file:
nano config/server.js
Update it as follows:
module.exports = ({ env }) => ({
  host: '0.0.0.0',
  port: 1337,
});
Restart Strapi:
npm run develop
With Strapi now listening on all interfaces, the next step is to ensure the server port is open for incoming traffic.
Open port on firewall
If a firewall is enabled on your VPS, allow traffic on port 1337:
ufw allow 1337
Now that the port is open, you can access Strapi from your local machine using the server’s public IP.
Access Strapi admin panel
Open your browser and navigate to:
http://your_server_ip:1337/admin
This connects your local browser to the Strapi server running on your VPS. On first access, Strapi will prompt you to create an admin account.
Create admin user
Enter your details:
- Password
- Name
This account will give you access to the Strapi dashboard. Once logged in, we’ll perform a quick test to confirm that PostgreSQL is storing data correctly.
Verify end-to-end connectivity
Inside the admin panel:
- Create a content type
- Add a sample entry
- Save it
If the data is saved successfully, it confirms:
- Strapi is running correctly
- PostgreSQL is connected and storing data
- The full application flow is working
Production hardening and best practices
Now that Strapi is running and connected to PostgreSQL, the next step is to make the setup more stable, secure, and suitable for production use.
Run Strapi in the background using PM2
Right now, Strapi runs in the foreground. If the terminal closes, the app stops. We’ll use PM2 to keep it running continuously. Install PM2 globally:
npm install -g pm2
Start Strapi using PM2:
pm2 start npm --name strapi-app -- run develop
Save the process:
pm2 save
Enable PM2 to start on system reboot:
pm2 startup
Now Strapi will keep running in the background, even if you disconnect from the server. Next, we’ll secure access to your VPS.
Configure basic firewall rules
If not already configured, enable UFW:
ufw enable
Allow essential ports:
ufw allow OpenSSH
ufw allow 1337
Check status:
ufw status
With firewall rules in place, your server is protected from unwanted access. Next, we’ll improve PostgreSQL security.
Restrict PostgreSQL access
By default, PostgreSQL listens locally, which is good for security. Ensure it is not exposed publicly.
Open the config file:
nano /etc/postgresql/*/main/postgresql.conf
Ensure:
listen_addresses = 'localhost'
Restart PostgreSQL:
systemctl restart postgresql
This ensures only local applications like Strapi can access the database. Next, we’ll improve credential handling.
Use environment variables for sensitive data
Avoid hardcoding credentials in config files.
Ensure your .env file contains:
DATABASE_HOST=127.0.0.1
DATABASE_PORT=5432
DATABASE_NAME=strapi_db
DATABASE_USERNAME=strapi_user
DATABASE_PASSWORD=strongpassword
This keeps your configuration flexible and secure. Next, we’ll briefly discuss scaling considerations.
Conclusion
Now that everything is set up, it’s worth understanding how Strapi and PostgreSQL work together behind the scenes.
Strapi uses a query builder called Knex to communicate with the database. The first time you start the application, it automatically creates the tables your content types need. Each content type you define in the admin panel maps to a table in PostgreSQL, giving you structured storage and efficient querying.
Strapi also handles schema management internally for most day-to-day changes, so you can focus on building APIs and managing content rather than maintaining the database structure directly.
Running PostgreSQL as your backend gives your Strapi application:
- Better performance with larger datasets
- Reliable transaction handling
- Scalability for production workloads
At this point, you have:
- A Kamatera VPS configured and running
- PostgreSQL installed and secured
- Strapi connected and operational
- A working admin panel for managing content
This gives you a solid foundation for building and scaling API-driven applications with Strapi and PostgreSQL.