


Most developers default to third-party APIs for large language models because local setup is a pain. The tradeoff: your data leaves your infrastructure, latency creeps in, and costs compound fast.
Ollama lets you run models like LLaMA and Mistral directly on your own hardware with minimal setup. But personal machines often lack the GPU power and memory these models actually need to perform. With customizable server configurations and a pre-built Ollama app image on a Kamatera VPS, you can deploy a dedicated LLM environment without touching complex manual installations.
This guide walks through deploying Ollama on Kamatera using that app image, then configuring it for secure, private model hosting. We will also cover model setup, API exposure, and basic optimization to get you to a production-ready setup.
Step-by-step guide
The first step in deploying Ollama on Kamatera is to log in to your Kamatera cloud management console. Once logged in, you’ll see the dashboard. This is where you’ll manage servers, networking, and storage.
Steps:
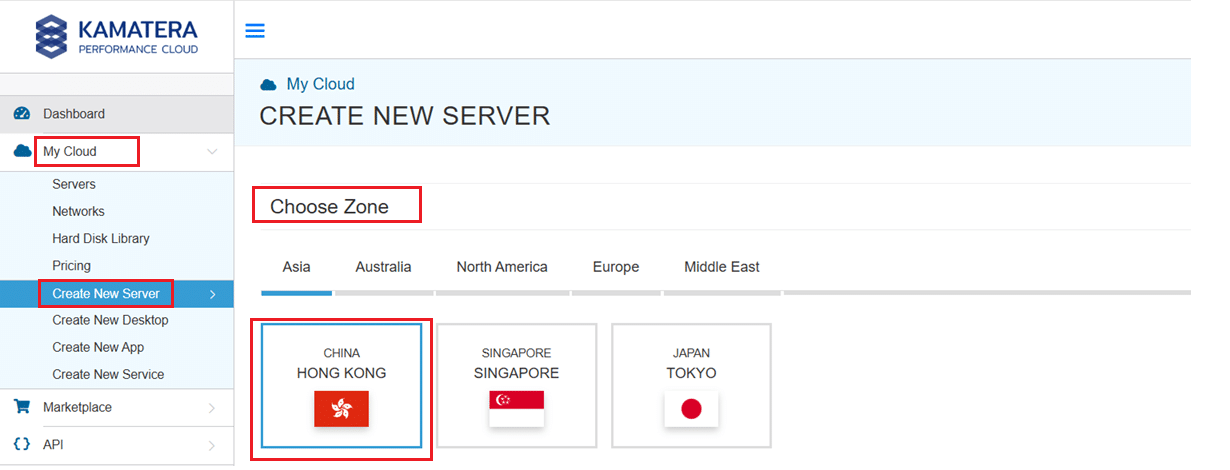
- Expand the My Cloud option on the right bar and choose Create New Server. Under create new server option, choose the zone.
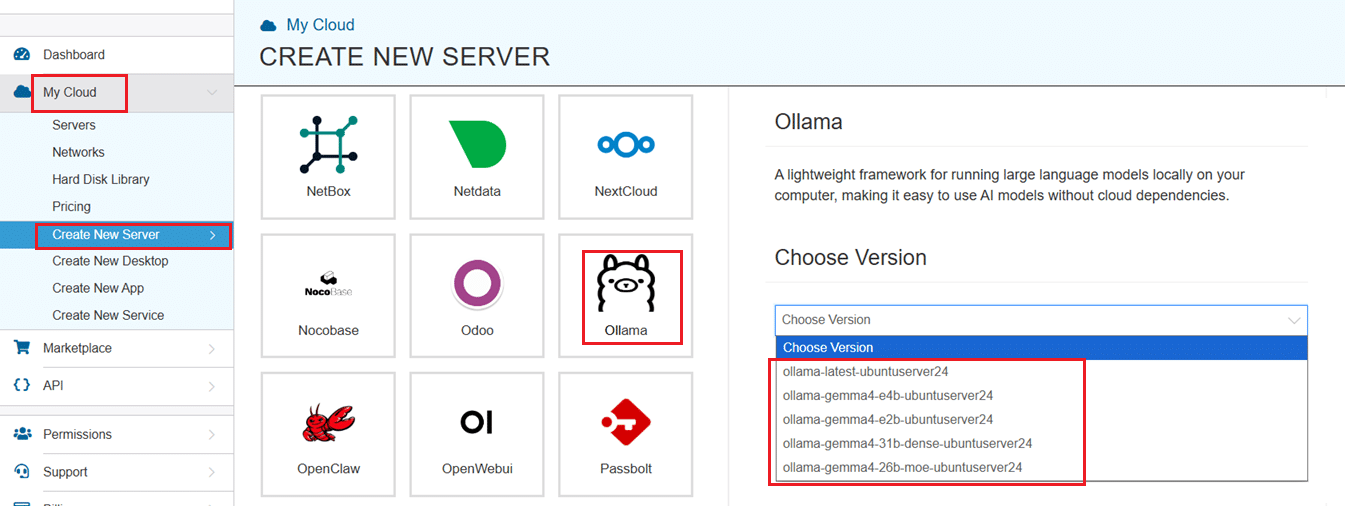
2. Scroll down and under the Service Images tab, look for Ollama. Select it and then choose the latest version.
Select your server specifications
- Scroll down and enable the Detailed View toggle to check the pricing per configuration. Here’s where you’ll input your preferred server specifications.
- Choose the Type, CPU, RAM, and Disk storage. Click on the help button on the side to learn more about each setting. You can add more disk storage at any point in your server’s life.
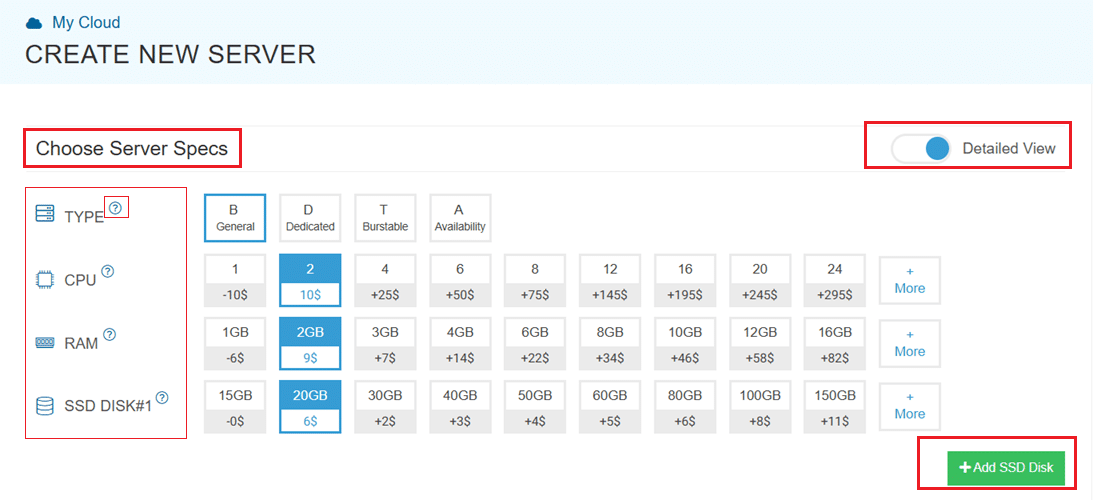
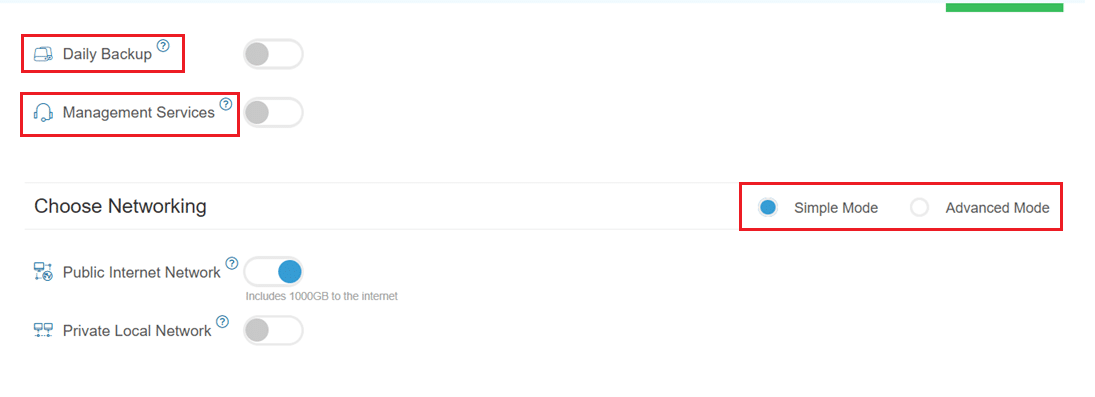
- Enable Daily backup option to enable a daily backup of your server storage.
- Enable Management Services toggle for a managed server option.
Configuring network and security settings
- Here we’ll choose either simple or advanced networking. This lets you define how your server will connect to the internet, and how much outbound data it can use per month.
- Simple Mode – Choose between WAN or LAN.
- Advanced Mode – NIC #1 (Network Interface Card)
- WAN (selected): This means your server will be accessible from the internet. It will get a public IP.
- The other options (LAN, Private, etc.) are only needed for internal or isolated setups.
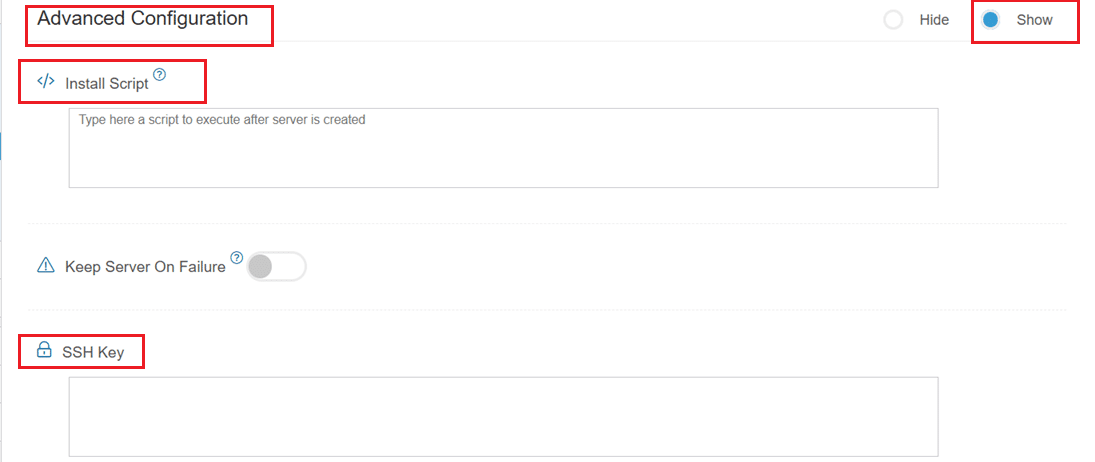
- Now, let’s look at Advanced Configuration:
- Keep Server On Failure: This option controls what happens if something goes wrong; for example, if a startup script fails while setting up your server. If this setting is OFF (default), Kamatera will automatically delete the server if the setup fails. It becomes useful if you want to avoid paying for a broken setup, but you won’t be able to debug what went wrong. If this setting is ON, Kamatera will keep the server running, even if something fails during the initial setup. This lets you log in, investigate the issue, fix problems manually, and retry setup if needed.
Recommended for most users:
Keep it OFF unless you’re running custom scripts or complex configurations. For basic setups like Ollama, the default (OFF) is usually fine.
- SSH key: Allows you to securely connect to the server without a password (recommended for better security).
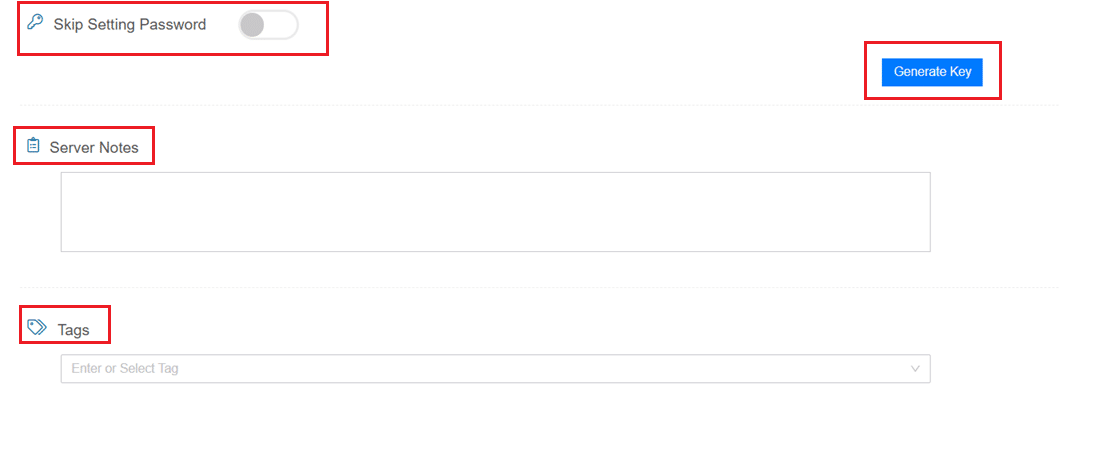
- Skip Setting Password: If enabled, your server will only allow SSH key login—no password access. You can click “Generate Key” if you don’t already have one. Input further server notes and tags if necessary.
Finalize deployment
- Finally, choose a strong password, select the number of servers, and input a server name.
- Once you have added all the details, choose your billing cycle and click on Create server button.

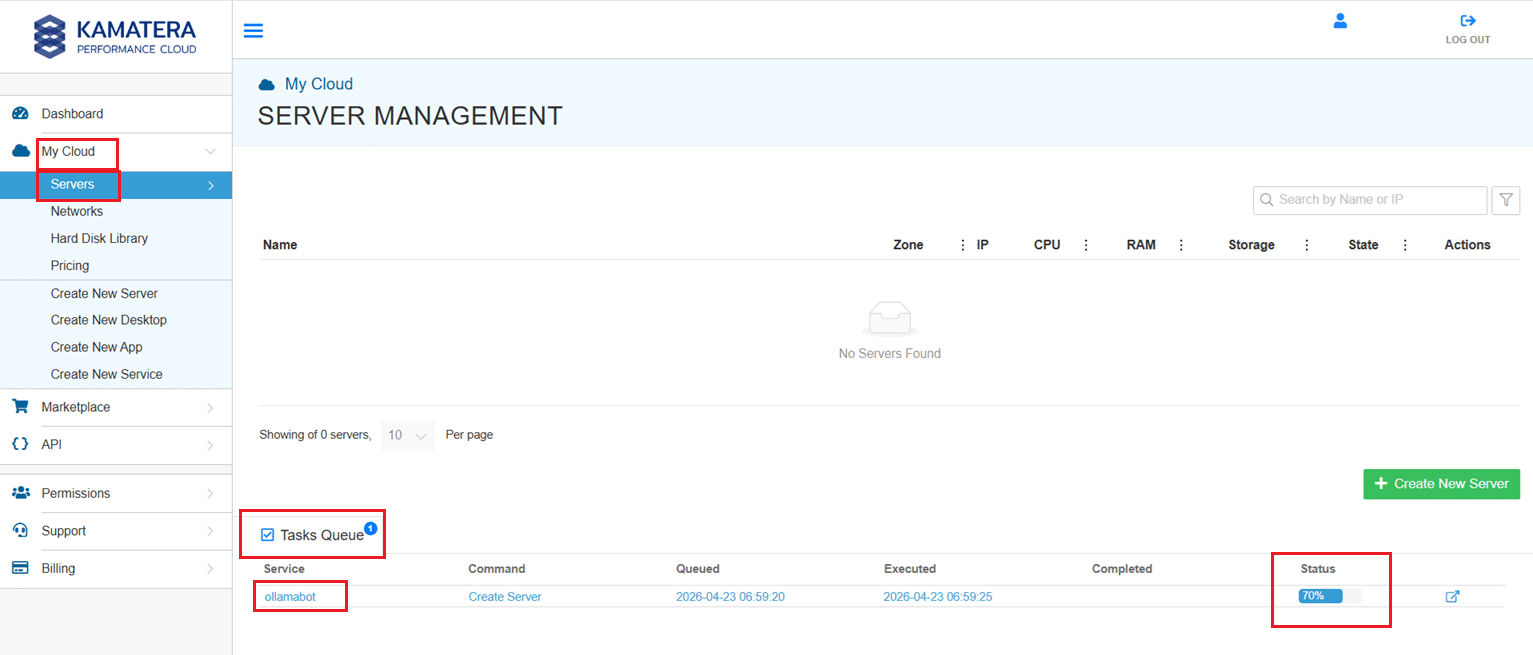
You can check the server creation progress under Server > Task Queue. Once created, you will see your server under the Servers panel.
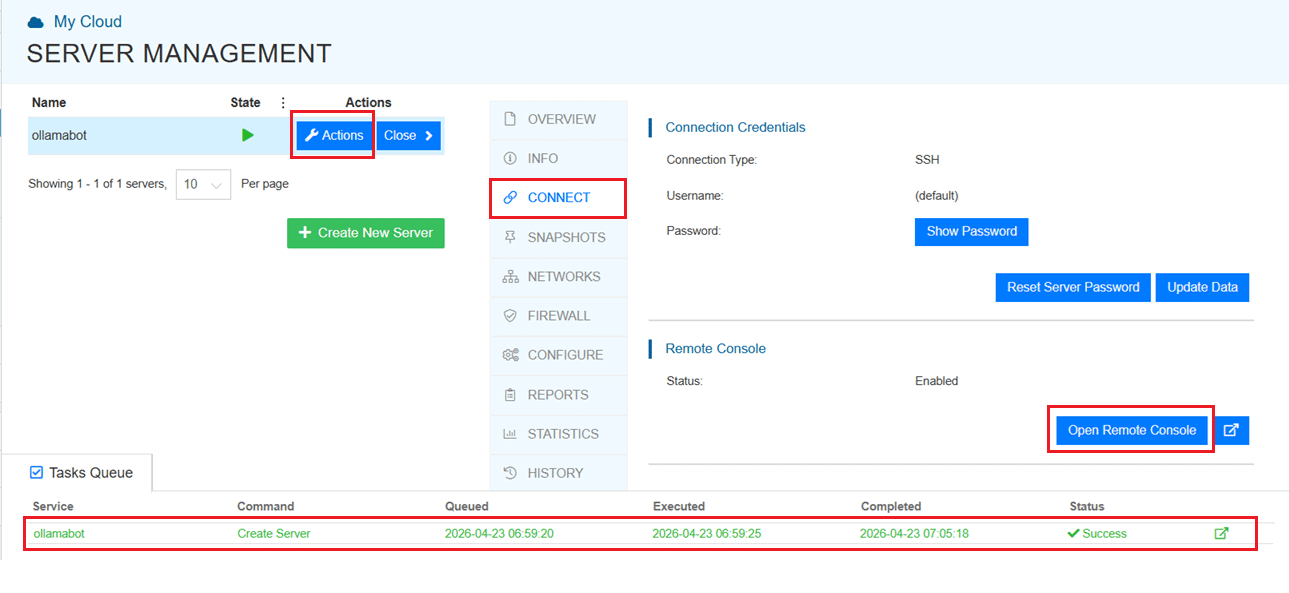
To open the remote server further click on Connect and Open Remote Console. This will open the remote machine in a separate window, where you can access the console of the remote machine, as well. To disconnect the remote server, click Disconnect.
Accessing the Kamatera VPS
Once the server is created using the Ollama app image, you can access it via the Kamatera web console or SSH.
On first login, you’ll be prompted with a standard Ubuntu terminal:
- Username: root
- Password: (the one you set during server creation)
After logging in, you should see a system message indicating that Ollama has been installed successfully.
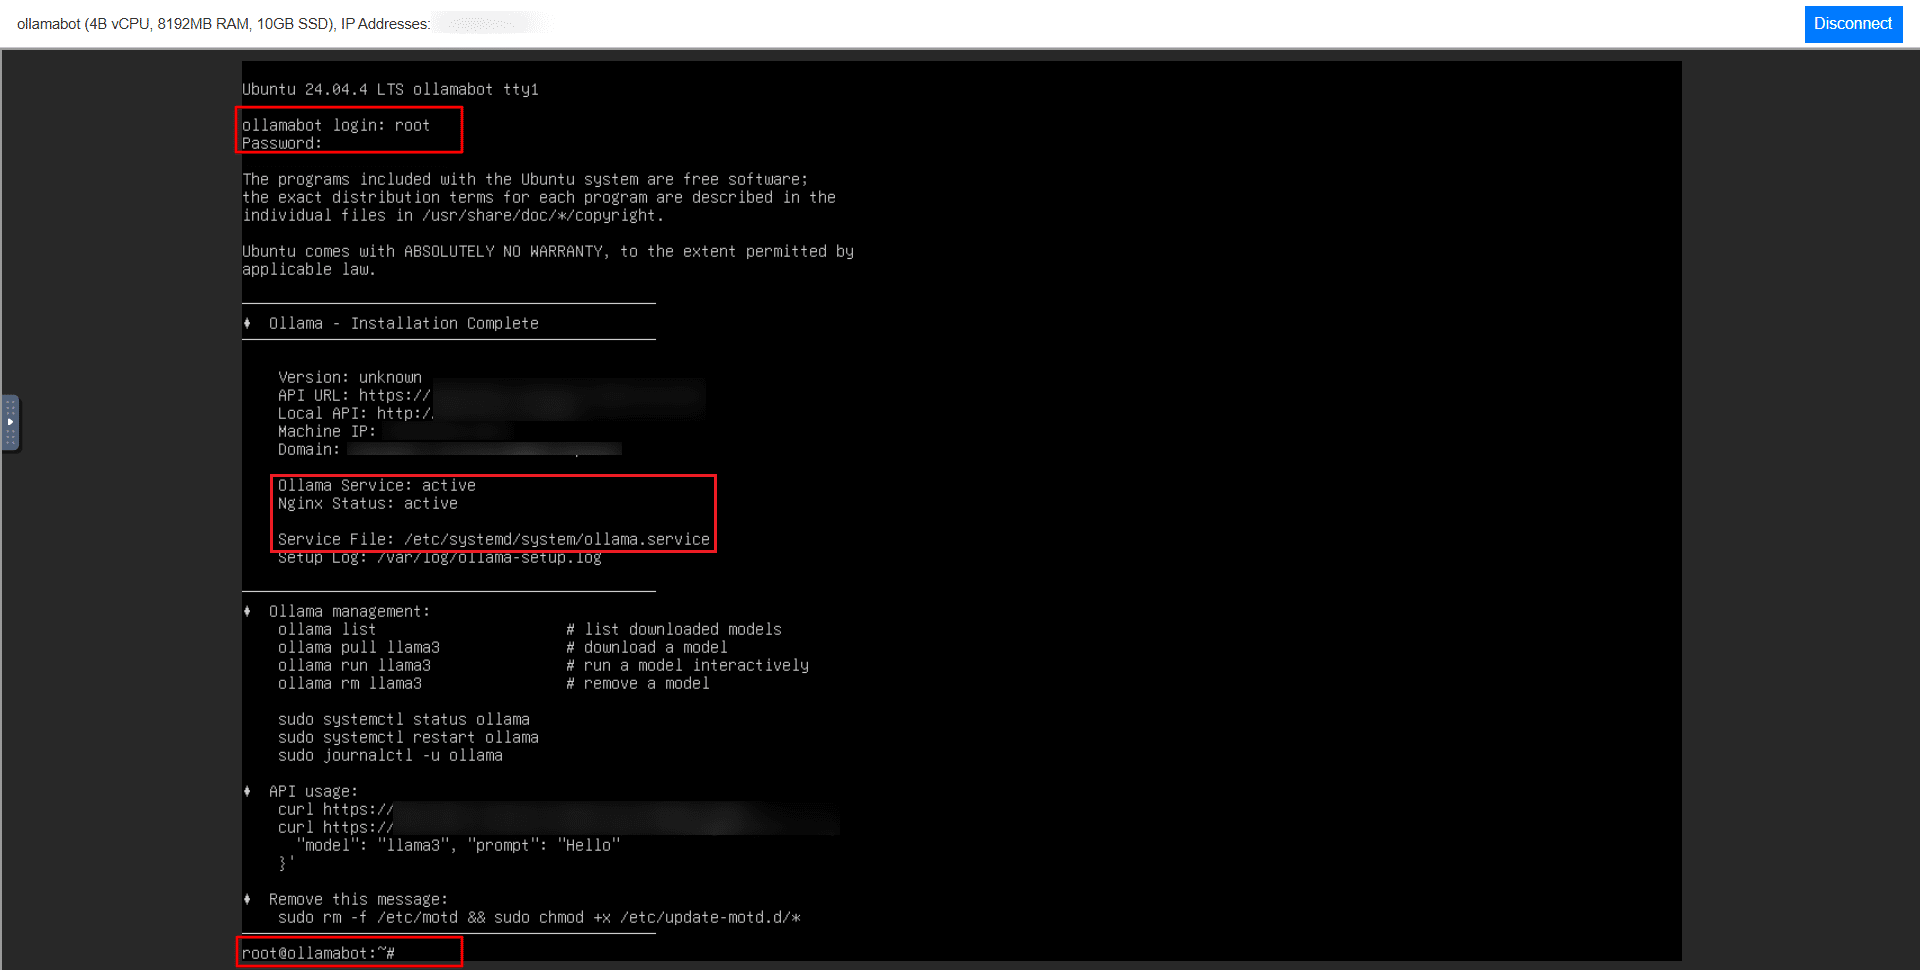
Verifying Ollama Installation
The pre-configured image installs and starts Ollama and NGINX automatically. Terminal output will confirm both services are active. To verify manually:
systemctl status ollama |
You should see the service running without errors.
Checking available models
No models are preloaded. Run the following to confirm:
ollama list |
An empty list is expected. You will need to pull a model before using the API or CLI.
Downloading a model
This guide uses LLaMA 3, which balances performance and resource usage well. Pull it with:
ollama pull llama3
Depending on the model version, the download may be several GBs and take a few minutes.
Running the model
Once downloaded, start an interactive session:
ollama run llama3
Enter queries directly at the prompt:
>>> Explain what a VPS is
A VPS (Virtual Private Server) is a virtualized server that provides dedicated resources...
Press Ctrl + D to exit.
When a model runs, Ollama loads it into memory and handles all inference locally on your VPS. No data is sent to external APIs, and the model stays cached for faster reuse.
Using Ollama via API
Ollama exposes a local API at http://localhost:11434. This is where its real value as a hosted service comes in: external applications can query your models directly.
Check that the API is responding:
curl http://localhost:11434/api/tags
Send a prompt:
curl http://localhost:11434/api/generate -d '{
"model": "llama3",
"prompt": "Explain what a VPS is"
}'
At this stage, the API is only accessible from within the server. The next section covers external access.
Enabling external access
By default, Ollama binds to localhost. To open it up:
Step 1: Update the service file
sudo nano /etc/systemd/system/ollama.service
Add the following under [Service]:
Environment="OLLAMA_HOST=0.0.0.0"
Step 2: Restart the service
sudo systemctl daemon-reload
sudo systemctl restart ollama
Step 3: Open port 11434
sudo ufw allow 11434
The API is now reachable externally at http://<your-server-ip>:11434. Test it:
curl http://<your-server-ip>:11434/api/tags
Exposing the API publicly without restrictions is a security risk. The next section covers how to lock it down.
Securing the deployment
Exposing Ollama on 0.0.0.0:11434 means anyone with your server IP can reach your model, which opens the door to misuse and unexpected resource consumption. Here are three ways to address that.
Option 1: Restrict access by IP
Allow only trusted IPs on port 11434:
sudo ufw allow from <your-ip-address> to any port 11434 sudo ufw deny 11434 |
Option 2: Use SSH tunneling (recommended for most users)
If you don’t need the API publicly accessible, skip opening the port entirely. SSH tunneling lets you reach the API from your local machine without exposing it to the internet:
ssh -L 11434:localhost:11434 root@<your-server-ip> |
Option 3: Add a reverse proxy
The Kamatera image includes NGINX, which you can configure to add authentication, route traffic, and enable HTTPS. This is the right path for production setups, but not required for basic usage.
As a baseline, never leave the API publicly accessible without at least one of these controls in place.
Managing models and storage
Ollama stores downloaded models locally. With larger models, disk usage adds up fast.
List installed models:
ollama list
Remove a model you no longer need:
ollama rm llama3
As a rough guide: 7B models typically use a few GBs, while larger models can reach 10-30GB or more. Check your available disk space before pulling multiple models, and remove unused ones regularly to avoid running out of room on smaller VPS instances.
Conclusion
Deploying Ollama on a Kamatera VPS gives you a private, self-contained LLM environment without the latency, cost, or data exposure that comes with third-party APIs.
This guide covered:
- Setting up a VPS using the Ollama app image
- Verifying the installation and pulling a model
- Running the model via CLI and API
- Enabling and securing external access
- Managing models and disk storage
You now have a working private LLM setup ready to integrate into your applications, with your data staying entirely within your own infrastructure.