


Every code push should trigger a chain reaction: build it, test it, and ship it, all without anyone touching a keyboard. That’s the core idea behind CI/CD, and it’s what turns a slow, error-prone release process into something your team barely has to think about.
Jenkins has earned its place as one of the most widely used tools for building that automation. It’s open-source, runs on almost any server, and its plugin ecosystem connects to nearly everything in a modern stack, from Git and Docker to cloud platforms and notification tools.
Kamatera gives you a straightforward place to run it. Spin up a server sized for your workload, scale it as your pipelines grow, and manage the whole setup with standard Linux commands.
This guide walks through building a working CI/CD pipeline from the ground up: installing Jenkins on a Linux server, completing the initial setup, connecting a Git repository, and creating a pipeline that automates your build process.
By the end, you’ll have a Jenkins instance running real jobs, ready to extend into full deployment automation as your project grows.
Prerequisites and server preparation
Before installing Jenkins, make sure your Kamatera server is ready for it.
Prerequisites
- An active Kamatera server running Ubuntu 20.04 or 22.04
- Root access to the server
- Stable internet connectivity
- Basic familiarity with Linux command-line operations
Accessing the server
Log in to your Kamatera server using SSH with the IP address and root credentials from your Kamatera console. Once connected, you’ll have full terminal access to complete the setup.
Updating system packages
Update the package index and upgrade existing packages so you’re working with a current system:
sudo apt update && sudo apt upgrade -y
Installing required utilities
Install the tools Jenkins setup will rely on for managing repositories and packages:
sudo apt install -y curl wget gnupg2 software-properties-common apt-transport-https ca-certificates
Installing Java (a Jenkins prerequisite)
Jenkins runs on Java, so before installing it, set up OpenJDK, the open-source implementation of the Java platform.
Install OpenJDK
sudo apt install -y openjdk-17-jdk
Verify the installation
Confirm Java installed correctly:
java -version
You should see output similar to:
openjdk version "21.x.x" ...
OpenJDK Runtime Environment ...
OpenJDK 64-Bit Server VM ...
Set JAVA_HOME (optional but recommended)
Setting JAVA_HOME ensures Jenkins and other tools can find your Java installation:
echo "JAVA_HOME=/usr/lib/jvm/java-21-openjdk-amd64" | sudo tee -a /etc/environment
source /etc/environment
Verify the variable:
echo $JAVA_HOME
With Java installed, the server is ready for Jenkins.
Accessing Jenkins
With Java installed, you’re ready to install Jenkins itself. This involves adding the official Jenkins repository, installing the package, and starting the service.
Add the Jenkins repository
Create the keyrings directory if it doesn’t exist, then download the Jenkins signing key and add the repository to your apt sources:
sudo mkdir -p /etc/apt/keyrings
sudo wget -O /etc/apt/keyrings/jenkins-keyring.asc https://pkg.jenkins.io/debian-stable/jenkins.io-2026.key
echo "deb [signed-by=/etc/apt/keyrings/jenkins-keyring.asc]
https://pkg.jenkins.io/debian-stable binary/" | sudo tee
/etc/apt/sources.list.d/jenkins.list > /dev/null
Installing Jenkins
With Java installed, the next step is to install Jenkins on your Kamatera server. This involves adding the official Jenkins repository, installing the package, and starting the service.
Add the Jenkins repository
Download the Jenkins repository signing key:
sudo mkdir -p /etc/apt/keyrings
sudo wget -O /etc/apt/keyrings/jenkins-keyring.asc https://pkg.jenkins.io/debian-stable/jenkins.io-2026.key
Add the Jenkins repository to your apt sources:
echo "deb [signed-by=/etc/apt/keyrings/jenkins-keyring.asc]
https://pkg.jenkins.io/debian-stable binary/" | sudo tee
/etc/apt/sources.list.d/jenkins.list > /dev/null
Install Jenkins
Update your package index and install Jenkins:
sudo apt update
sudo apt install -y jenkins
This downloads and installs Jenkins along with its required dependencies.
Start and enable Jenkins
Start the Jenkins service and enable it to launch automatically on boot:
sudo systemctl start jenkins
sudo systemctl enable jenkins
Verify the status
Check that Jenkins is running:
sudo systemctl status jenkins
The output should show the service as active (running).
Open the firewall port
Jenkins runs on port 8080 by default. Allow it through the firewall:
sudo ufw allow 8080
Access Jenkins
Open a web browser and go to:
http://your_server_ip:8080
Replace your_server_ip with your Kamatera server’s public IP address. You should see the Jenkins unlock screen.
Retrieve the initial admin password
To unlock Jenkins, retrieve the initial admin password using:
sudo cat /var/lib/jenkins/secrets/initialAdminPassword
- cat → reads the file
- /var/lib/jenkins/secrets/initialAdminPassword → location where Jenkins stores the password
When you run it, you’ll see something like:
3f8a9c1b2d4e5678f90a123456789abc
That long string is the password you paste into the Jenkins unlock screen.
At this stage, Jenkins is successfully installed and ready for initial configuration.
Initial Jenkins setup
Once Jenkins is installed and accessible in your browser, the next step is to complete the initial setup process. This includes unlocking Jenkins, installing plugins, and creating an admin user.
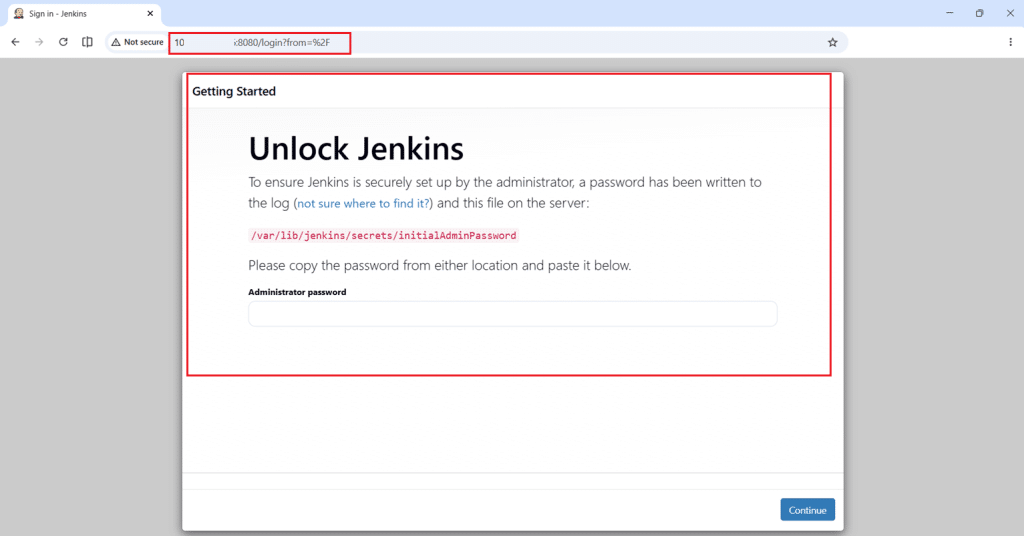
Unlocking Jenkins
When you first access Jenkins in your browser at:
http://your-server-public-ip:8080
You will see the “Unlock Jenkins” screen.
Note: Replace <your-server-public-ip> with the public IP address of your Kamatera server.
To retrieve the administrator password, run the following command on your server:
sudo cat /var/lib/jenkins/secrets/initialAdminPassword
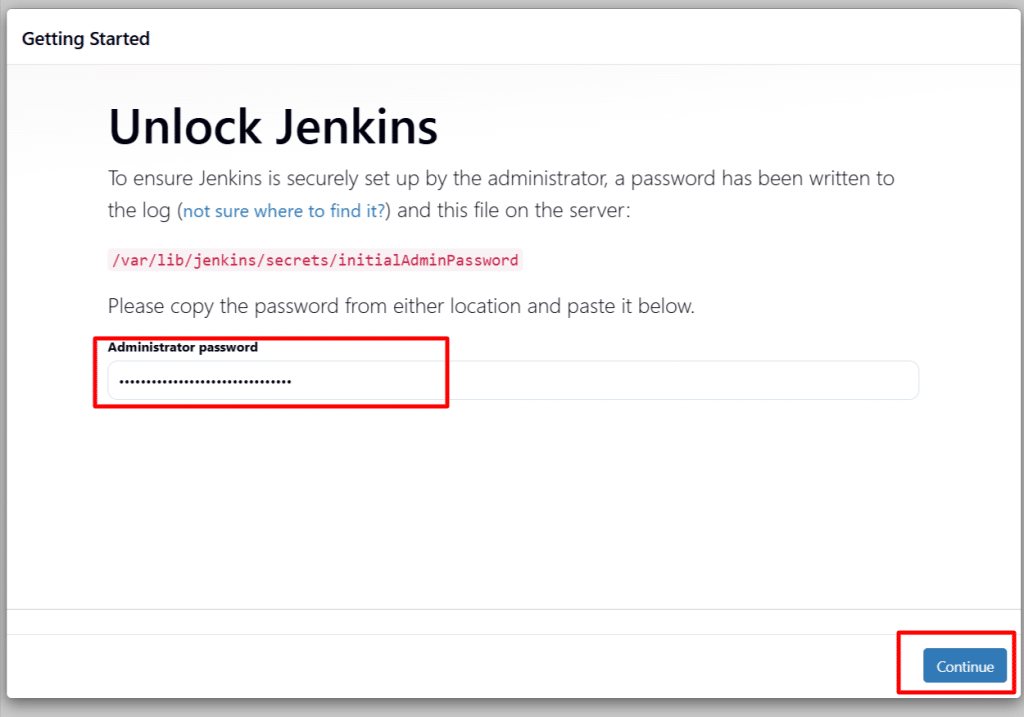
This command displays a temporary password. Copy it and paste it into the Administrator password field on the Jenkins setup page, then click Continue.

Note: The password in the screenshot above has been partially redacted for security. Your terminal will show the full password string.
Installing plugins
Once you put the password in the Jenkins browser page and click continue, Jenkins will prompt you to install plugins. Choose:
Install suggested plugins
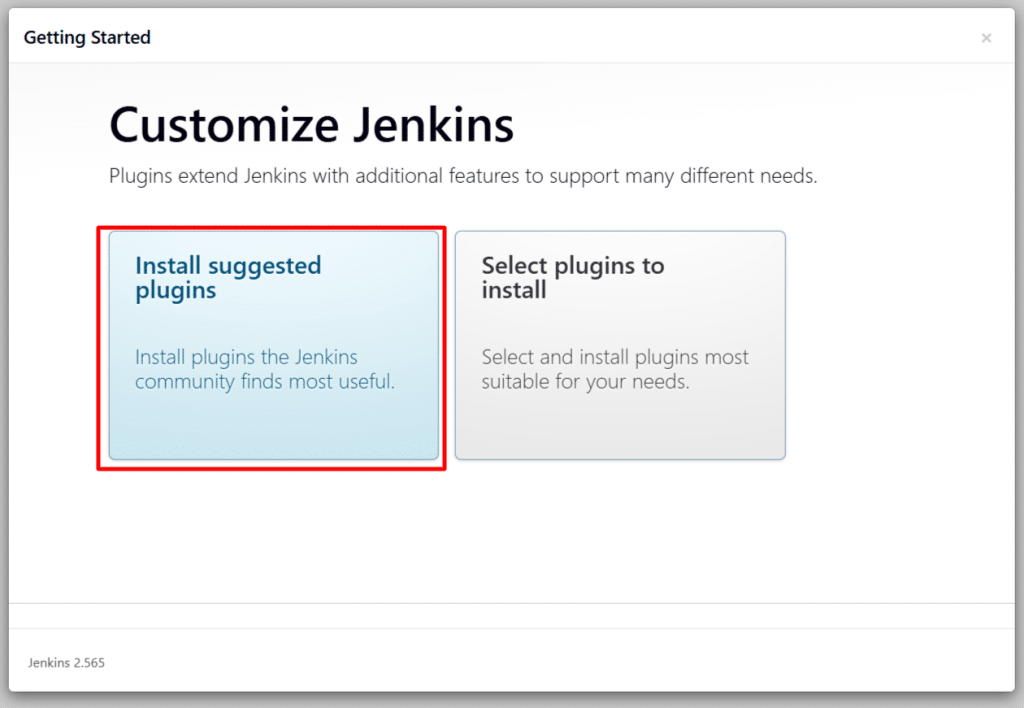
This option installs a standard set of plugins required for most CI/CD workflows, including:
- Git integration
- Pipeline support
- Build tools
The installation may take a few minutes depending on your server and network speed.
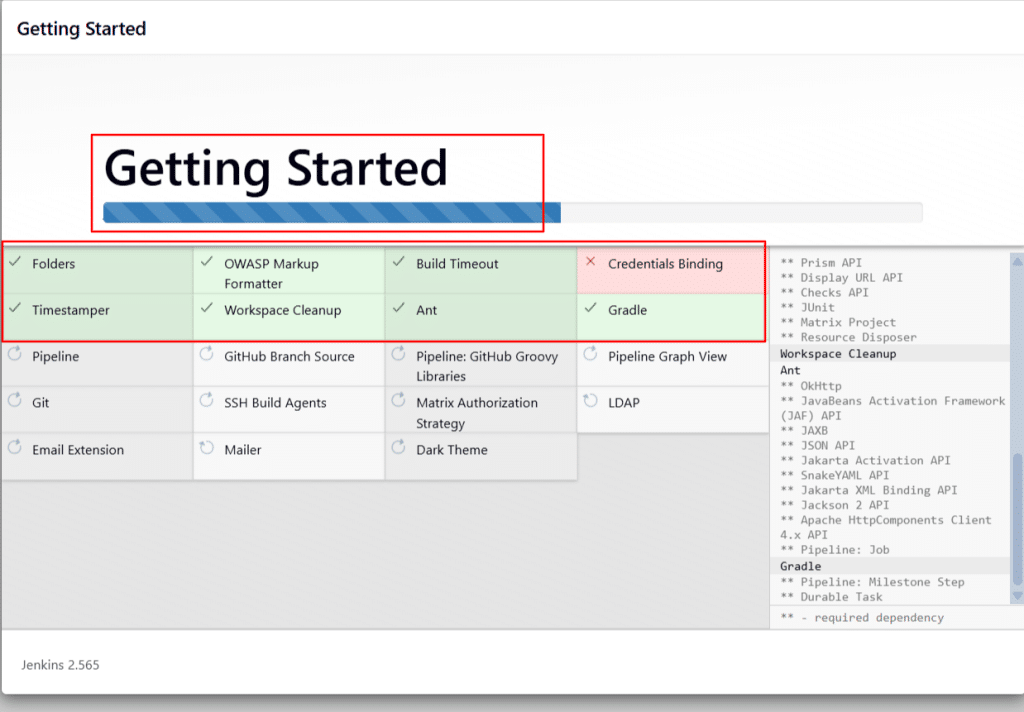
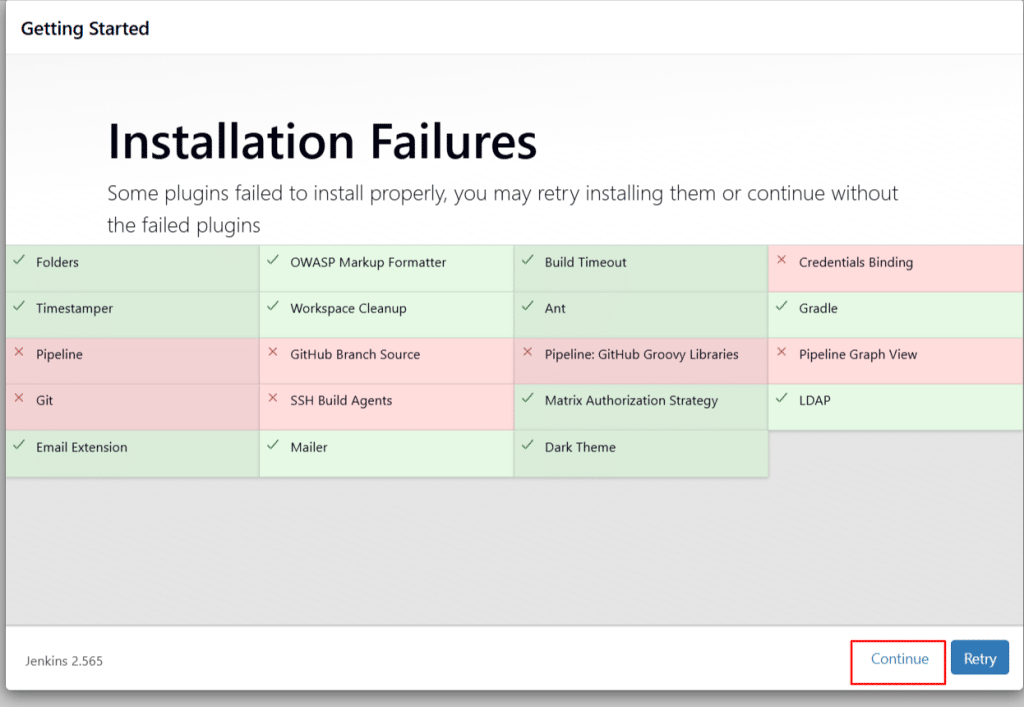
Some plugins may fail to install due to temporary network or dependency issues. These plugins can be installed later from the Jenkins dashboard, so you can proceed by clicking Continue.
Creating the admin user
After plugin installation, Jenkins will ask you to create your first admin user.
Provide the following details:
- Username
- Password
- Full name
- Email address
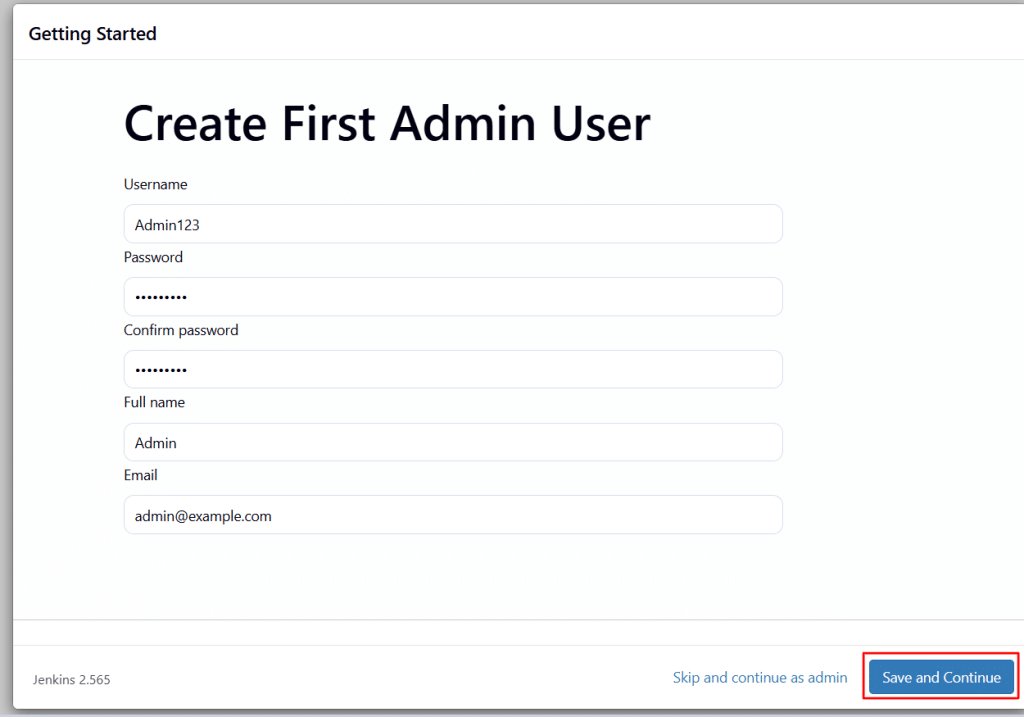
Click Save and Continue.
Instance configuration
You will then be asked to confirm the Jenkins URL. By default, it will be:
http://your-server-public-ip:8080/
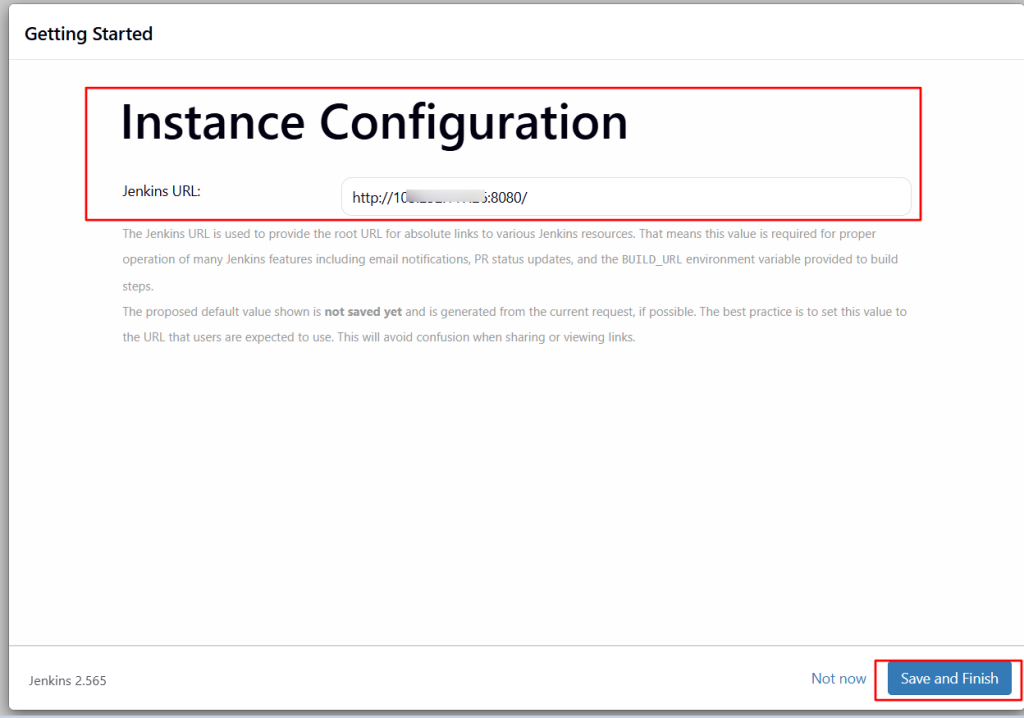
Click Save and Finish.
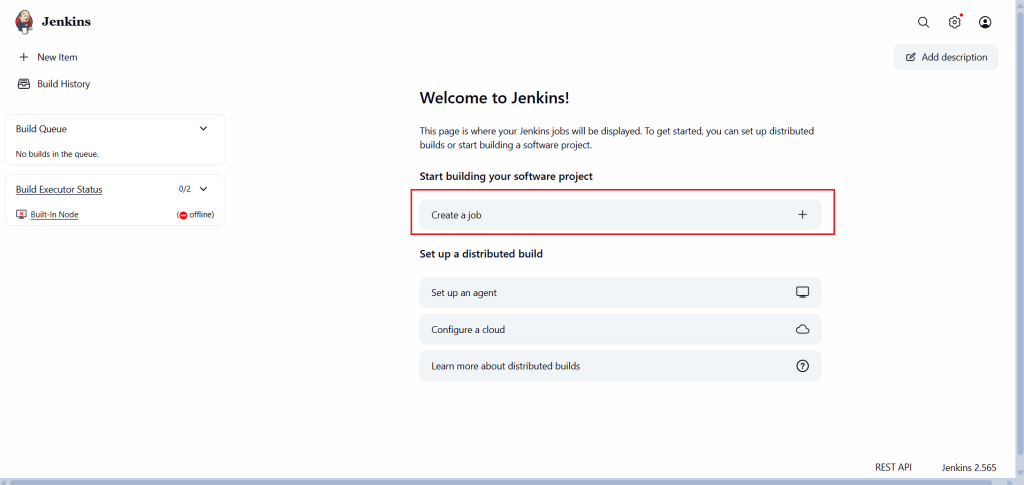
Accessing the Jenkins dashboard
Once setup is complete, click Start using Jenkins.
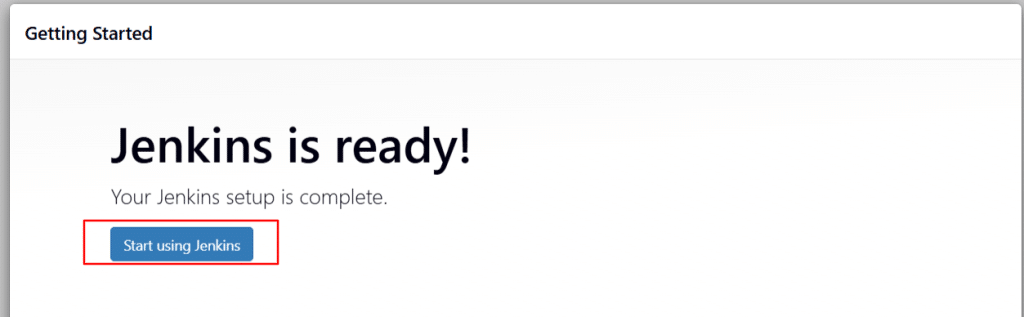
You will be redirected to the Jenkins dashboard, where you can:
- Create new jobs
- Configure pipelines
- Manage plugins and settings
At this point, Jenkins is fully set up and ready to be used for building CI/CD pipelines.
Installing Git
Jenkins uses Git to pull source code from repositories and execute build pipelines. Installing Git on the server ensures seamless integration with version control systems.
Install Git
Install Git using the package manager:
sudo apt install -y git
Verifying Git Installation
After installation, verify that Git is installed correctly:
git --version
You should see output like:
git version 2.x.x
With Git installed, Jenkins can now connect to repositories and fetch code for building and deployment.
Creating a CI/CD pipeline in Jenkins
With Jenkins set up, you’re ready to create your first job. In this section, you’ll create a Jenkins job, connect it to a Git repository, and run a basic build.
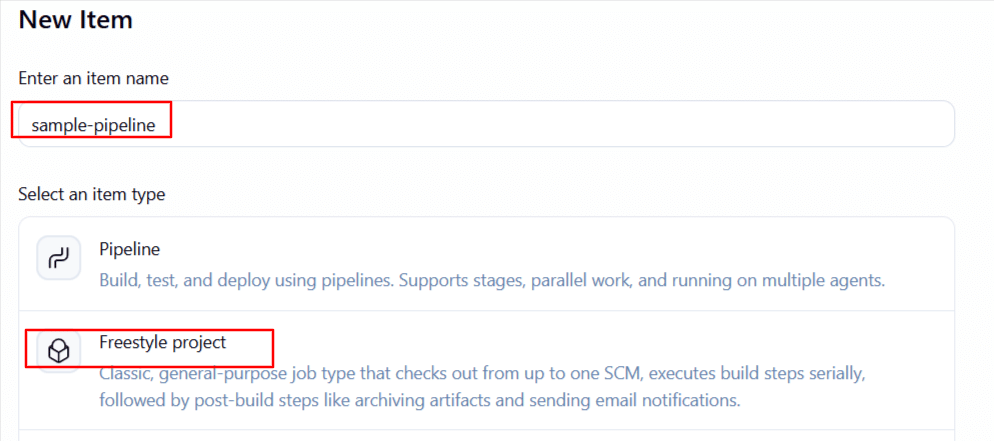
Creating a new job
Open the Jenkins dashboard.
Click New Item.
Enter a name for your job (for example, sample-pipeline).
Select Freestyle project.
Click OK.
Adding a build step
Scroll to the Build section:
- Click Add build step
- Select Execute shell
Add a simple test command:
echo "Hello, Jenkins CI/CD Pipeline!"
This step verifies that Jenkins can execute commands successfully. Then Click Save to create the job.
Running the job
- Click Build Now from the left panel.
- A new build will appear under Build History.
Viewing build output
Click on the build number, then select Console Output. You should see output like:
Hello, Jenkins CI/CD Pipeline!
Finished: SUCCESS
You have now successfully created and executed a basic CI/CD pipeline in Jenkins.
Creating a pipeline using Jenkinsfile
While Freestyle jobs are useful for simple tasks, modern CI/CD workflows are typically defined using a Jenkinsfile. A Jenkinsfile defines the pipeline stages and steps in code, enabling automation of build, test, and deployment processes. It describes the stages and steps Jenkins should execute. This allows you to version-control your pipeline along with your application code.
To create a Jenkins Pipeline Job, follow the below steps:
- Go to the Jenkins dashboard.
- Click New Item.
- Enter a name (e.g., pipeline-job).
- Select Pipeline.
- Click OK.
Once the pipeline is created, to configure it, scroll to the Pipeline section. Here you can define the pipeline in two ways:
- Pipeline script (directly in Jenkins)
- Pipeline script from SCM (recommended for real projects)
For now, select Pipeline script.
Writing a basic Jenkins pipeline
Add the following pipeline script:
pipeline {
    agent any

    stages {
        stage('Build') {
            steps {
                echo 'Building the application...'
            }
        }

        stage('Test') {
            steps {
                echo 'Running tests...'
            }
        }

        stage('Deploy') {
            steps {
                echo 'Deploying application...'
            }
        }
    }
}
To save and run the pipeline, click Save and then click Build Now. To view the pipeline, click on the build number under Build History. Open Console Output, you should see logs for each stage:
Building the application...
Running tests...
Deploying application...
Finished: SUCCESS
The use of Jenkins here enables version control of pipelines, supports complex workflows, and makes CI/CD reproducible and scalable. At this point, you have created a structured CI/CD pipeline using Jenkins.
Conclusion
In this guide, you built a complete CI/CD pipeline using Jenkins on a Kamatera Linux server. You installed Java and Jenkins, completed the initial setup, and connected Git for source control. From there, you created a basic Freestyle job to confirm Jenkins was working, then built a structured pipeline using a Jenkinsfile, the same approach used in production environments.
That gives you a working foundation: a Jenkins instance that can build your project from a Jenkinsfile, version-controlled alongside your code. From here, the steps that turn this into a production pipeline are mostly additions to what you’ve already built:
- Connecting to private repositories
- Running automated test suites
- Building and deploying Docker containers
- Deploying to your cloud environment
Each of these layers onto your existing setup through additional plugins and pipeline stages. Your Jenkins instance is up and running, the rest comes down to shaping it around your project’s needs.