


Alpine Linux is a lightweight, security-focused Linux distribution built around musl libc and BusyBox. Compared to more familiar distributions like Ubuntu or CentOS, it has a significantly smaller footprint, faster boot times, and a reduced attack surface, which makes it a popular choice for containerized workloads, microservices, and lean virtual machines.
That minimalism comes with a learning curve. Alpine behaves differently from mainstream distributions in ways that can catch first-time users off guard, from how packages are managed to how system libraries are structured.
This guide walks through getting started with Alpine Linux on a Kamatera cloud server.
Prerequisites
Before getting started, make sure you have the following:
- Kamatera account. You will need access to a Kamatera account to provision a cloud server with Alpine Linux.
- Basic Linux familiarity. Comfort with the terminal and basic commands will help you follow along.
- SSH client. Linux and macOS users can use the built-in terminal. Windows users can connect via PowerShell, Command Prompt, or a tool like PuTTY.
- Stable internet connection. Required for server access and package installation.
Step-by-step guide
The first step in deploying Alpine on Kamatera is to log in to your Kamatera cloud management console. Once logged in, you’ll see the dashboard. This is where you’ll manage servers, networking, and storage.
Steps:
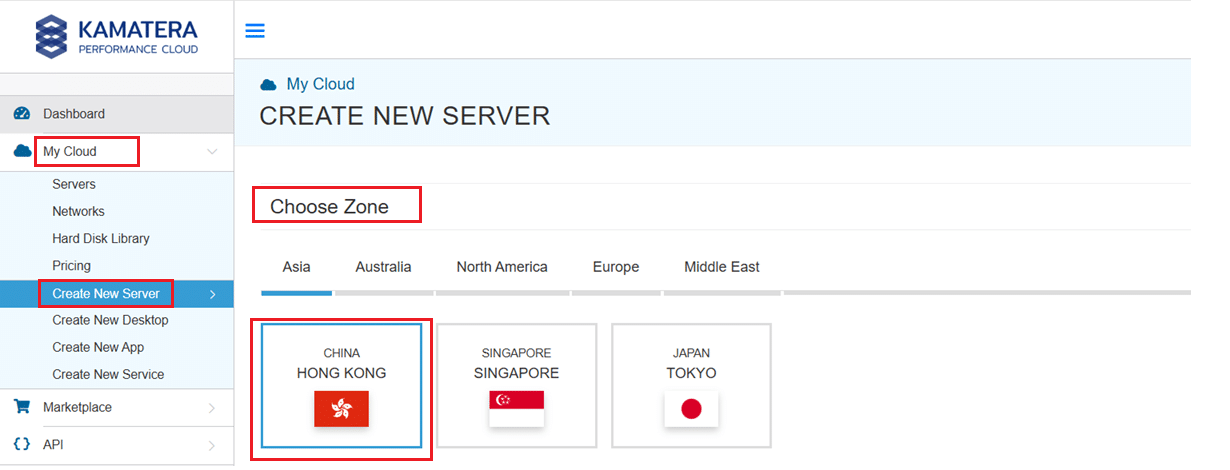
- Expand the My Cloud option on the right bar and choose Create New Server. Under create new server option, choose the zone.
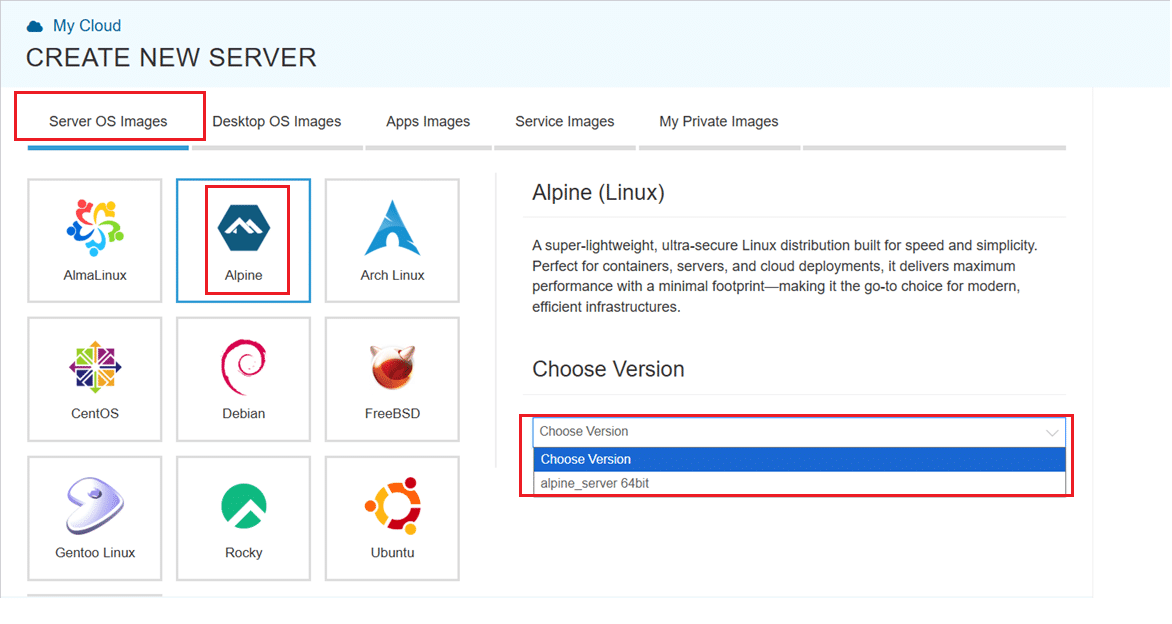
2. Scroll down and under the Service Images tab, look for Alpine Linux. Select it and then choose the latest version.
Select your server specifications
- Scroll down and enable the Detailed View toggle to check the pricing per configuration. Here’s where you’ll input your preferred server specifications.
- Choose the Type, CPU, RAM, and Disk storage. Click on the help button on the side to learn more about each setting. You can add more disk storage at any point in your server’s life.
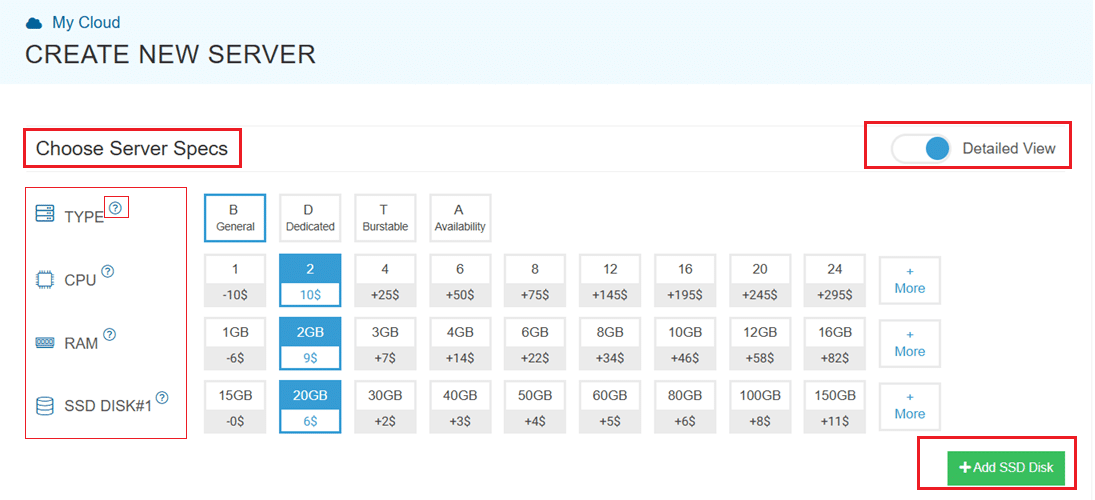
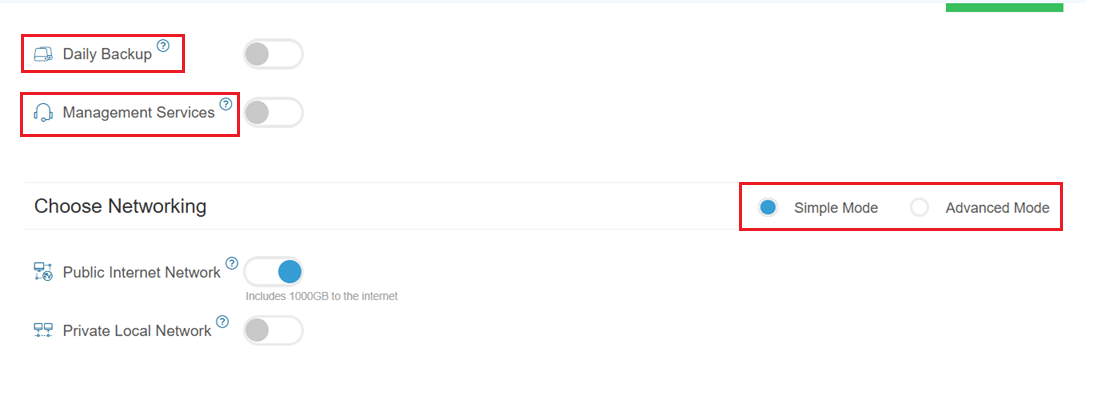
- Enable Daily backup option to enable a daily backup of your server storage.
- Enable Management Services toggle for a managed server option.
Configuring network and security settings
- Here we’ll choose either simple or advanced networking. This lets you define how your server will connect to the internet, and how much outbound data it can use per month.
- Simple Mode – Choose between WAN or LAN.
- Advanced Mode – NIC #1 (Network Interface Card)
- WAN (selected): This means your server will be accessible from the internet. It will get a public IP.
- The other options (LAN, Private, etc.) are only needed for internal or isolated setups.
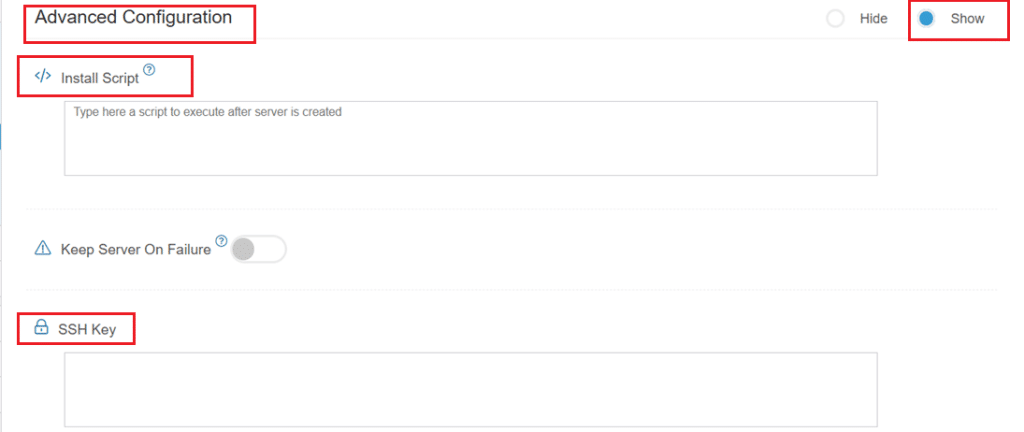
- Now, let’s look at Advanced Configuration:
- Keep Server On Failure: This option controls what happens if something goes wrong; for example, if a startup script fails while setting up your server. If this setting is OFF (default), Kamatera will automatically delete the server if the setup fails. It becomes useful if you want to avoid paying for a broken setup, but you won’t be able to debug what went wrong. If this setting is ON, Kamatera will keep the server running, even if something fails during the initial setup. This lets you log in, investigate the issue, fix problems manually, and retry setup if needed.
Recommended for most users:
Keep it OFF unless you’re running custom scripts or complex configurations. For basic setups like Alpine Linux, the default (OFF) is usually fine.
- SSH key: Allows you to securely connect to the server without a password (recommended for better security).
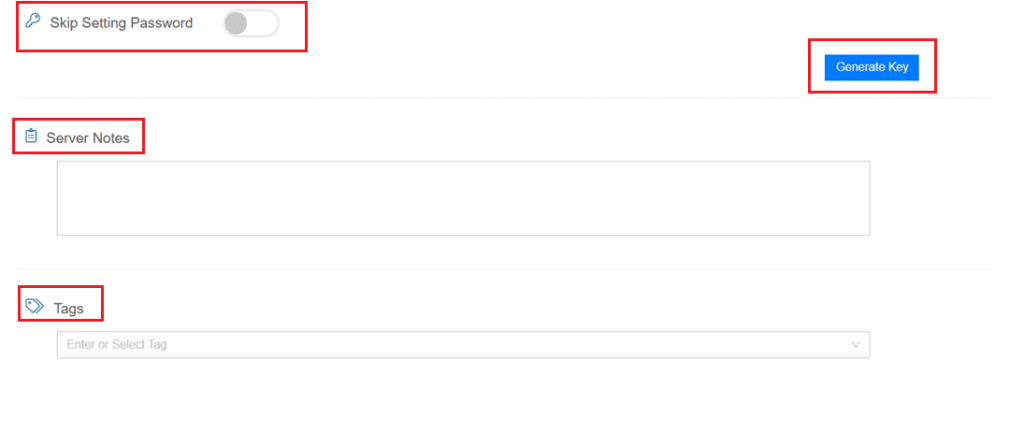
- Skip Setting Password: If enabled, your server will only allow SSH key login—no password access. You can click “Generate Key” if you don’t already have one. Input further server notes and tags if necessary.
Finalize deployment
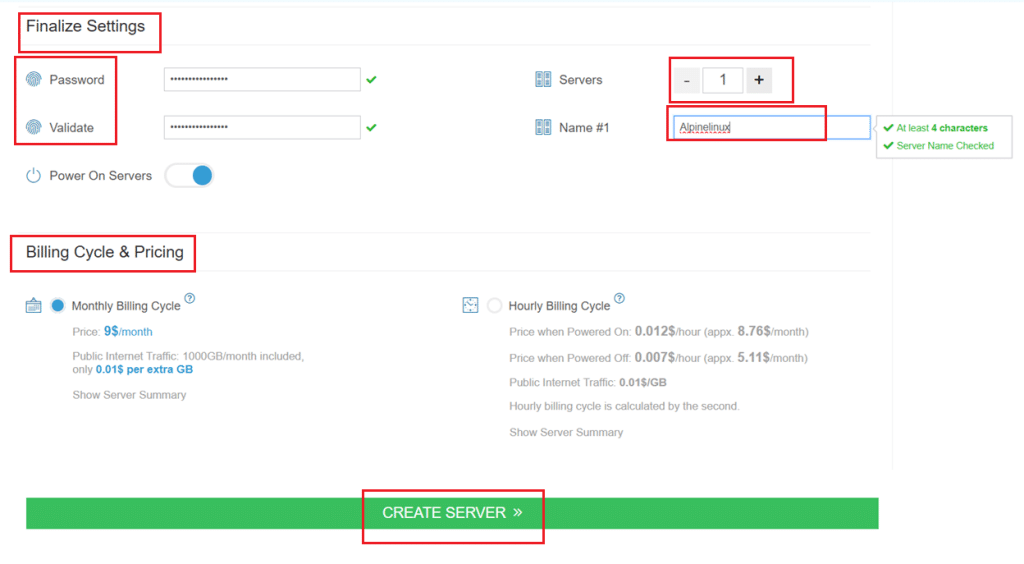
- Finally, choose a strong password, select the number of servers, and input a server name.
- Once you have added all the details, choose your billing cycle and click on Create server button.
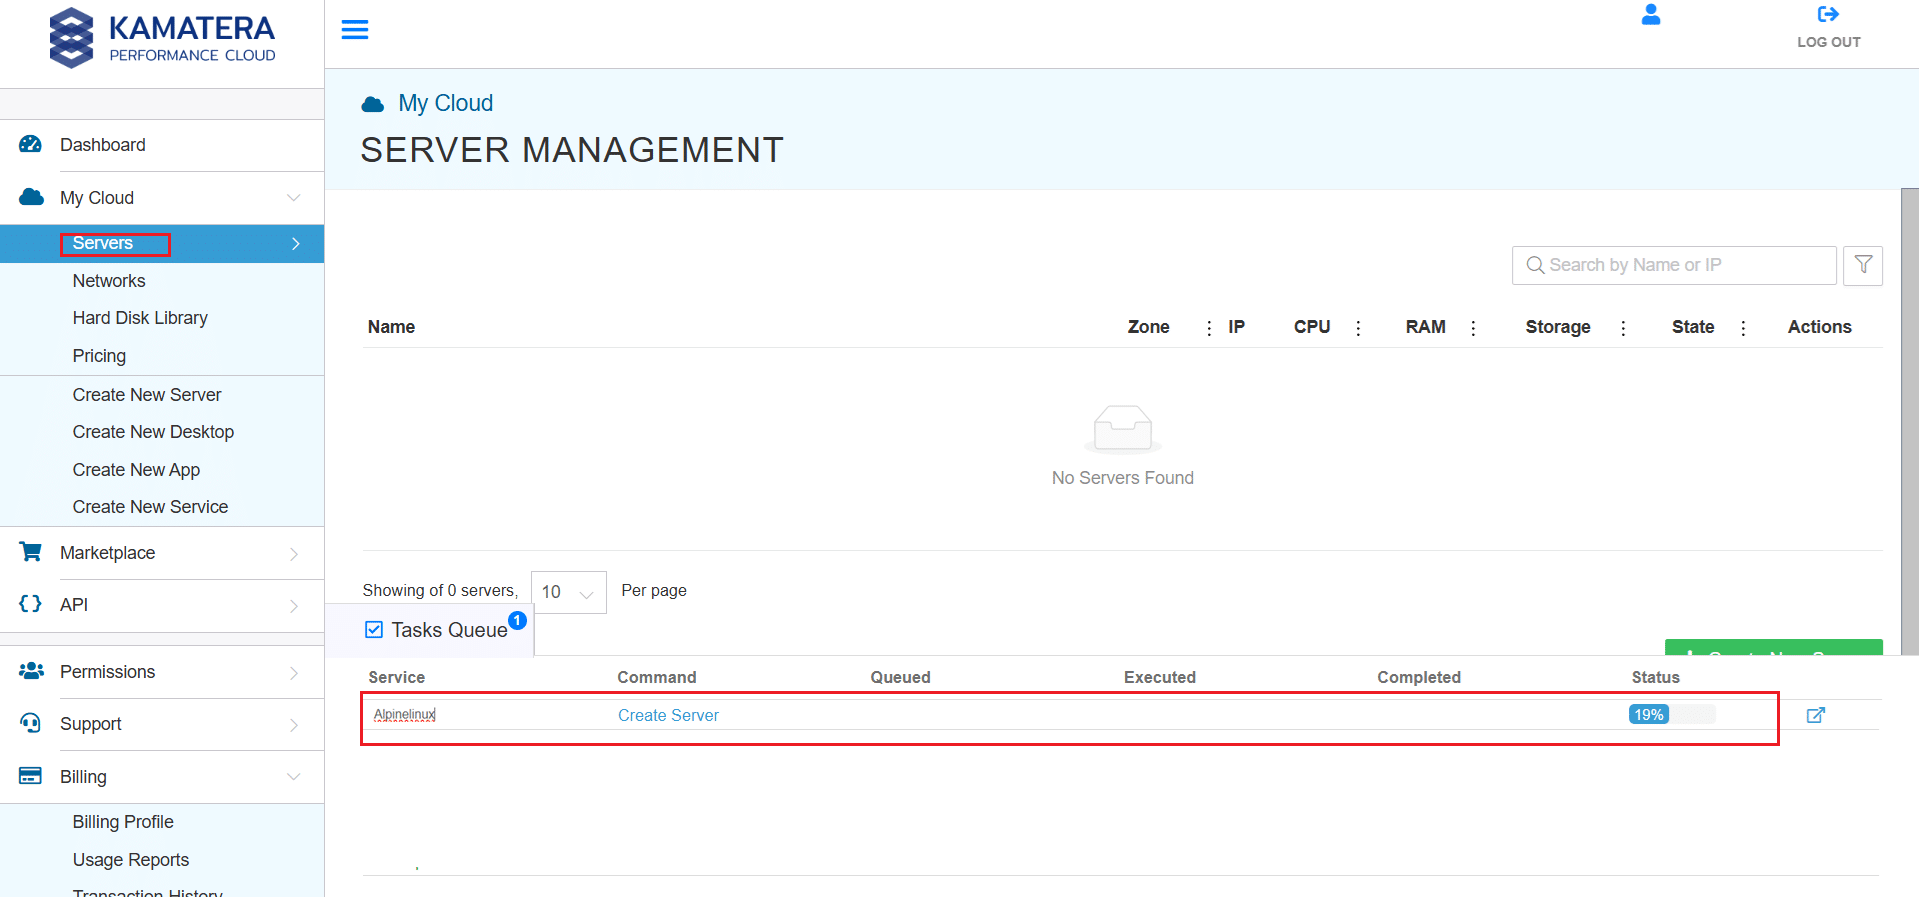
You can check the server creation progress under Server > Task Queue. Once created, you will see your server under the Servers panel.
Connecting to your server
Once your Alpine Linux server is running on Kamatera, connect to it via SSH.
First, grab your server details from the Kamatera dashboard: your public IP address, your username (usually root), and your SSH key or password, depending on how you configured the server.
Then open your terminal and connect:
ssh root@your-server-ip
If you’re using an SSH key:
ssh -i /path/to/your-key.pem root@your-server-ip
On first login, you’ll see a host authenticity prompt. Type yes to continue. Once connected, you’ll see the Alpine Linux shell prompt.
Initial setup
Alpine starts with a minimal environment, so a few setup steps are worth doing before anything else.
Update your packages
Refresh the package index and upgrade any existing packages:
apk update
apk upgrade
This ensures your system has the latest security patches before you start installing anything.
Set a hostname
echo "alpine-server" > /etc/hostname
hostname -F /etc/hostname
Replace alpine-server with whatever name you want to use.
Set your timezone
apk add tzdata

cp /usr/share/zoneinfo/Region/City /etc/localtime

echo "Region/City" > /etc/timezone
For example, for Kolkata:
cp /usr/share/zoneinfo/Asia/Kolkata /etc/localtime

echo "Asia/Kolkata" > /etc/timezone
Create a non-root user
Running everything as root is a security risk. Create a regular user account:
adduser username
Follow the prompts to set a password.
Grant administrative privileges
Alpine uses doas instead of sudo by default. Install it and configure it for your user:
apk add doas
echo "permit username as root" > /etc/doas.d/doas.conf
Replace username with the account you just created. If you prefer sudo, you can install that instead with apk add sudo.
A note on services
Alpine uses OpenRC rather than systemd. If you install any services, you’ll start and enable them like this:
rc-service sshd start
rc-update add sshd
This comes up again in the sections below.
Managing packages with apk
Alpine uses apk (Alpine Package Keeper) as its package manager. It’s fast, lightweight, and straightforward once you know the basic commands.
Install a package:
apk add package-name
Remove a package:
apk del package-name
Search for a package:
apk search keyword
Update the package index:
apk update
Upgrade installed packages:
apk upgrade
You can also install multiple packages in a single command:
apk add git curl vim
Managing services with OpenRC
Alpine uses OpenRC rather than systemd, which is what most Ubuntu and CentOS users are used to. The commands work differently, but the concepts are the same.
Start a service:
rc-service service-name start
Stop a service:
rc-service service-name stop
Restart a service:
rc-service service-name restart
Check service status:
rc-service service-name status
Enable a service to start at boot:
rc-update add service-name
See all services enabled at boot:
rc-update show
Networking
On Kamatera, networking is configured automatically and your server is ready to use immediately after login. If you ever need to adjust network settings manually, they’re managed through /etc/network/interfaces.
Installing Docker
Alpine is a popular base for containerized workloads, and Docker installs cleanly with a few commands.
Install Docker:
apk add docker
Start the Docker service:
rc-service docker start
Enable Docker at boot:
rc-update add docker
Verify the installation:
docker version
Run a quick test to confirm everything is working:
docker run hello-world
If Docker is set up correctly, it will pull and run a test image.
By default, Docker requires root privileges. To allow a non-root user to run Docker commands, add them to the docker group:
addgroup username docker
Log out and back in for the change to take effect.
Security basics
Before putting your server to work, a few simple practices will keep it in good shape.
Use a non-root account for daily operations. The root user should be reserved for administrative tasks that genuinely require it.
Use SSH key authentication. Disable password-based login in /etc/ssh/sshd_config by setting PasswordAuthentication no and use SSH keys instead.
Keep your system updated. Run the following regularly:
apk update && apk upgrade
Disable root SSH login. In /etc/ssh/sshd_config, set:
PermitRootLogin no
Then restart SSH to apply the change:
rc-service sshd restart
Wrapping up
Alpine Linux takes a little getting used to if you’re coming from Ubuntu or CentOS, but its speed, small footprint, and straightforward design make it well suited to cloud environments and containerized workloads. With your server configured and secured, you’re ready to start deploying.