



Linux divides disk storage into partitions. A partition is a section of a physical or virtual disk. Each partition is formatted with a file system, which organizes data into directories and files. Linux accesses a partition’s file system through a directory called a mount point. In this article, we show you how to create, format, mount, and expand a partition in four steps.
Step 1: Provision a server
Provision a Kamatera Ubuntu server as described in “How to Operate a Linux Server on Kamatera.”
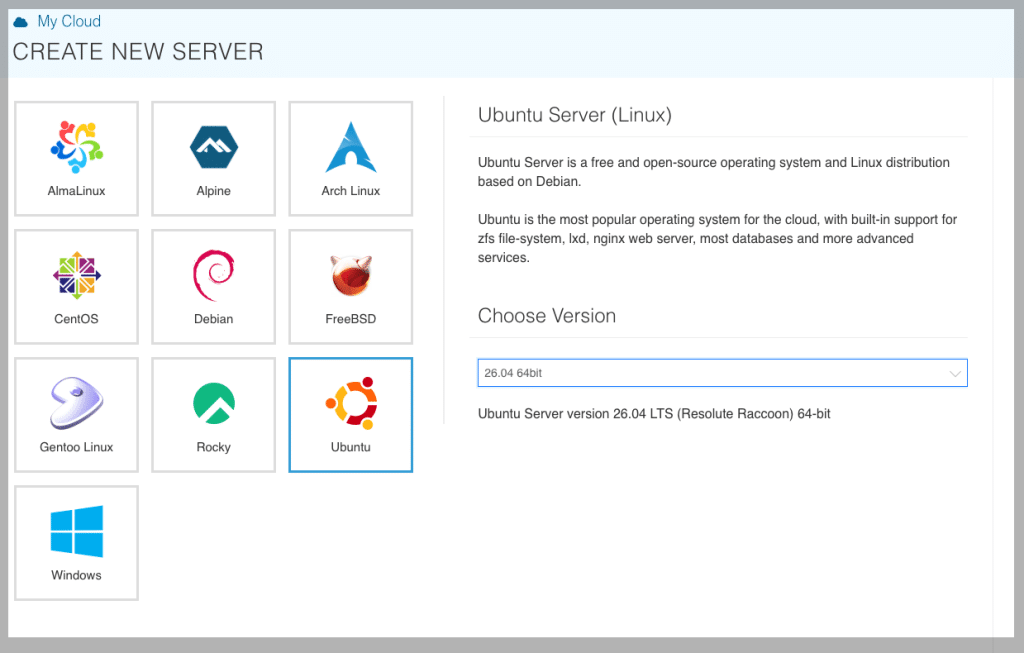
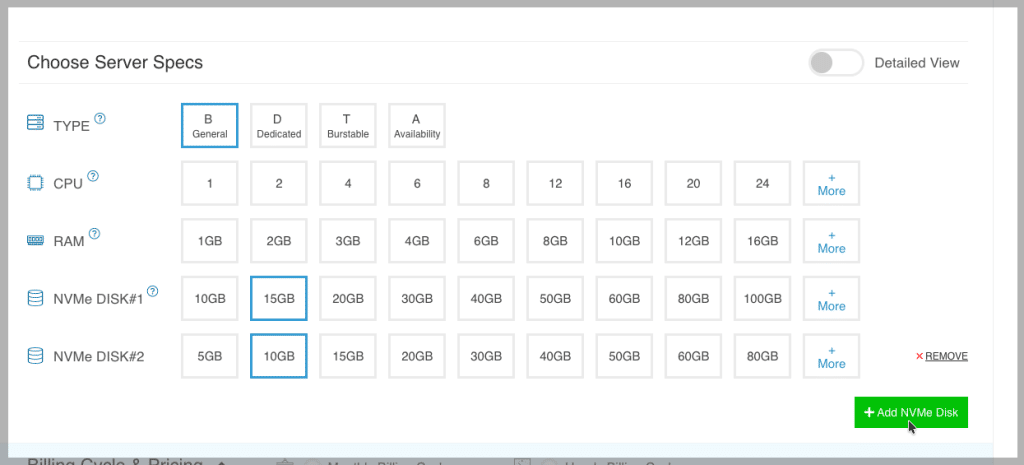
For our purposes, create a server with at least two disks. This lets you partition the second disk without touching the disk that holds the operating system.
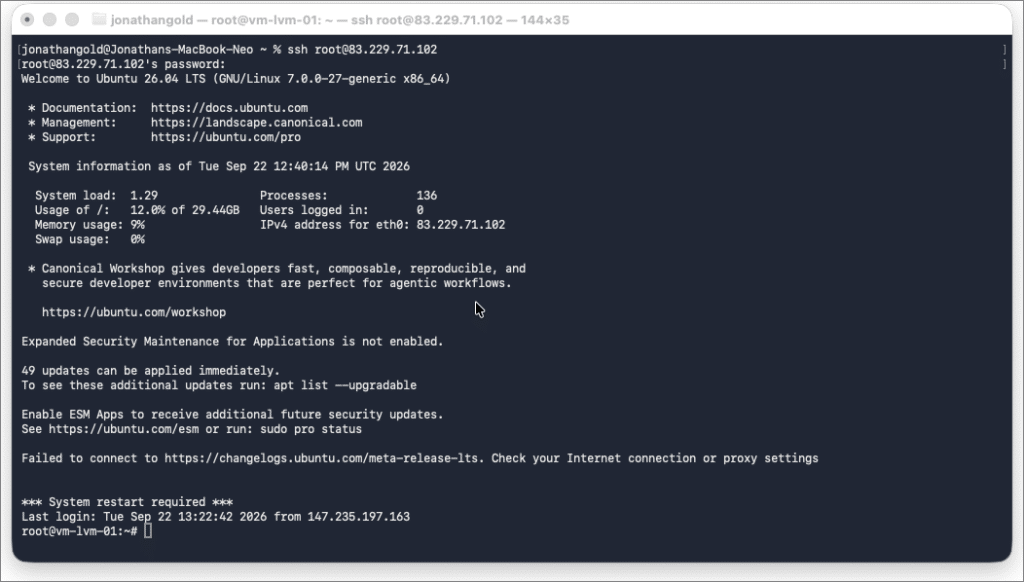
After the server is provisioned, connect to it through the Kamatera console or a local SSH terminal window.
Step 2: Create a partition
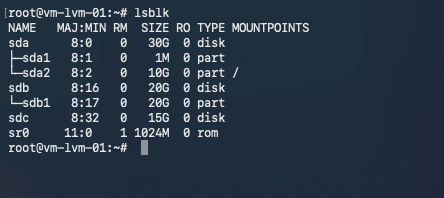
Before partitioning, list the disks on your server with the lsblk command. It displays each disk and the partitions it contains.
lsblk
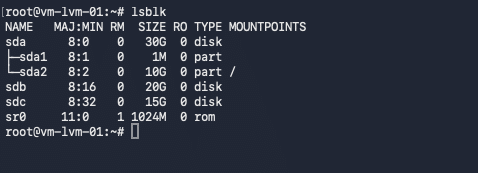
Our server has three disks: sda, sdb, and sdc. sda is the main disk and has two partitions. sdb and sdc have no partitions. To create a partition, launch fdisk followed by the disk’s device path.
fdisk <disk path>
# Example
fdisk /dev/sdb
Type m to display the menu.
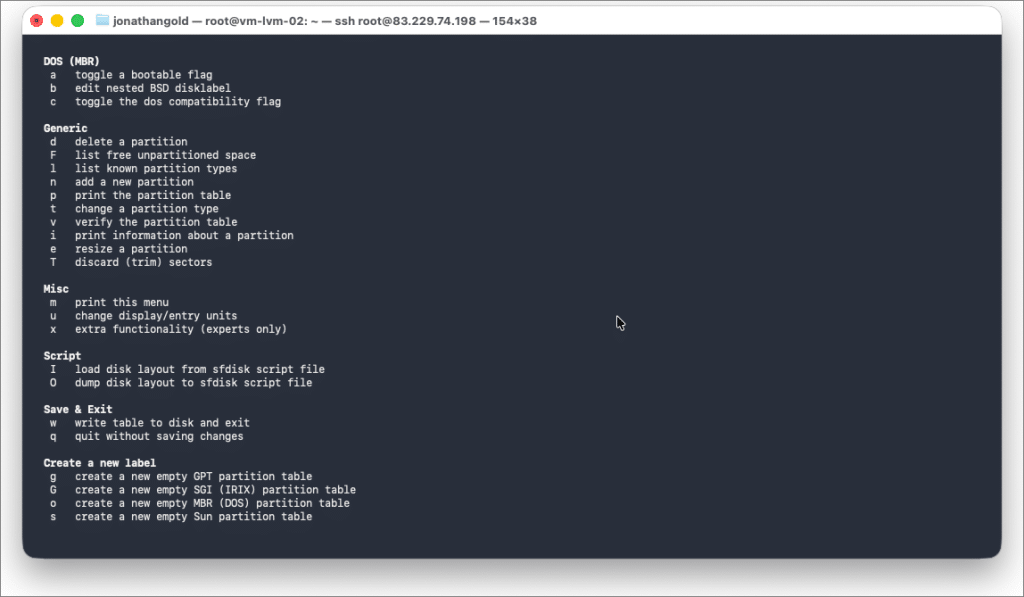
Type n to create a new partition and follow the prompts. Press Enter to accept the defaults, which use the whole disk. Type w to write the changes and exit. The new partition is named sdb1.
Step 3: Format and mount the partition
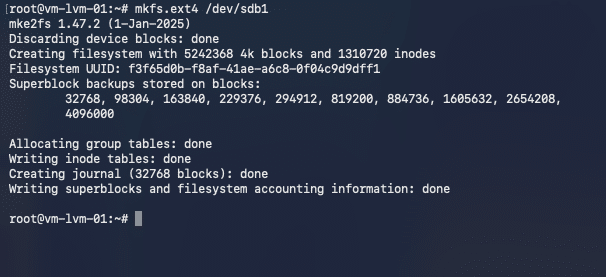
Now that we have a partition, format it with a file system, such as the Fourth Extended File System (ext4).
mkfs.<format> <partition path>
# Example
mkfs.ext4 /dev/sdb1
Next, create a directory to use as the mount point.
mkdir /mnt/my-data
Mount the partition with the mount command:
mount <partition path> <mount directory path>
# Example
mount /dev/sdb1 /mnt/my-data
Use lsblk to confirm the partition is mounted:
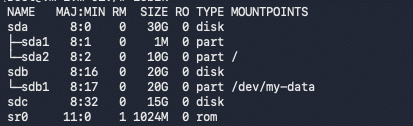
You can also use the df command:
df -h
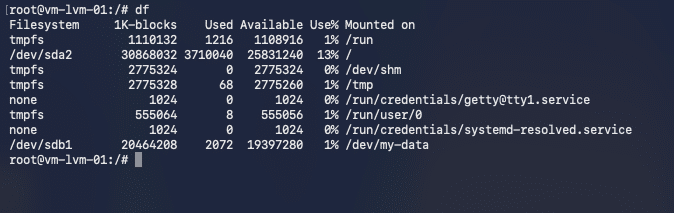
You can unmount the partition with the umount command:
umount <mount directory path>
# Example
umount /mnt/my-data
Mount the partition at boot
A partition mounted with the mount command is unmounted when the server restarts. To mount it automatically, add it to /etc/fstab. First, find the partition’s UUID:
blkid /dev/sdb1
Then add a line like this to /etc/fstab, using your own UUID:
UUID=<uuid> /mnt/my-data ext4 defaults 0 2
To check the entry without rebooting, run:
mount -a
If the command prints no errors, the entry is valid.
Step 4: Expand the partition
If you increase the size of a disk, the partition and its file system do not grow automatically. Expanding takes two steps: grow the partition, then grow the file system inside it.
First, grow the partition with the growpart command. On Ubuntu, growpart is part of the cloud-guest-utils package. Install it if it is missing.
apt install cloud-guest-utils
growpart <disk path> <partition number>
# Example
growpart /dev/sdb 1
Note that a partition can only expand into free space on its disk.

Next, grow the ext4 file system to fill the enlarged partition with resize2fs.
resize2fs <partition path>
# Example
resize2fs /dev/sdb1
Like growpart, this command can only expand into space that is available.

Conclusion
Linux manages disk storage as partitions. Each partition holds a file system that organizes data into directories and files. In this article, we took you through the basics of creating, formatting, mounting, and expanding a partition. These tools work well for simple setups. For more complex scenarios, check out our guide on How to set up LVM on a Kamatera VPS. LVM is a flexible Linux disk management system that lets you create, expand, resize, move, and snapshot volumes while preserving your data.