


Migrating a website to a new hosting environment is an opportunity to improve performance, scalability, and reliability. Kamatera Cloud offers flexible infrastructure, customizable server configurations, and a global network of data centers, making it a solid choice for hosting modern web applications and websites.
This guide walks through the full migration process: preparing your existing site, transferring files and databases, configuring the server environment, updating DNS, and validating that everything works correctly.
Each step uses command-line instructions and scripts instead of screenshots, keeping the process clear, repeatable, and consistent across environments. Whether you’re migrating a simple static site or a dynamic application with a database backend, these steps will help you complete the move with minimal downtime.
By the end of this guide, your website will be live on Kamatera Cloud, configured for stability and ready to scale.
Prerequisites
Before you start, make sure you have:
- A running Kamatera server with SSH access
- Root or sudo privileges on the server
- Access to your domain’s DNS settings
- Access to your existing website files and database
- Basic familiarity with the Linux command line
Accessing your Kamatera server
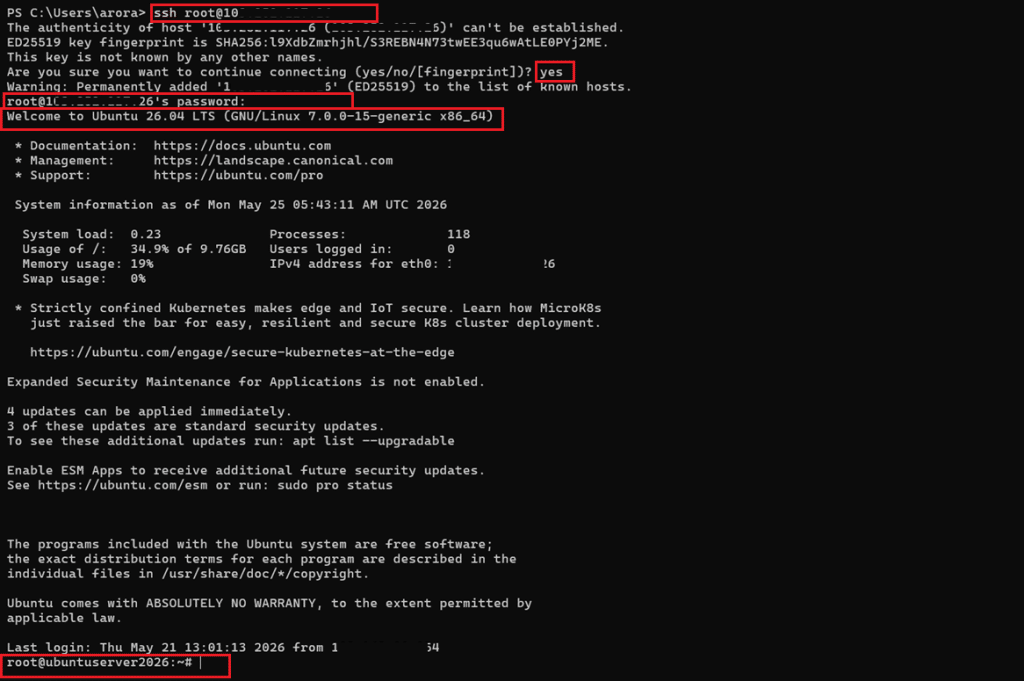
To begin the migration, you need to securely connect to your Kamatera server using SSH.
Connect via SSH
Use the following command from your local machine:
ssh root@your_server_ip
If you are using a non-root user:
ssh username@your_server_ip
If your server uses an SSH key for authentication:
ssh -i /path/to/private_key username@your_server_ip
Verify connection
Once connected, you should see a prompt similar to:
username@server:~$
Update the server
It’s recommended to update the package list before proceeding:
sudo apt update && sudo apt upgrade -y
At this point, your server is ready for installing the required web server environment.
Setting up the web server environment (LAMP/LEMP)
Before migrating your website, you need to configure the required web server stack on your Kamatera server. This section covers a typical LAMP setup (Linux, Apache, MySQL, PHP). You can adapt it for NGINX, if needed.
Install Apache
sudo apt install apache2 -y
Start and enable Apache:
sudo systemctl start apache2
sudo systemctl enable apache2
Verify installation:
sudo systemctl status apache2
Install MySQL
sudo apt install mysql-server -y
Secure the installation:
sudo mysql_secure_installation
Install PHP and required extensions
sudo apt install php libapache2-mod-php php-mysql php-cli php-curl php-zip php-gd php-mbstring php-xml -y
Verify PHP installation:
php -v
Configure Apache
Set your web root directory (default is /var/www/html):
cd /var/www/html
Set proper permissions:
sudo chown -R www-data:www-data /var/www/html
sudo chmod -R 755 /var/www/html
Restart Apache to apply changes:
sudo systemctl restart apache2
Test the web server
Open your browser and visit:
http://your_server_ip
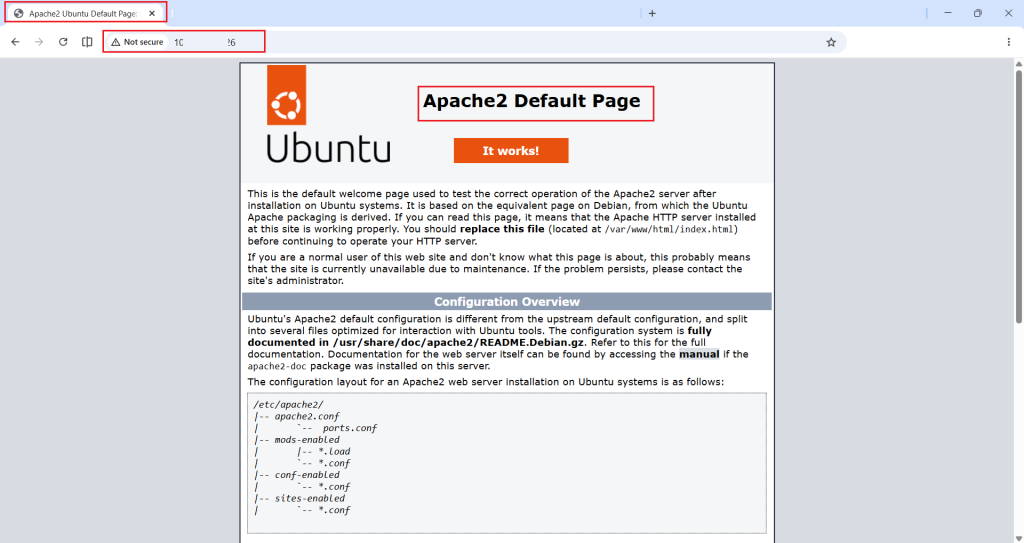
You should see the default Apache page, confirming the server is ready and your environment is now prepared to host the migrated website.
Preparing the source website for migration
Before transferring your website, it is important to prepare the source environment to ensure a clean and consistent migration.
Enable maintenance mode (recommended for dynamic sites)
If your website is live and frequently updated, enable maintenance mode to prevent data inconsistencies during migration.
For example (WordPress):
wp maintenance-mode activate
Or manually create a maintenance file:
touch .maintenance
Clean up unnecessary files
Remove cache, logs, and temporary files to reduce transfer size:
rm -rf cache/*
rm -rf tmp/*
rm -rf logs/*
Ensure you are in the correct directory before running these commands.
Verify website files
Navigate to your website root directory and confirm all required files are present:
cd /path/to/your/website
ls -lah
Backup website files
Create a compressed backup of your website:
tar -czvf website-backup.tar.gz /path/to/your/website
Backup database
Export your database using mysqldump:
mysqldump -u db_user -p db_name > db-backup.sql
Note configuration details
Keep the following details handy for later steps:
- Database name
- Database user and password
- Application configuration files (e.g., .env, wp-config.php)
At this stage, your source website is cleaned, backed up, and ready for transfer to the Kamatera server.
Transferring website files to Kamatera
Once your source website is prepared, the next step is to transfer the website files to your Kamatera server.
Using SCP (Secure Copy)
From your local machine or source server, run:
scp website-backup.tar.gz username@your_server_ip:/var/www/html/
If using an SSH key:
scp -i /path/to/private_key website-backup.tar.gz username@your_server_ip:/var/www/html/
Alternative: Using Rsync (recommended for large sites)
rsync -avz website-backup.tar.gz username@your_server_ip:/var/www/html/
Verify file transfer
SSH into your Kamatera server and check:
cd /var/www/html
ls -lh
You should see the uploaded website-backup.tar.gz file.
Extract website files
tar -xzvf website-backup.tar.gz
If the archive contains a nested folder, move files to the web root:
mv /var/www/html/your-folder/* /var/www/html/
Set proper permissions
sudo chown -R www-data:www-data /var/www/html
sudo chmod -R 755 /var/www/html
At this point, your website files are successfully transferred and placed in the correct directory on the Kamatera server.
Exporting and importing the database
After transferring the website files, you need to migrate the database to ensure your application functions correctly.
Create database on Kamatera cloud
Log in to MySQL:
sudo mysql -u root -p
Create a new database:
CREATE DATABASE db_name;
Create a user and grant privileges:
CREATE USER 'db_user'@'localhost' IDENTIFIED BY 'password';
GRANT ALL PRIVILEGES ON db_name.* TO 'db_user'@'localhost';
FLUSH PRIVILEGES;
EXIT;
Transfer database backup
If not already transferred, copy the database file:
scp db-backup.sql username@your_server_ip:/var/www/html/
Import database
On the Kamatera server, run:
mysql -u db_user -p db_name < /var/www/html/db-backup.sql
Verify database import
Log in and check tables:
mysql -u db_user -p
USE db_name;
SHOW TABLES;
You should see all your application tables listed. At this stage, your database has been successfully migrated and is ready to be connected with your website.
Updating website configuration
After migrating both files and database, you need to update your application’s configuration to connect to the new database and environment.
Update database credentials
Locate your application’s configuration file. Common examples:
- WordPress: wp-config.php
- Laravel: .env
- PHP apps: config.php or similar
Edit the file:
nano /var/www/html/wp-config.php
Update the database settings:
define('DB_NAME', 'db_name');
define('DB_USER', 'db_user');
define('DB_PASSWORD', 'password');
define('DB_HOST', 'localhost');
For .env (Laravel or similar):
DB_DATABASE=db_name
DB_USERNAME=db_user
DB_PASSWORD=password
DB_HOST=127.0.0.1
Update application URL (if required)
If your domain or IP has changed, update the site URL.
For WordPress (via MySQL):
mysql -u db_user -p
USE db_name;
UPDATE wp_options SET option_value='http://your_domain_or_ip' WHERE option_name IN ('siteurl','home');
Clear cache (if applicable)
Remove cached data to avoid loading old configurations:
rm -rf /var/www/html/cache/*
Restart services
Apply all changes:
sudo systemctl restart apache2
sudo systemctl restart mysql
At this point, your website is configured to work with the new environment on Kamatera and is ready for testing.
Configuring domain and DNS
To make your website accessible via your domain, you need to point your domain to the Kamatera server.
Find your server IP
On your Kamatera server, confirm the public IP:
curl ifconfig.me
Update DNS records
Log in to your domain registrar or DNS provider and update the following:
- A Record:
- Host: @ (or your domain)
- Points to: your_server_ip
- Optional (www subdomain):
- Host: www
- Points to: your_server_ip
Verify DNS propagation
You can check if DNS is updated using:
nslookup yourdomain.com
or
dig yourdomain.com
Configure Apache virtual host (basic setup)
Create a virtual host file:
sudo nano /etc/apache2/sites-available/yourdomain.conf
Add the following:
<VirtualHost *:80>
 ServerName yourdomain.com
 ServerAlias www.yourdomain.com
 DocumentRoot /var/www/html

 <Directory /var/www/html>
 AllowOverride All
 Require all granted
 </Directory>

 ErrorLog ${APACHE_LOG_DIR}/error.log
 CustomLog ${APACHE_LOG_DIR}/access.log combined
</VirtualHost>
Enable the site and rewrite module:
sudo a2ensite yourdomain.conf
sudo a2enmod rewrite
sudo systemctl reload apache2
DNS changes may take some time to propagate globally. Once completed, your domain will point to the Kamatera server.
Testing the website on Kamatera
Before going live, it’s important to verify that your website is functioning correctly on the new server.
Test using server IP
Open your browser and access:
http://your_server_ip
Check:
- Pages are loading correctly
- Styles (CSS) and scripts (JS) are working
- Images are displayed properly
Test domain locally (before DNS propagation)
You can map your domain to the new server locally using the hosts file.
On Linux/Mac:
sudo nano /etc/hosts
On Windows:
notepad C:\Windows\System32\drivers\etc\hosts
Add this line:
your_server_ip yourdomain.com www.yourdomain.com
Save and exit, then access http://yourdomain.com
Verify database connectivity
Check if dynamic content is working:
- Login functionality
- Forms submission
- Data retrieval from database
If there are errors, review logs:
sudo tail -f /var/log/apache2/error.log
Check file permissions
If pages fail to load or show errors:
sudo chown -R www-data:www-data /var/www/html
sudo chmod -R 755 /var/www/html
Restart services (if needed)
sudo systemctl restart apache2
sudo systemctl restart mysql
Once all checks pass and the website behaves as expected, you are ready to proceed to the final go-live step. If no website files have been deployed yet, you may still see the default Apache page.
This confirms that the server is running correctly.
Go live and final checks
Once testing is complete and everything is functioning as expected, you can proceed to make your Kamatera-hosted website live.
Update DNS (if not already done)
Ensure your domain’s A record points to the Kamatera server IP. Once updated, allow time for DNS propagation.
Remove hosts file entry
If you added a local hosts entry for testing, remove it:
sudo nano /etc/hosts
Delete the line:
your_server_ip yourdomain.com www.yourdomain.com
Save and exit.
Disable maintenance mode
Re-enable access to your website.
For WordPress:
wp maintenance-mode deactivate
Or remove manually:
rm -f .maintenance
Final verification
Check your live website using the domain:
- Load multiple pages
- Test forms and login
- Verify database-driven content
- Check mobile responsiveness
Monitor logs
Watch for any runtime errors after going live:
sudo tail -f /var/log/apache2/error.log
Optional: Enable HTTPS
Install SSL using Certbot:
sudo apt install certbot python3-certbot-apache -y
sudo certbot --apache
Follow the prompts to configure HTTPS.
At this stage, your website is live on Kamatera Cloud and accessible via your domain.
Post-migration best practices
After successfully migrating your website, it’s important to perform a few final steps to ensure stability, security, and optimal performance.
Set up regular backups
Schedule automated backups for both files and database:
crontab -e
Example (daily database backup):
0 2 * * * mysqldump -u db_user -p'password' db_name > /backup/db-$(date +\%F).sql
Enable firewall
Allow only required ports:
sudo ufw allow OpenSSH
sudo ufw allow 'Apache Full'
sudo ufw enable
Check status:
sudo ufw status
Monitor server resources
Use basic monitoring tools:
top
or install:
sudo apt install htop -y
htop
Optimize performance
- Enable caching (application-level or server-level)
- Use a CDN if serving global traffic
- Compress assets (CSS, JS, images)
Secure the Server
- Disable root login (optional)
- Use SSH keys instead of passwords
Keep system packages updated:
sudo apt update && sudo apt upgrade -y
Verify scheduled tasks
If your application relies on cron jobs, ensure they are configured correctly:
crontab -l
Final recommendation
Keep monitoring your website for the first 24–48 hours after migration to quickly catch and resolve any issues.
With these practices in place, your website will remain secure, stable, and ready to scale on Kamatera Cloud.
You did it!
Your website is now live on Kamatera Cloud, migrated with a structured process that minimized downtime and protected your data along the way. From preparing the source environment to transferring files and databases, then testing thoroughly before going live, each step builds toward a stable foundation you can rely on.
Because this guide relies on commands rather than screenshots, the entire process is repeatable. Document it once, and you can apply the same steps to your next migration, whether that’s a single WordPress site or a multi-service application with its own database.
The migration itself is just the starting point. Regular backups, a properly configured firewall, and routine monitoring will keep your site running smoothly as it scales on Kamatera Cloud.