


Firewalls are a critical component of securing your cloud infrastructure. These gatekeepers control incoming and outgoing traffic based on defined security rules, ensuring that only authorized users and systems can access your server.
As the first line of defense for your servers, firewalls:
- Filter inbound and outbound traffic
- Restrict unauthorized access to server ports
- Help enforce your organization’s security policies
With Kamatera’s user-friendly console, creating and managing firewall rules is streamlined, allowing you to protect your infrastructure with minimal effort.
This guide walks you through the simple process of setting up a firewall using the Kamatera cloud console.
You can follow along our video tutorial, or use our text-based guide below.
Video Tutorial
Prerequisites
Before you begin, ensure:
- You have an active Kamatera account
- You are logged into the Kamatera Cloud Management Console
- You have at least one server deployed (How to deploy a Kamatera server)
Step-by-step guide
-
-
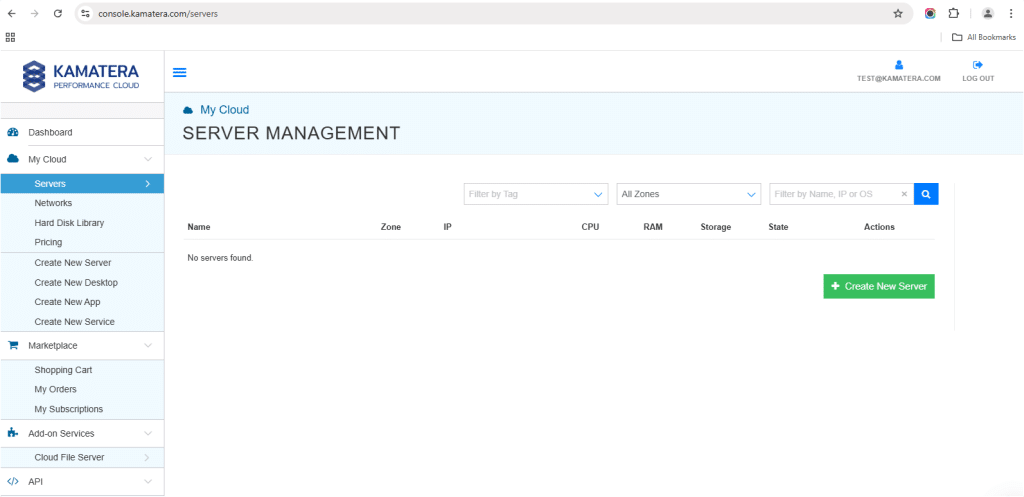
- Go to https://console.kamatera.com and click Login to log into your Kamatera account.

- Navigate to My Cloud from the left-hand side menu and select Servers.
- If a server is already deployed, it will appear in the SERVER MANAGEMENT dashboard.
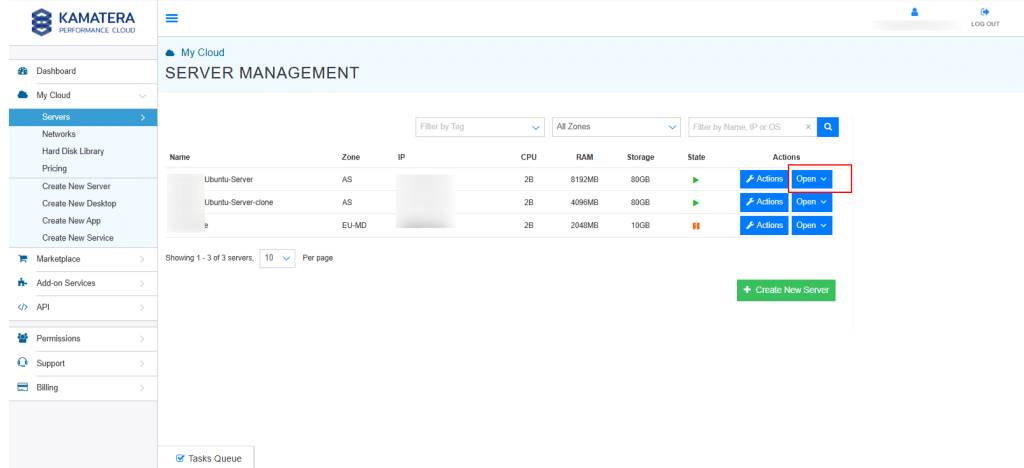
- To create a new server, click Create New Server either from the left-hand navigation menu or by using the Create New Server button on the right-hand side of the screen.
- From the dashboard, locate the server you want to secure and click Open to access its settings panel.
Note: Since the server is already deployed, we will use the existing server.
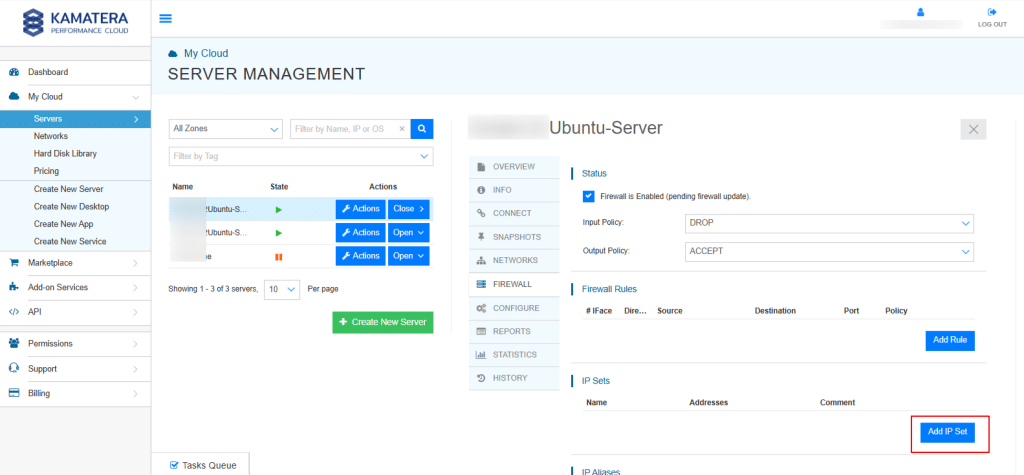
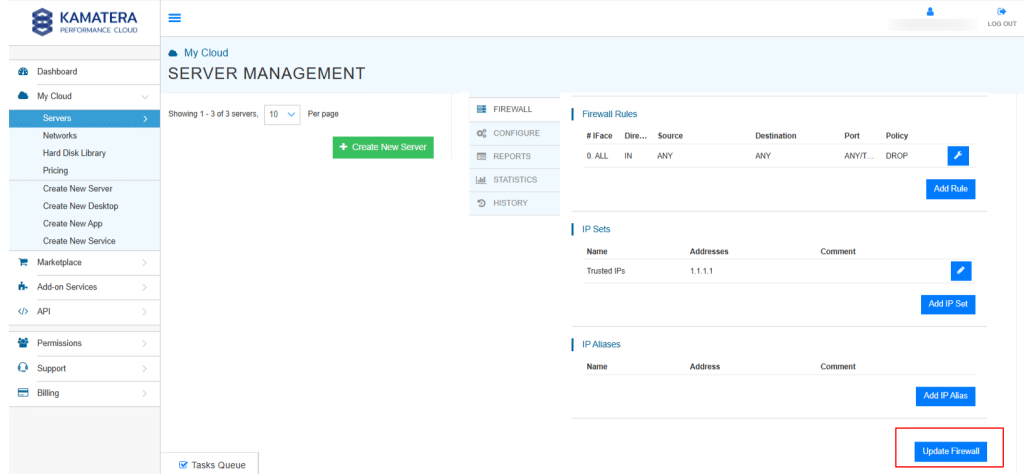
- In the server settings menu on the right-hand side, navigate to the Firewall tab.
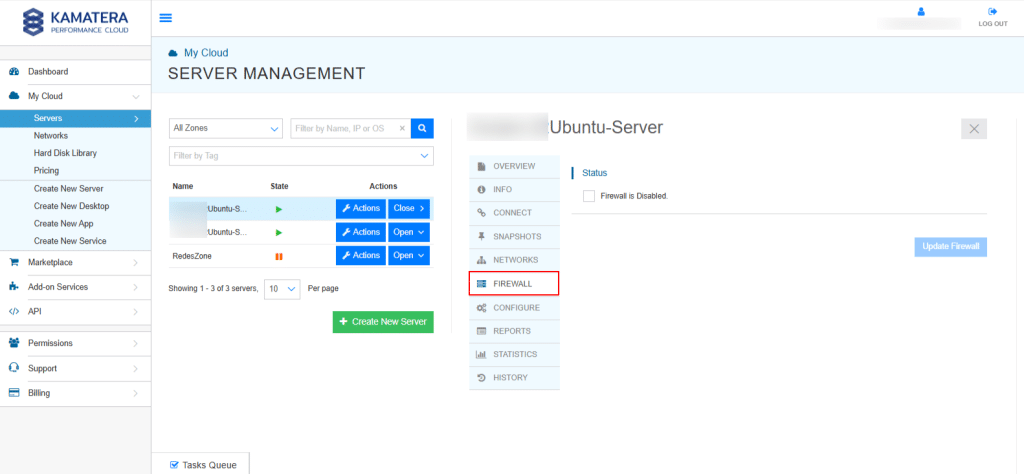
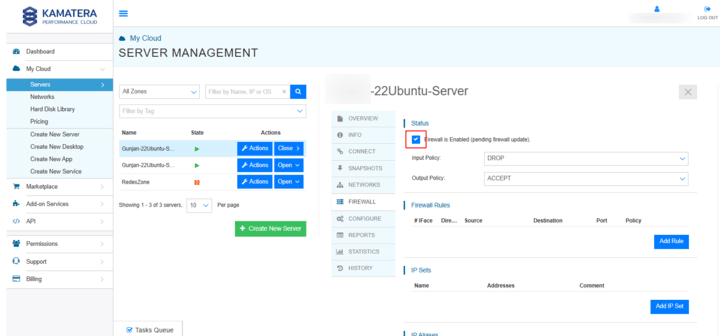
- You’ll see a checkbox labeled Firewall is disabled. Check this box to enable firewall settings for the server.
- IP sets are groups of IP addresses that you can reference when creating firewall rules. They’re useful for managing trusted IPs or blocking known malicious ranges.
- Click Add IP Set.
- Provide a descriptive name (e.g., Trusted-IPs).
- Optionally, add a comment explaining the purpose.
- Click Add Address and enter one or more IP addresses or CIDR ranges (e.g., 192.168.1.10, 203.0.113.0/24).
- Click Add IP Set to save.
- Click Add IP Set.
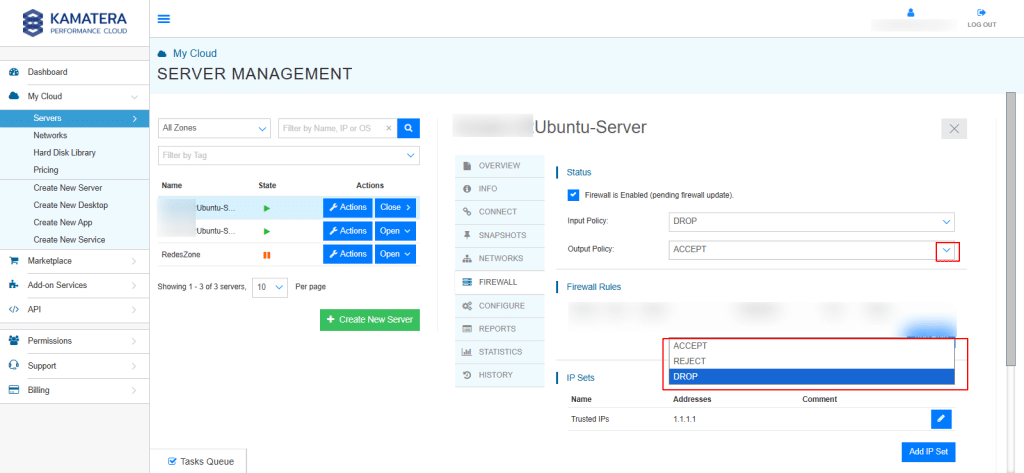
- Before creating specific rules, you need to define how the firewall should treat traffic by default:
-
- Input Policy: Defines the default action for incoming traffic.
- Output Policy: Defines the default action for outgoing traffic.
You can choose from the following policies:
-
- Accept: Allow all traffic unless explicitly blocked.
- Reject: Block traffic and notify the sender.
- Drop: Silently block traffic without notification.
-
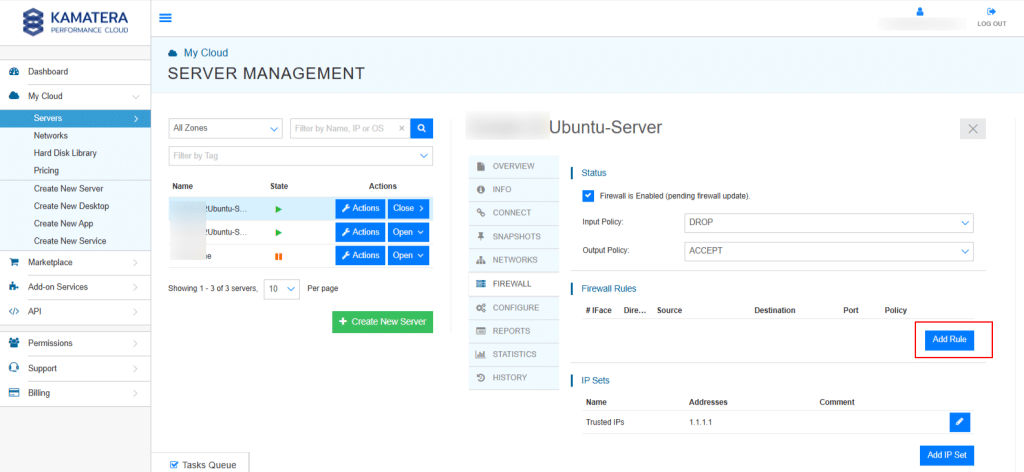
- Now it’s time to define how specific types of traffic are handled.
-
- Click Add Rule.
- Configure the rule using the following fields:
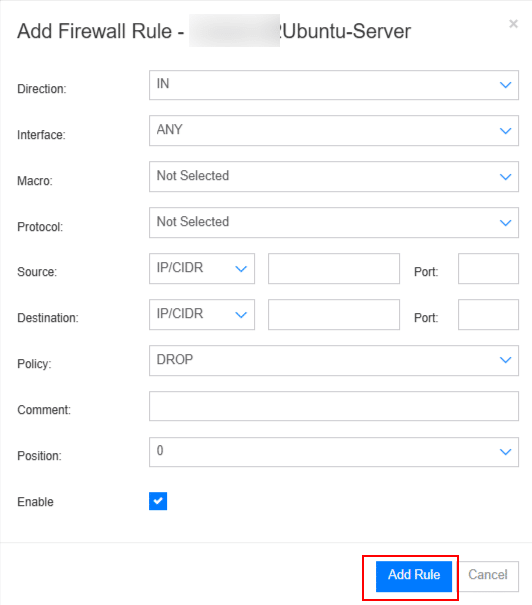
Field Description Direction Select In for Inbound or Out for Outbound Traffic. Interface Choose Any to apply the rule to all interfaces, or net0 to target the main WAN interface. Macro Use a predefined setting for common services (e.g., SSH, HTTP, HTTPS) to simplify rule creation. Protocol Choose between TCP, UDP, or ICMP. Source IP/Network Enter the source IP address or range. You may also select an IP Set created earlier. Port Specify the port number or range (e.g., 22 for SSH, 80 for HTTP). Destination IP/Network Define where the traffic is going (optional for most cases). Policy Choose how the firewall should handle matching traffic: Accept, Reject, or Drop. Comments Add optional notes for documentation or audit purposes. Position Define the rule’s order of evaluation. Rules are processed from top to bottom. -
-
- Use the Enable toggle to activate the rule immediately.
- Once all fields are completed, click Add Rule.
-
- Click Add Rule.
- Go to https://console.kamatera.com and click Login to log into your Kamatera account.
-
Note: Always place your most specific rules higher in the list to ensure correct priority.
9. After adding all the desired rules, scroll to the bottom of the page. Click Update Firewall to apply and save your configuration.
Note: If you exit without clicking “Update Firewall,” your changes will not be saved or applied.
If needed, you can return to the firewall settings at any time to:
- Edit or remove rules
- Add new IP sets
- Adjust your default traffic policies
Congratulations! You have successfully configured a firewall using the Kamatera console. With your new rules in place, your server is now better protected against unauthorized access and potential security threats.