


Veeam Backup & Replication is a leading solution for ensuring the availability and recoverability of critical workloads, offering reliable backup, replication, and recovery for virtual, physical, and cloud-based environments. This guide walks you through the process of implementing Veeam on Kamatera.
First, let’s create an account on Kamatera.
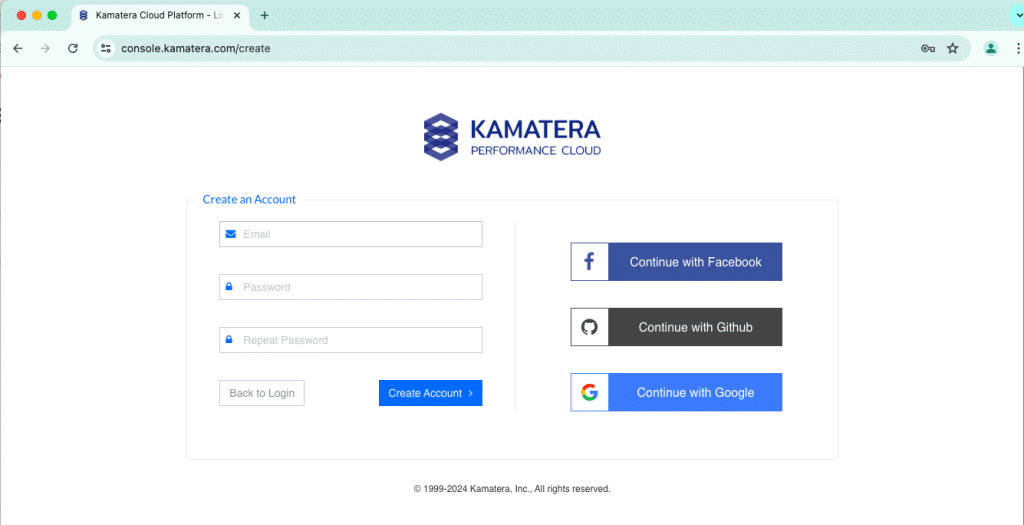
Go to console.kamatera.com and sign up for an account by providing the following information:
- Verify Your Email: Click the verification link sent to your email by Kamatera.
- Password: Enter your password.
- Repeat Password: Re-enter your password and click Create Account.
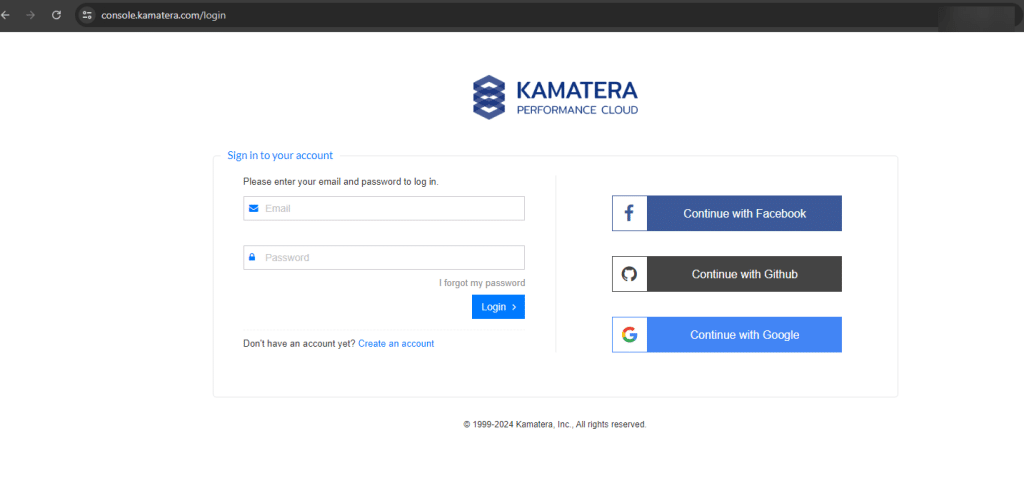
Enter your username and password and click Login to access the Kamatera Management Console.
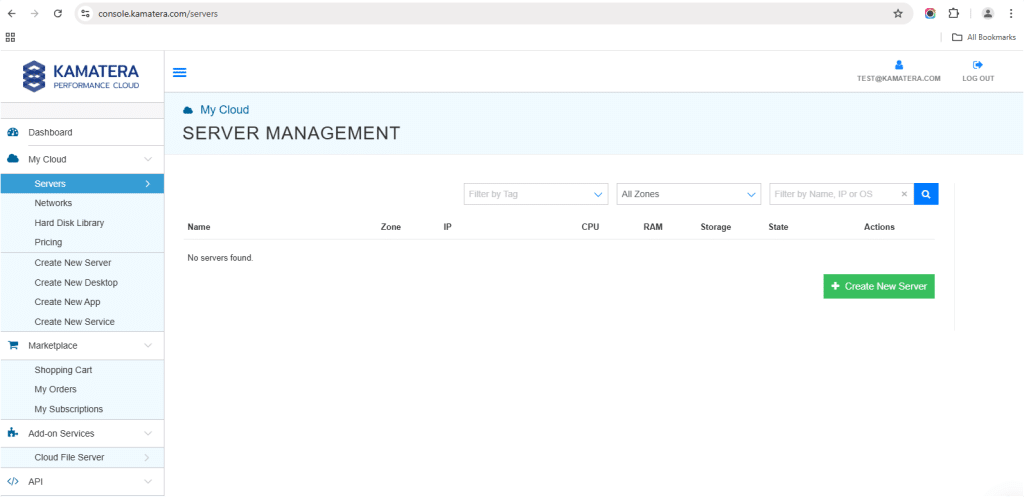
Navigate to My Cloud on the left pane, select Servers, and click on Create New Server. Alternatively, you can click on Create New Server on the right pane.
Choose the zone from the following options:
- Asia
- North America
- Europe
- Middle East
Note: For this setup, we used the Asia server domain to set up the Windows server.

Choose an image
Kamatera offers a variety of app and server images to help users set up preconfigured resources. Users can explore options such as:
- Server OS images
- Desktop OS images
- App images
- Service images
- My private images
Choose Server OS Images and select Windows Server.
In Choose Version, select the latest version of Microsoft Windows Server (2025_standard 64-bit).
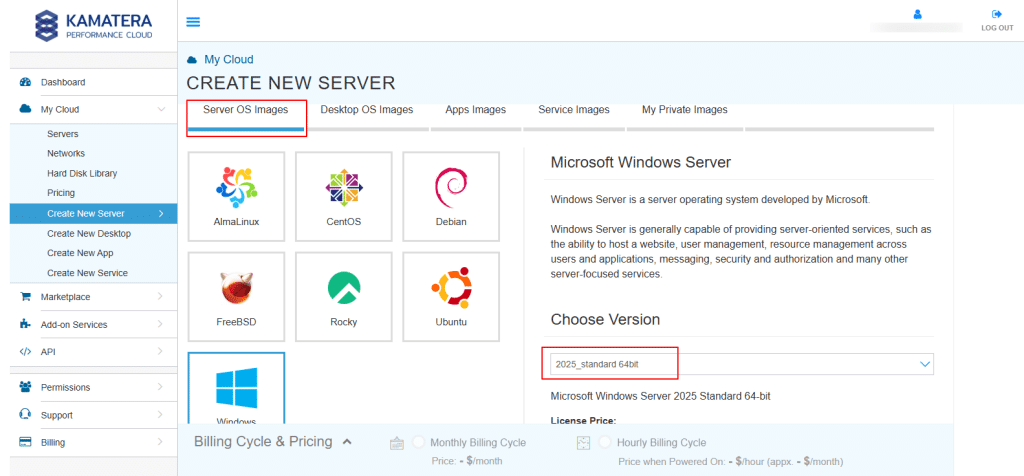
Upon selecting the version, the License prices are displayed. Toggle the Detailed view button enable to view the detailed description, including the price.
For this use case, we’ll use the server specifications below. You can configure them to your requirements.
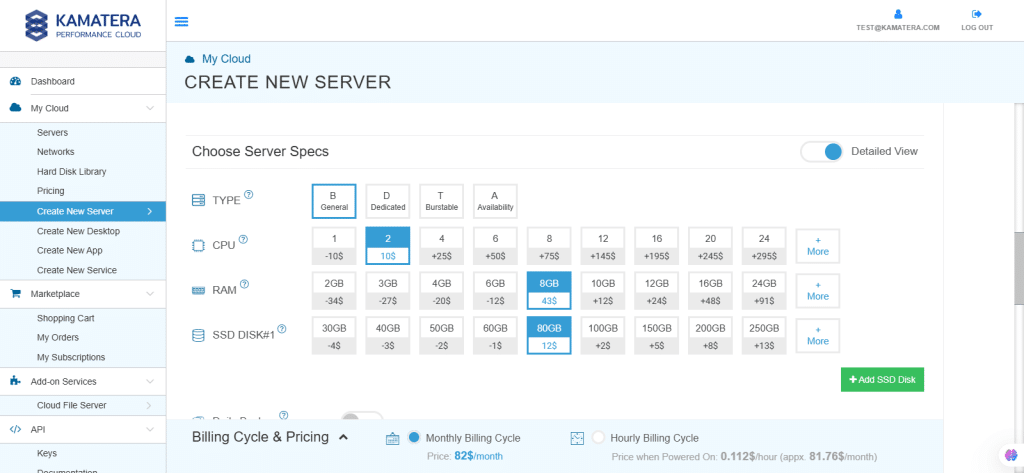
Choose server specs
| Field | Description |
| Type | Type B-General Purpose: Server CPU are assigned to a dedicated physical CPU thread with reserved resources guaranteed.
Type D–Dedicated: Server CPU are assigned to a dedicated physical CPU Core (2 threads) with reserved resources guaranteed. Type T-Burst: Server CPU are assigned to a dedicated physical CPU thread with reserved resources guaranteed. Exceeding an average usage of 10% will be extra charged for CPUs usage consumption. Type A-Availability: Server CPUs are assigned to a non-dedicated physical CPU thread with no resources guaranteed. Note: More information on CPU types is available on the My Cloud- Pricing page. |
| CPU | Choose the number of vCPUs that will be installed on the server. Type B/T can be configured with up to 104 vCPUs per server. Based on Intel’s latest Xeon Processors, 2.7 GHz+. |
| RAM | Choose the amount of RAM that will be installed on the server. Type B/T/D can be configured with up to 512GB RAM per server. |
| NVMe SSD DISK | Choose NVMe SSD Storage Size. You can add up to 15 NVMe SSD Disk. NVMe SSD Storage includes unlimited IOPS and unlimited storage bandwidth, free of charge. |
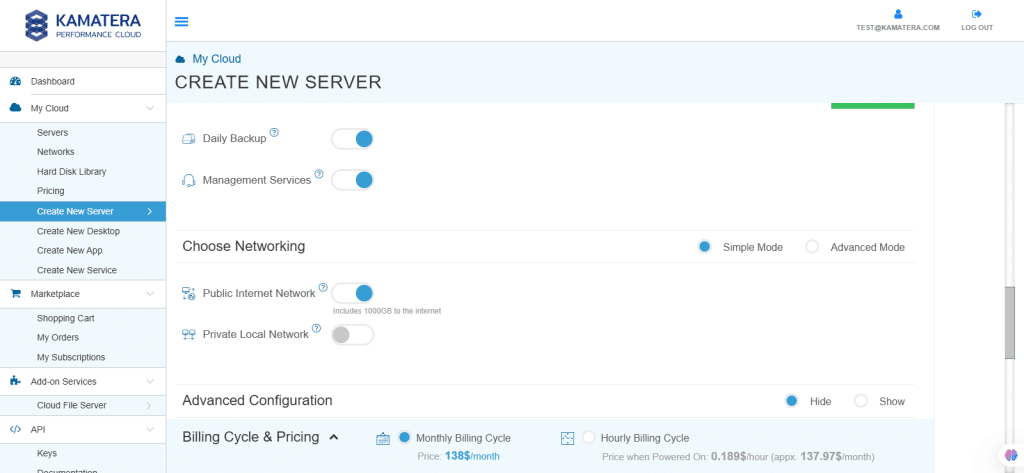
| Daily Backup | Toggle the switch to enable extended daily backups of your server’s storage to external backup storage. |
| Managed services | Toggle the switch to enable managed services to the server’s operating system by Kamatera’s Technical Support Team. |
Choose networking
Users can select the network they wish to use, whether it is a public Internet network or a private local network.
Simple mode
| Field | Description |
| Public Internet Network | Check to connect the server to a network interface connected to Public Internet Network. |
| Private Local Network | Check to connect the server to a network interface connected to Private Local Network. |
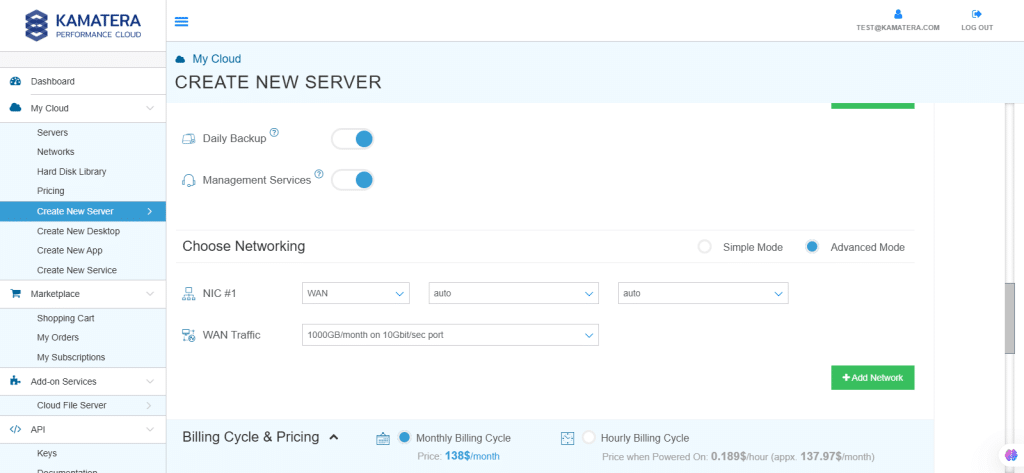
Advanced mode
| Field | Description |
| NIC #1 | Select WAN from the options available in the drop-down menu.
|
| WAN Traffic | Select 5000 GB per month on 10 Gbit per second port. |
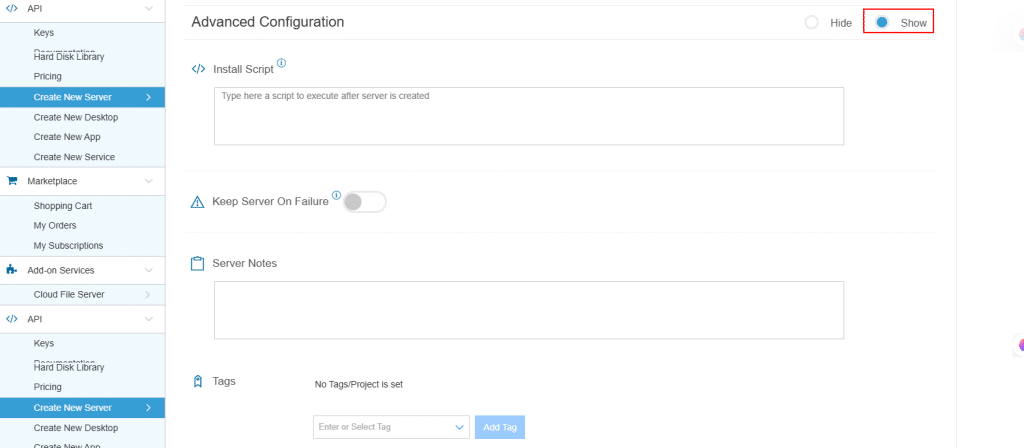
Advanced configuration
- Hide: to hide the advanced configuration.
- Show: to see the advanced configuration.
| Field | Description |
| Install Script | Enter the script here to execute once the server is created.
Note: For Windows system use Power Shell. |
| Keep Server On Failure | Do not terminate server if Start up Script or provisioning sails |
| Server Notes | Enter any server notes to be noted. |
| Tags | Select the tags from the drop-down menu and click Add Tag. |
Finalize settings
Finalize settings by setting the password, re-validating it, selecting the number of servers, specifying the server’s name, and enabling the Power On Servers option.
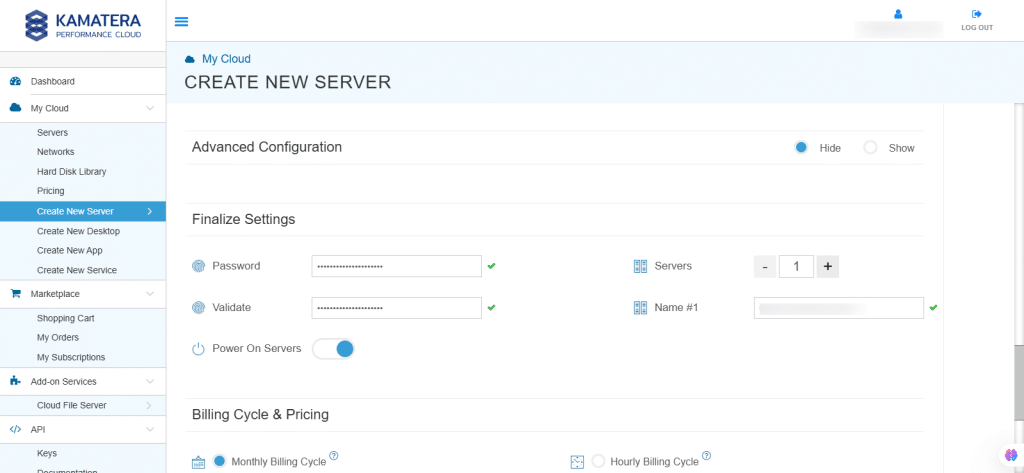
| Field | Description |
| Password | Select password
Password allowed characters: a-z, A-Z,0-9 !@#$^&*()~ and must need the following requirements:
|
| Validate | Re-enter the password to validate. |
| Servers | Select the number of servers the user wants. |
| Name # 1 | Enter the name of the server. |
| Power On Servers | Switch on the toggle button to see the details |
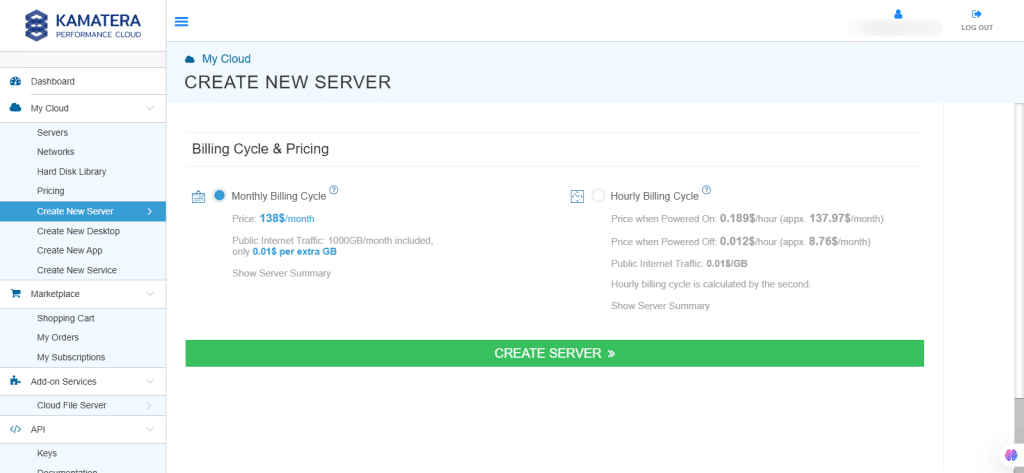
Billing Cycle and Pricing
The user can choose between monthly or hourly billing.
Note: The Server Summary displays the location, operating system (including server specifications), add-on services, servers, and pricing.
Click Create Server.
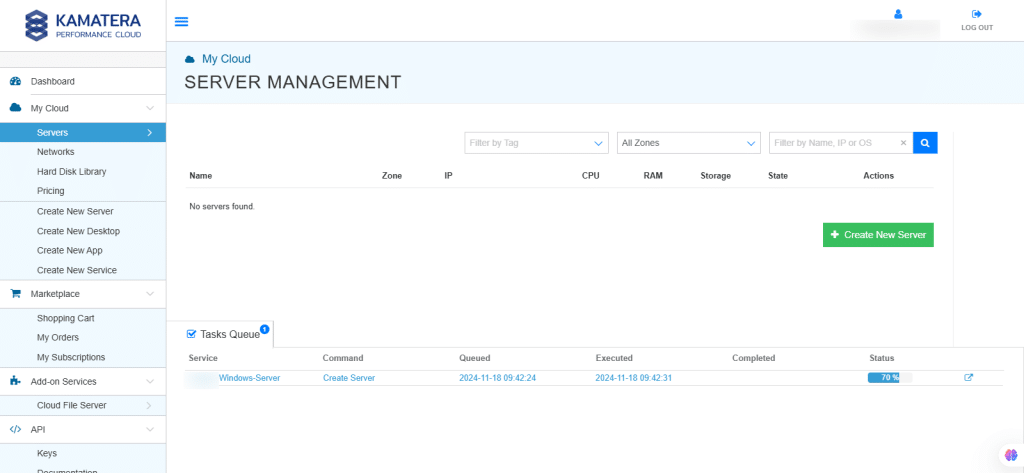
Click on Tasks Queue to see the progress of installation of Windows Server.
The server will be created and will appear on the Server Management screen. Once the server is created, click Open.
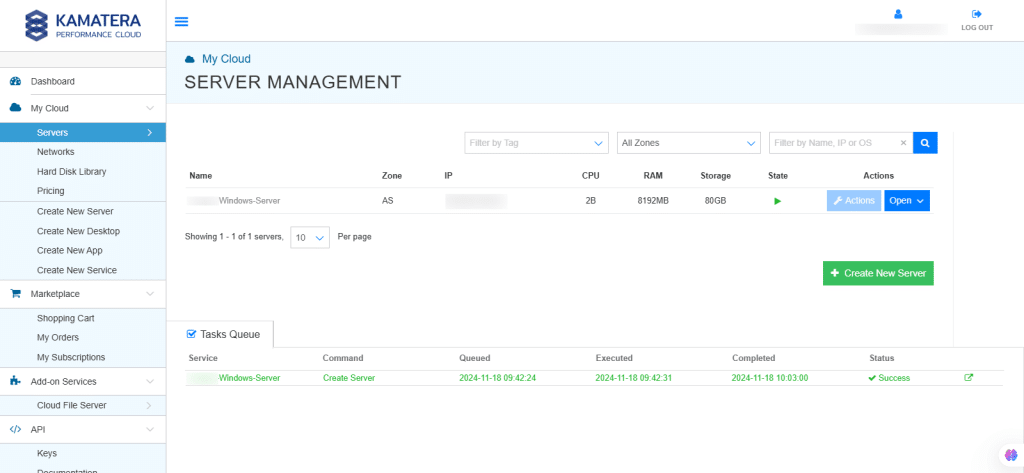
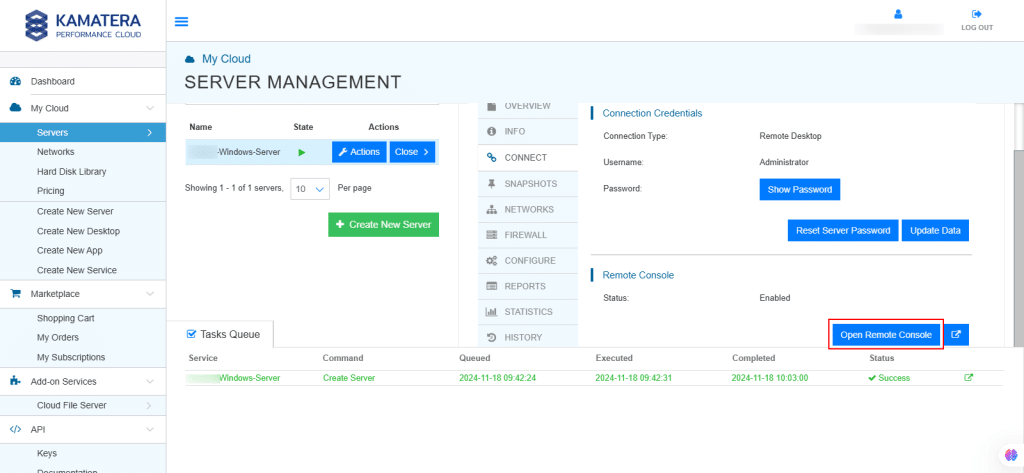
A new screen shows up. Overview tab in the center is selected by default and it displays information like Power state, Guest OS, Zone, Public Internet (WAN), Server ID of the server and Configuration-Number of CPU. Memory Size, Disk 1.
Click on Connect to connect to Windows Server.

Connection credentials like Connection Type, Username, and Password are shown. Now, click on Open Remote Console.
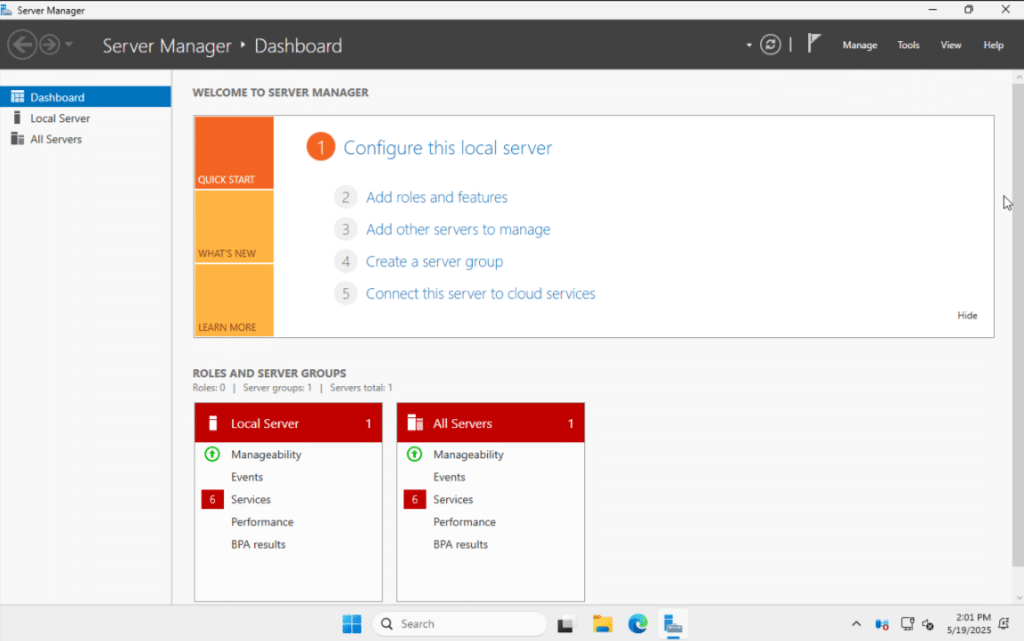
A new tab opens, connecting to the new server and displaying the Server Manager Dashboard.
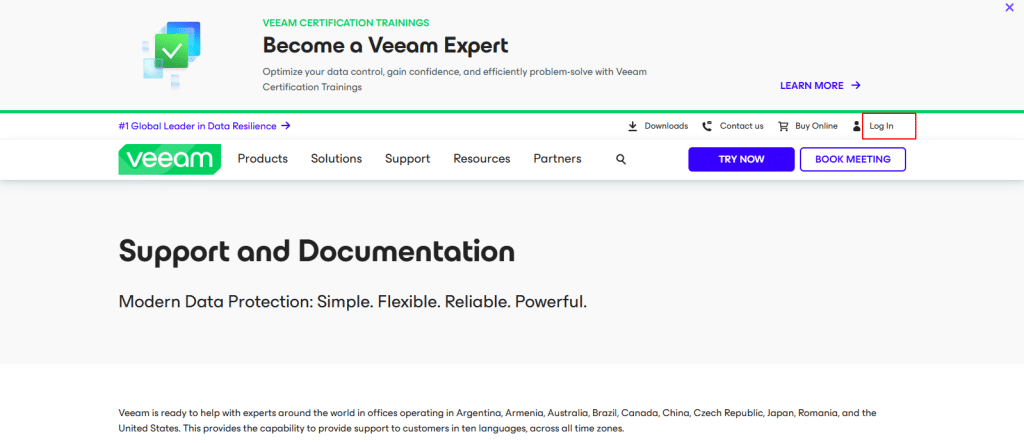
Next, launch your browser and go to the Veeam website: https://www.veeam.com/. To create a Veeam account, click on Login at the top right corner.
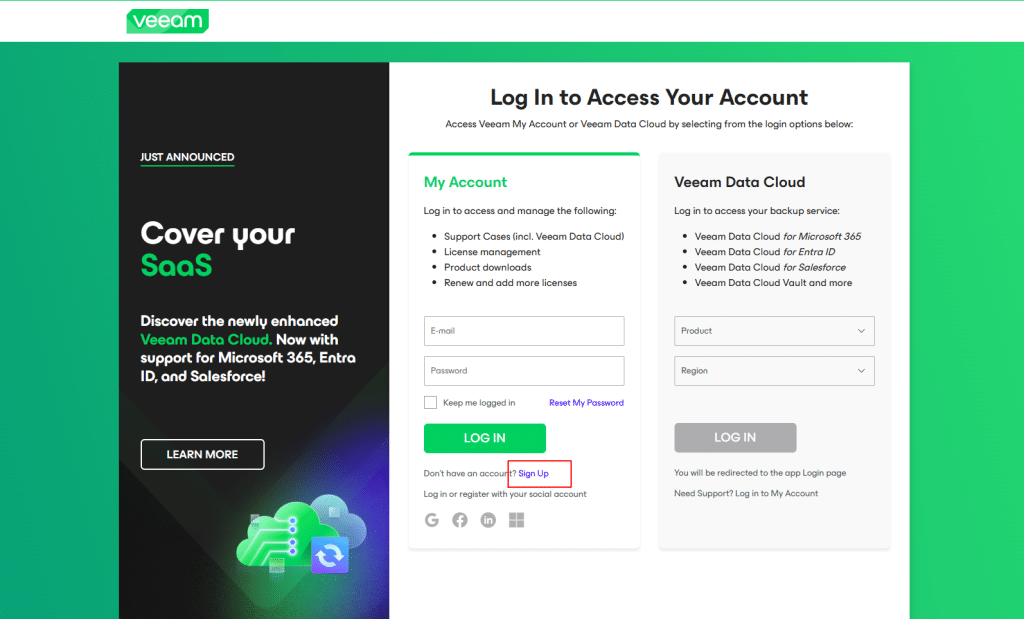
If you already have an account, please enter your email and password, then click Log In to access your account. If you’re a new user, click Sign Up to create a new account.
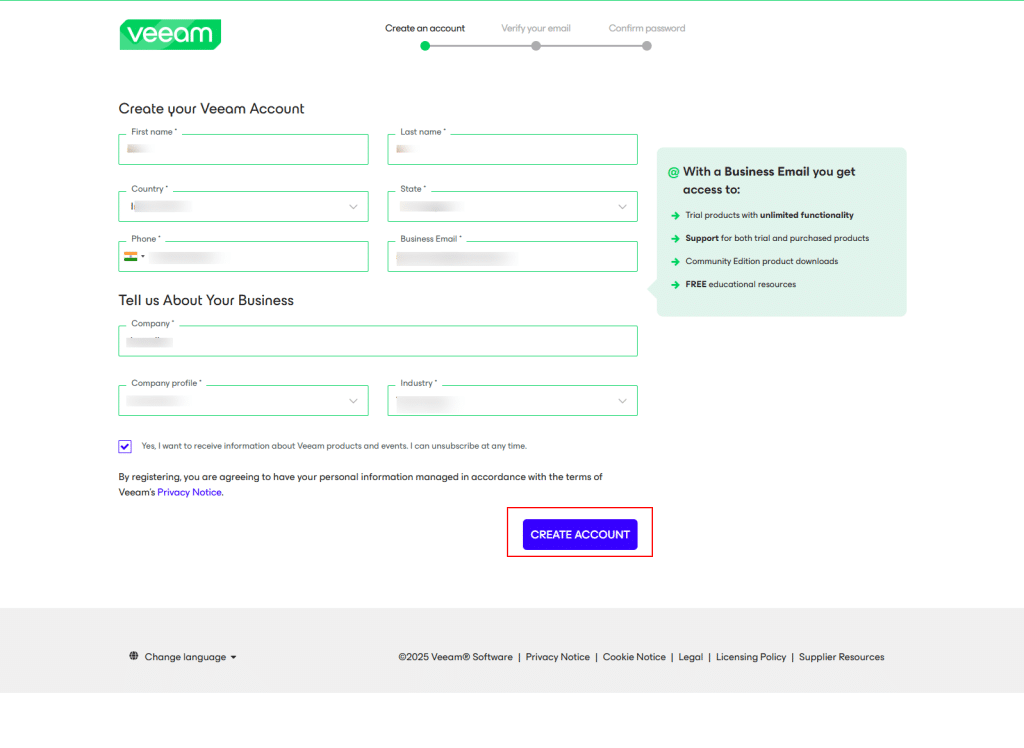
Here, we are creating a new account. Please fill in all the required information-such as your First name, Last name, Country, State, Phone, Business Email, Company, Company profile, and Industry. Check the box, and then click on CREATE ACCOUNT to complete the registration process.
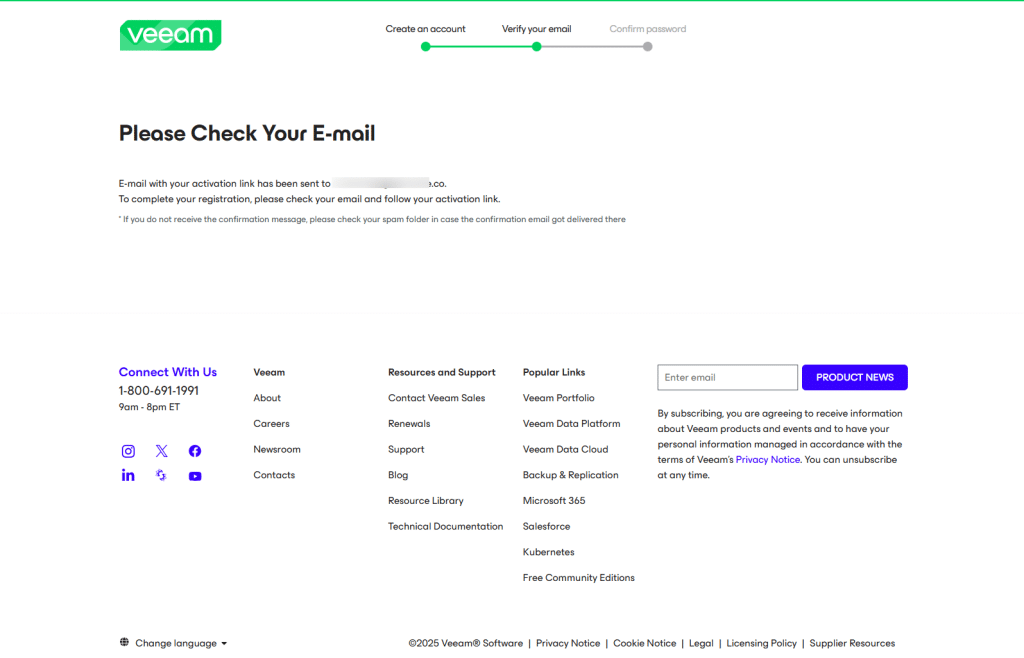
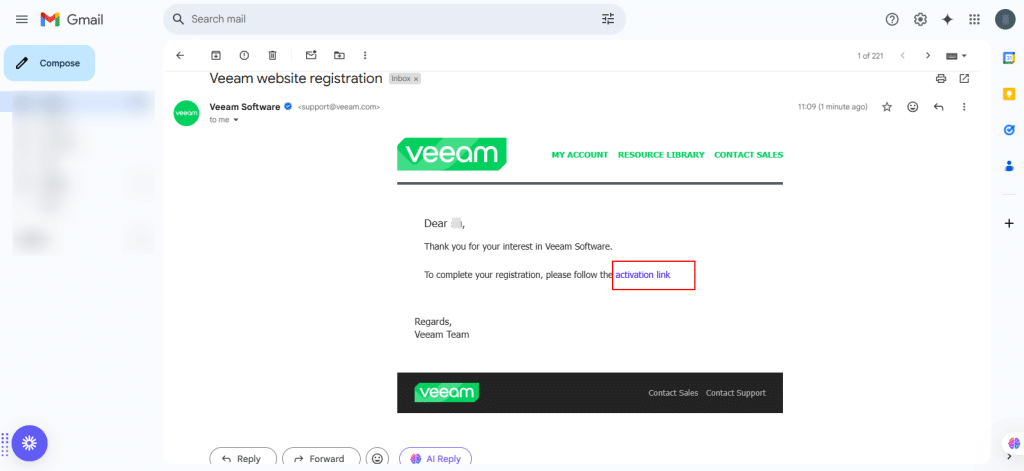
A new page will open, as shown in the screenshot below, confirming that an activation email has been sent to your registered email address.
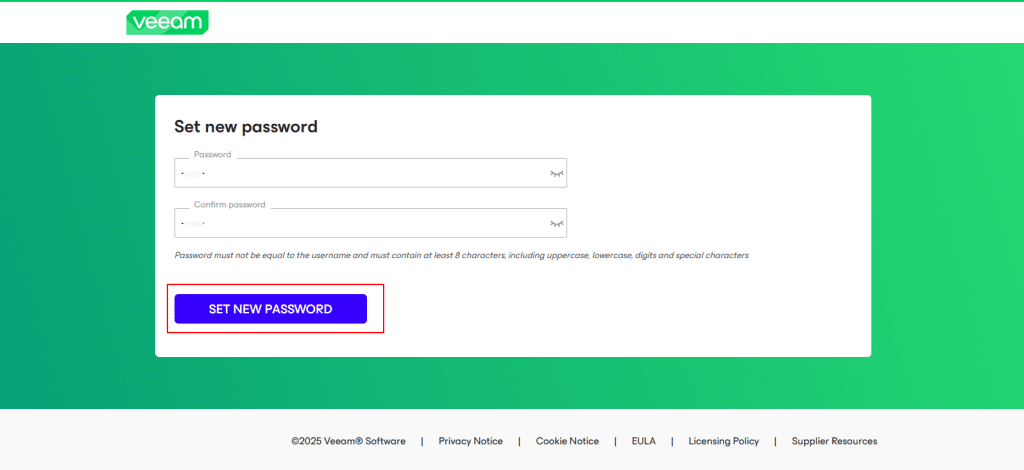
On this screen, you will be prompted to set your new password. Enter your desired password in the Password field and re-enter the same password in the Confirm Password field to ensure accuracy. Once both fields are filled, click on SET NEW PASSWORD to complete the password setup process.
On this screen, you will be prompted to set your new password. Enter your desired password in the Password field and re-enter the same password in the Confirm Password field to ensure accuracy. Once both fields are filled, click on SET NEW PASSWORD to complete the password setup process.

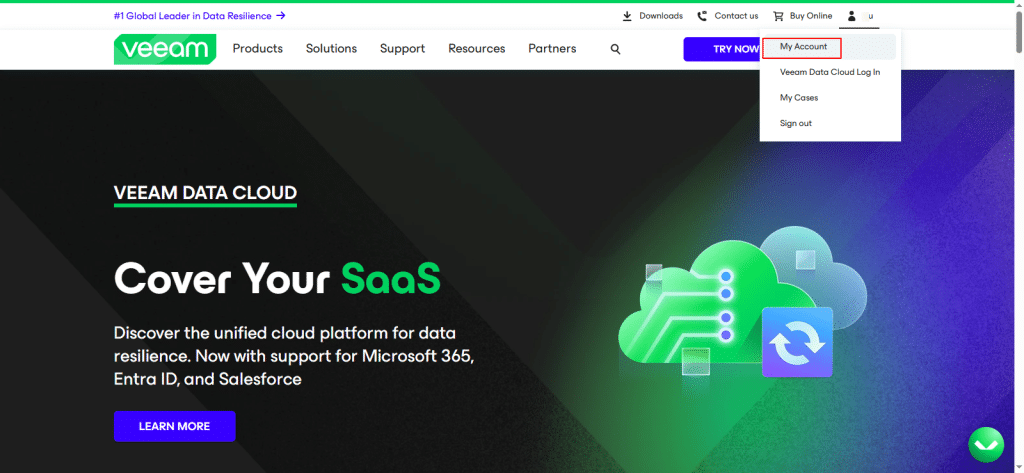
Once your account has been successfully created, your account name will appear at the top right corner of the page. Click on it to open the drop-down menu, then select My Account to access your account settings and details.
Note: A new window will open. Locate Veeam Data Platform Essentials and click Download to begin downloading the software.
While the download is in progress, go to the left-hand menu, find License Management, and select Production License. A new window will open. In this window, choose Veeam Data Platform Essentials and click Get License Key. When the next window appears, click Download to download the license file.
Once you have all the necessary files, go to your Downloads folder and extract the archive. Open the extracted folder and locate the Replication ISO file. Right-click on the ISO file and select Mount.
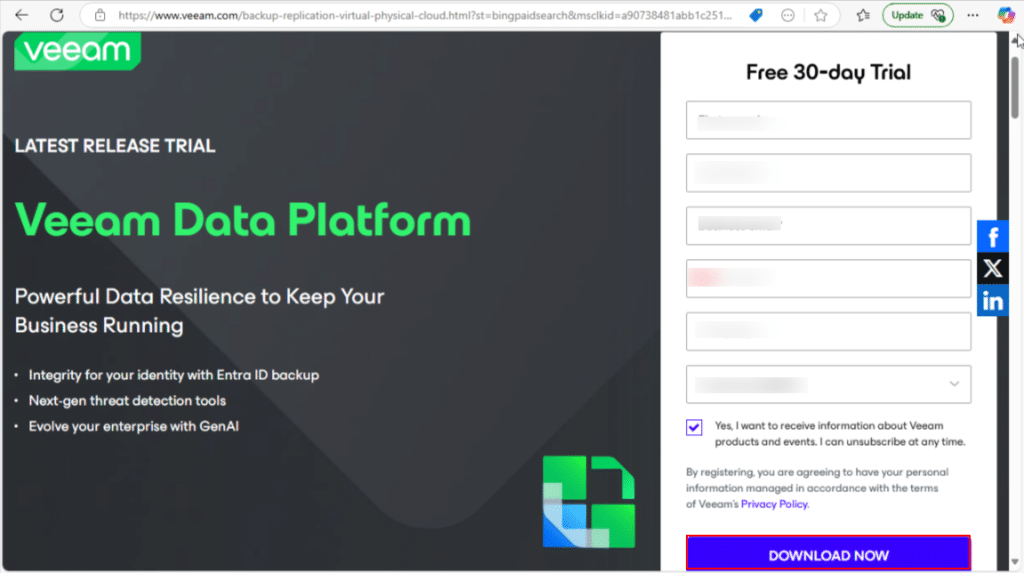
For this use case, we are using the trial version of Veeam Backup & Replication. To proceed with the download, enter your First Name, Last Name, Business Email Address, Phone Number, Company Name, and Country in the registration form. Once all fields are completed, click the DOWNLOAD NOW button to begin downloading the installer.
On this screen, you will be prompted to set your new password. Enter your desired password in the Password field and re-enter the same password in the Confirm Password field to ensure accuracy. Once both fields are filled, click on SET NEW PASSWORD to complete the password setup process.
Once you return to the platform, you will see your name displayed in the top-right corner of the screen, indicating that you are logged in. From there, click on the Downloads section to proceed.

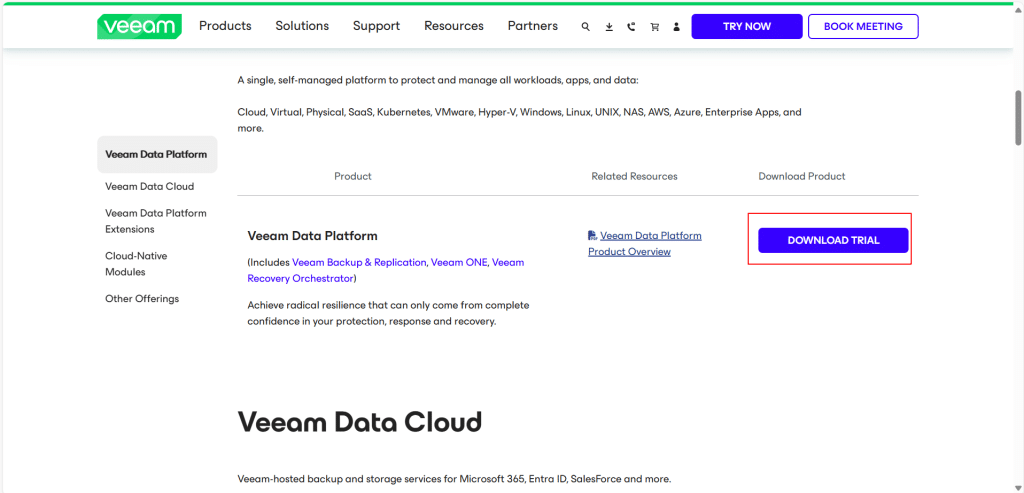
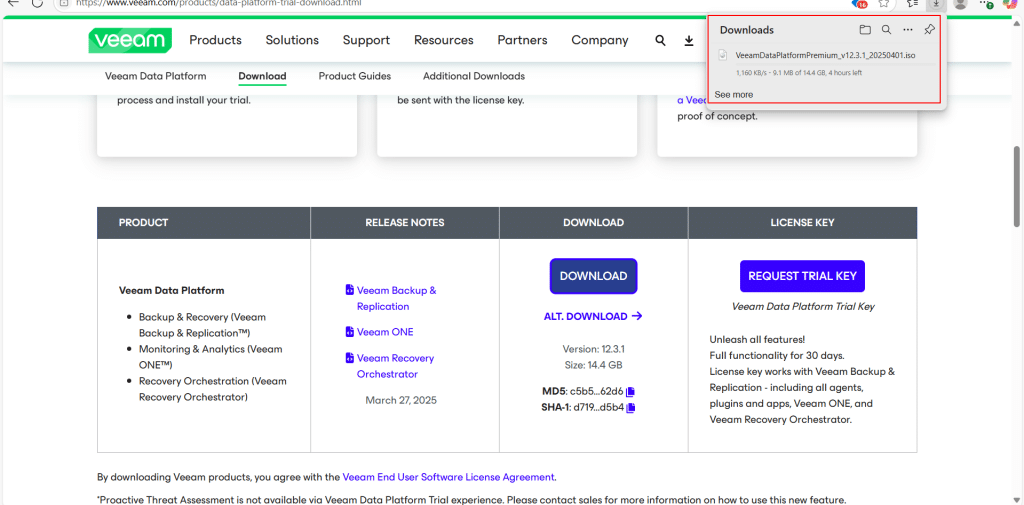
Scroll down the page until you locate the Veeam Data Platform section. Once found, click on the DOWNLOAD TRIAL button to begin the trial download process.
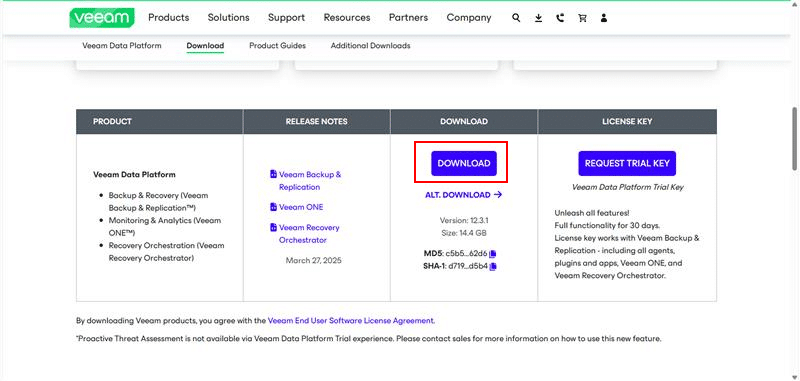
You will be redirected to a new page. On this page, locate the appropriate product Veeam Data Platform and click the Download button to initiate the DOWNLOAD.
In the top-right corner of your browser, you will see that the file VeeamDataPlatformPremium.iso is downloading. This ISO file is a disk image that contains the full installation package for the Veeam Data Platform Premium edition. Once the download is complete, you can mount or extract the ISO to begin the installation process.
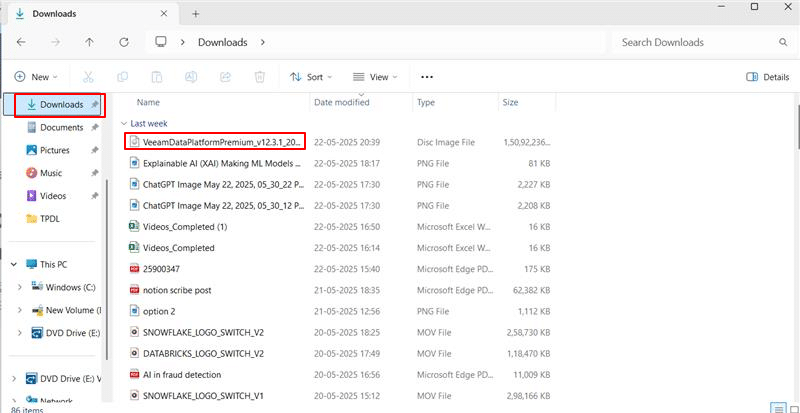
Right click on the ISO file and select Mount.
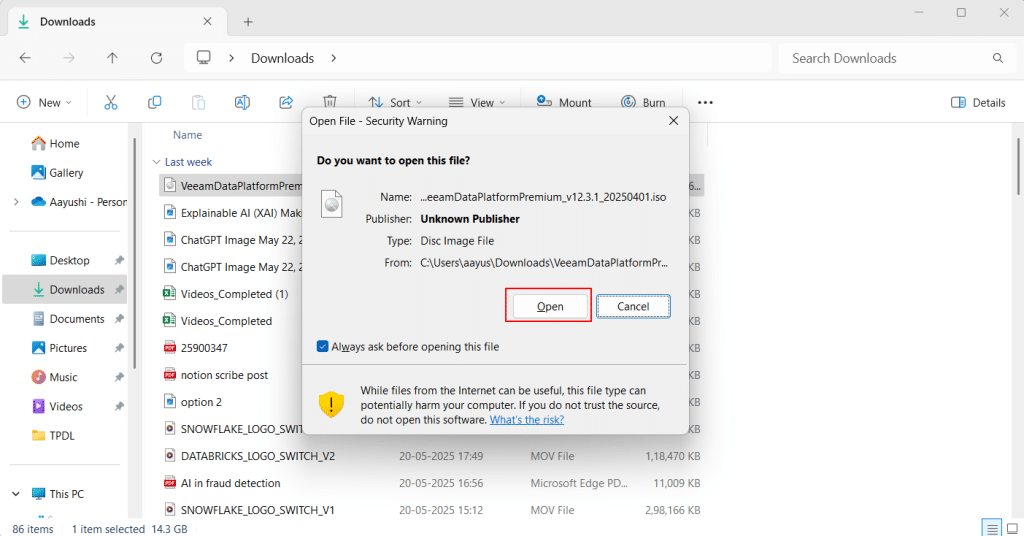
A pop-up window with security Warning opens, click Open.
Now, run the Setup.exe file by right clicking on it and select Open.

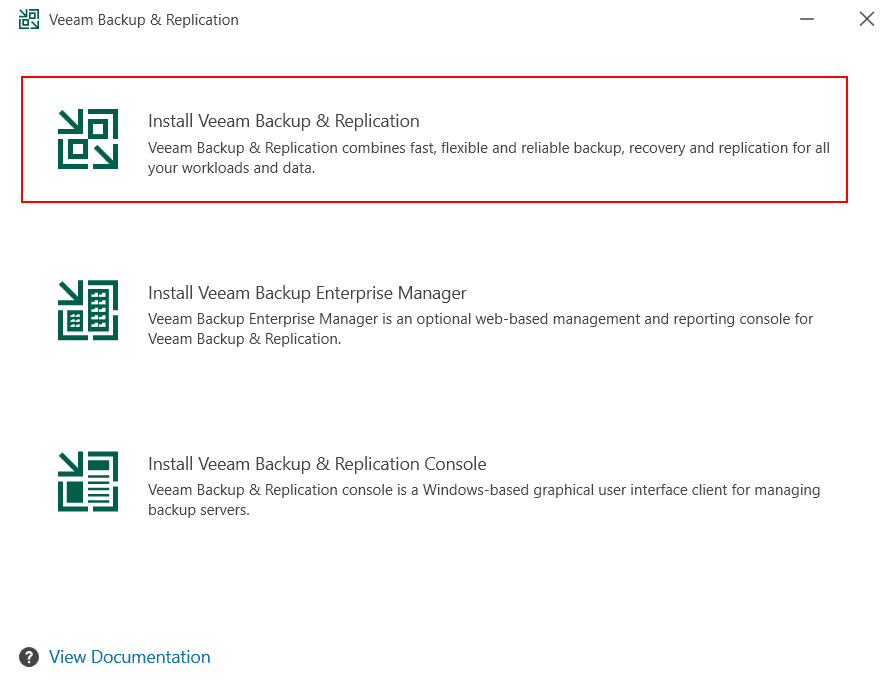
On the Veeam Data Platform wizard, select Veeam Backup & Replication 12.3 as shown in the screen below:

At the Veeam Backup & Replication step of the wizard, choose Install Veeam Backup & Replication.
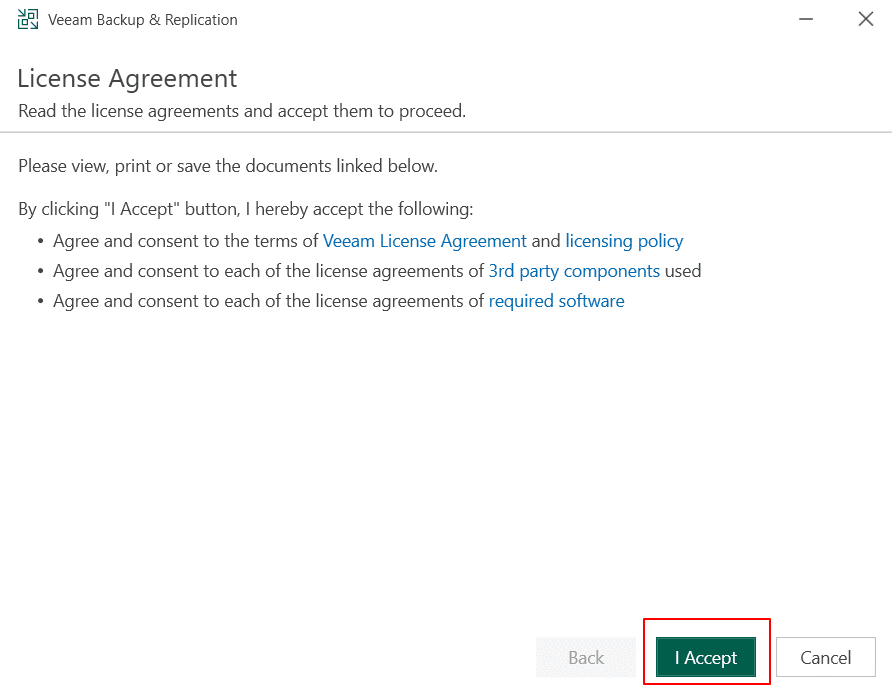
At the License Agreement step of the wizard, review the Veeam License Agreement, licensing policy, and the license agreements for third-party components and required software. To accept the terms and continue with the installation of Veeam Backup & Replication, click I Accept.
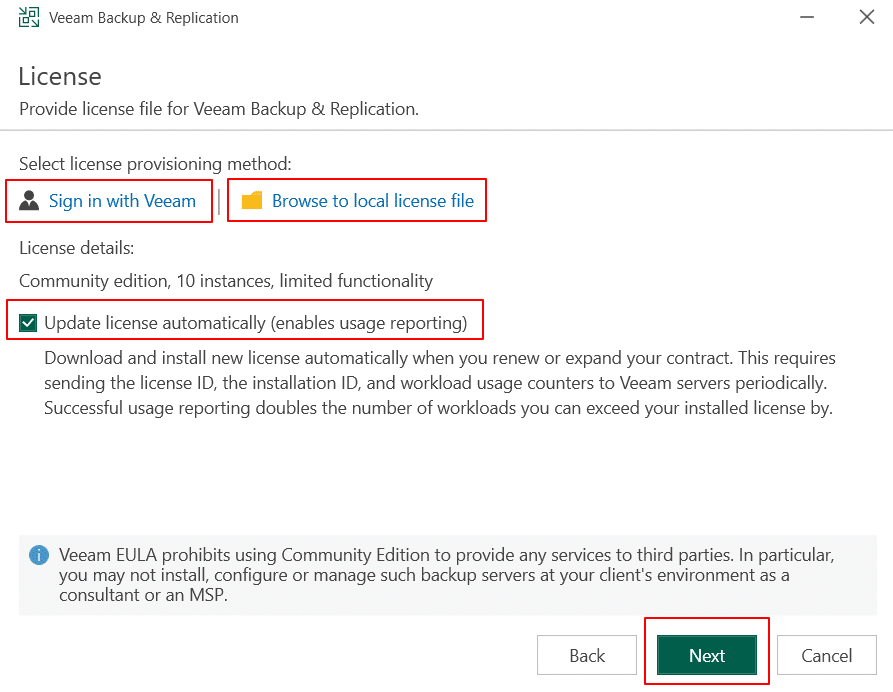
At the License step of the wizard, choose the license you want to install for Veeam Backup & Replication.
If a valid license is already installed, the wizard will notify you, and you can skip this step.
You can install a license in two ways:
- Sign in with Veeam: Click Sign in with Veeam and enter your credentials and select a license to install
- Browse to local license file: Click Browse to license file and select a valid license from your local server or network
- Update license automatically: To enable automatic license updates upon renewal or expansion, check Update license automatically.
Note: Here, the Update license automatically (enables usage reporting) box is checked, as it is a trial version.
Click Next.
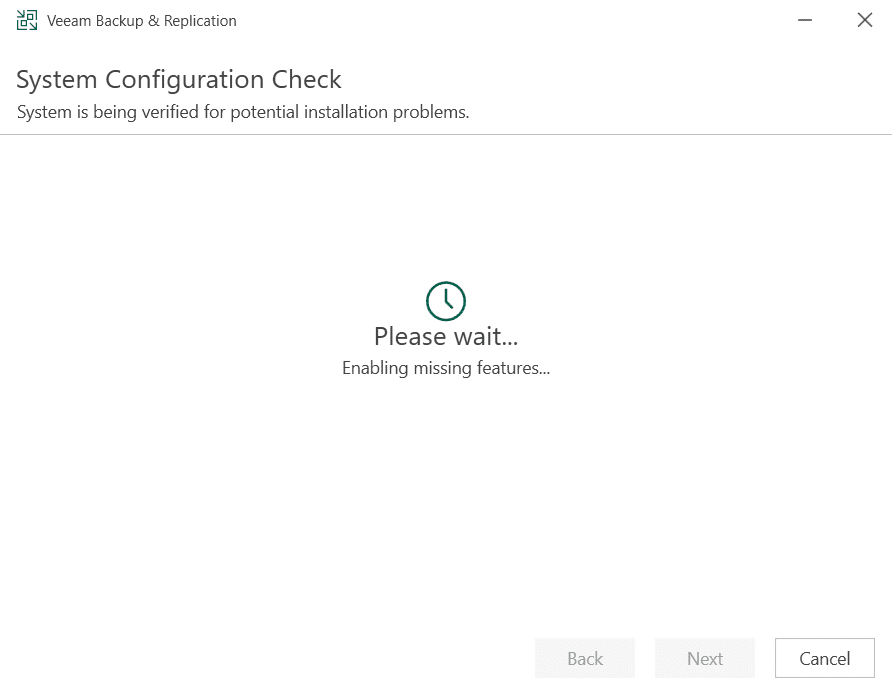
At the System Configuration Check step, the system checks if the required software is installed on the machine. If some of the components are missing, the setup will try to install them automatically. It takes a few seconds to complete.
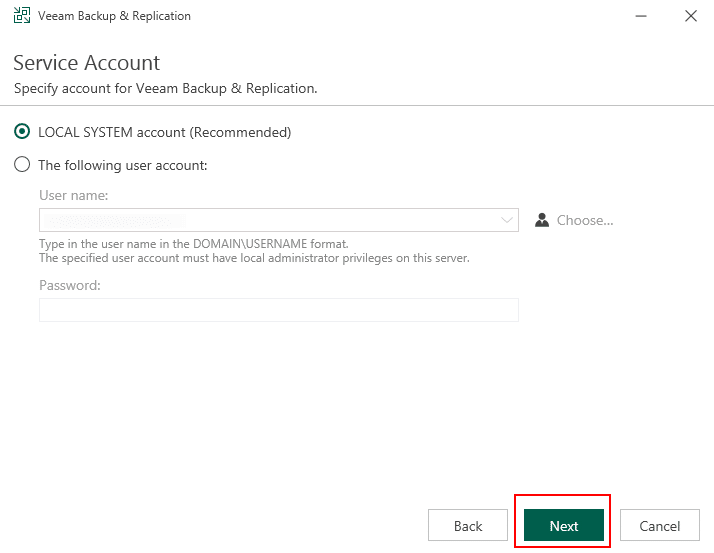
Now, At the Service Account step (available when configuring installation settings manually), choose the account for running the Veeam Backup Service:
- LOCAL SYSTEM account (default and recommended)
- Custom user account (in DOMAIN\USERNAME format)
If using a custom account, it must:
- Be a member of the Administrators group on the local machine
- Have db_owner rights on the configuration database
To the specified user account, Veeam Backup & Replication automatically grants the Log on as a service right.
Click Next.
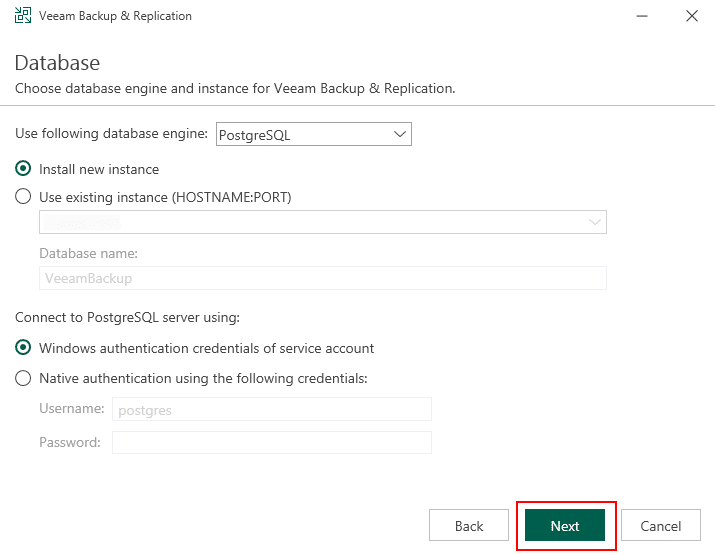
At the Database step of the wizard, you can manually configure installation settings.
Click Next.
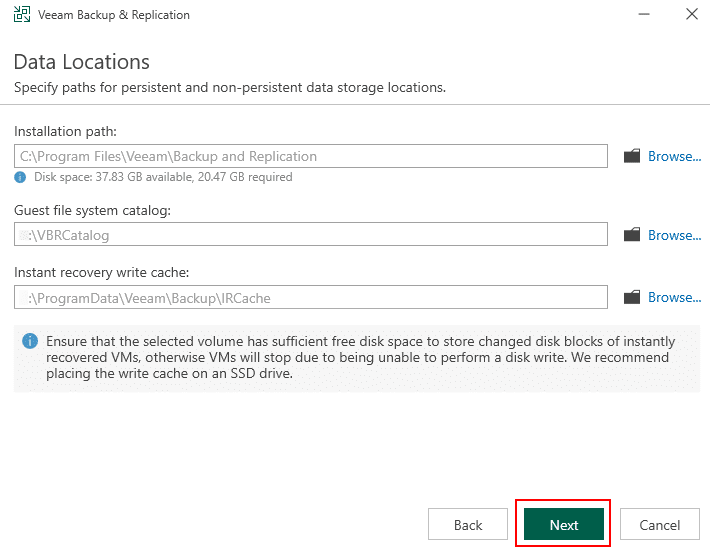
At the Data Locations step of the wizard,
- To change the installation folder, click Browse next to Installation path.
- To change the index file location, click Browse next to Guest file system catalog.
- [VMware only] To update the instant recovery cache location, click Browse next to Instant recovery write cache. Ensure at least 100 GB of free space is available.
Note: Default settings are recommended.
Click Next.
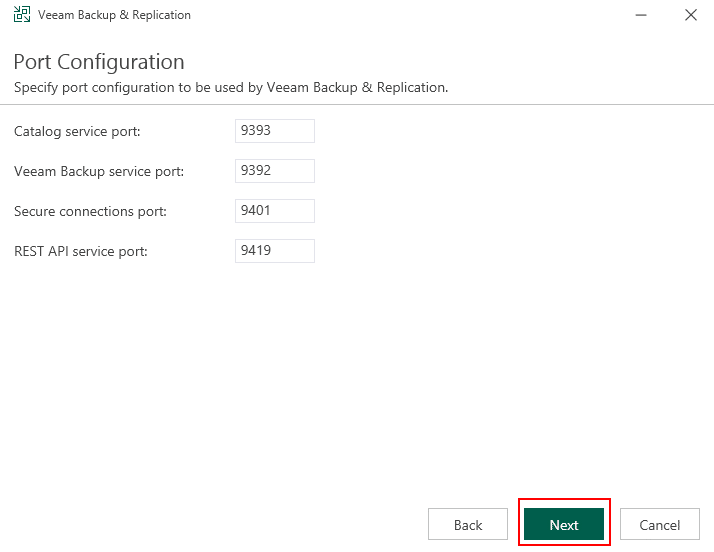
At the Port Configuration step of the wizard, you can configure the installation settings manually.
- Catalog Service: Port 9393 (for replicating catalog data)
- Backup Service: Port 9392 (used by Enterprise Manager and console)
- Secure Connections: Port 9401 (used by the mount server to communicate with the backup server)
- REST API: Port 9419 (for REST API communication)
Note: Default settings are recommended.
Click Next.
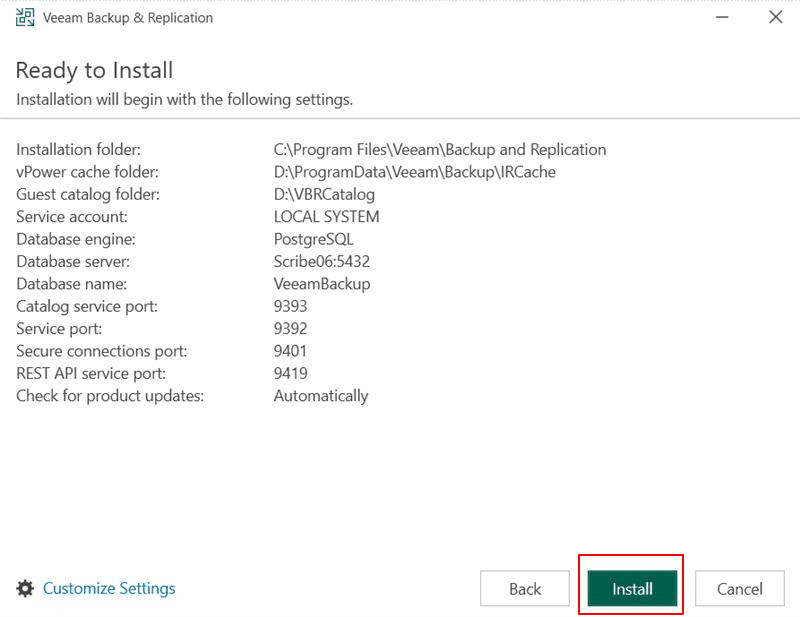
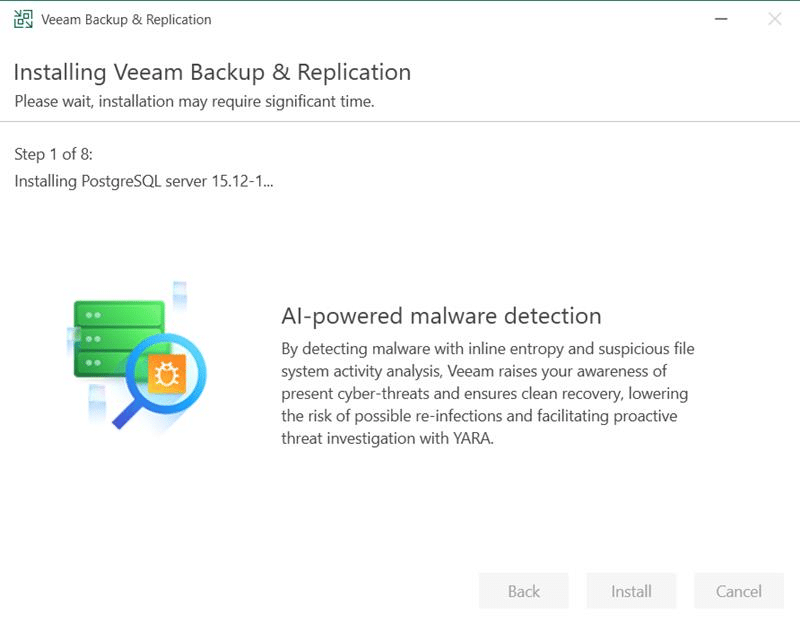
At this step, you can review the Veeam Backup & Replication installation settings and start the installation process.
Click Install.
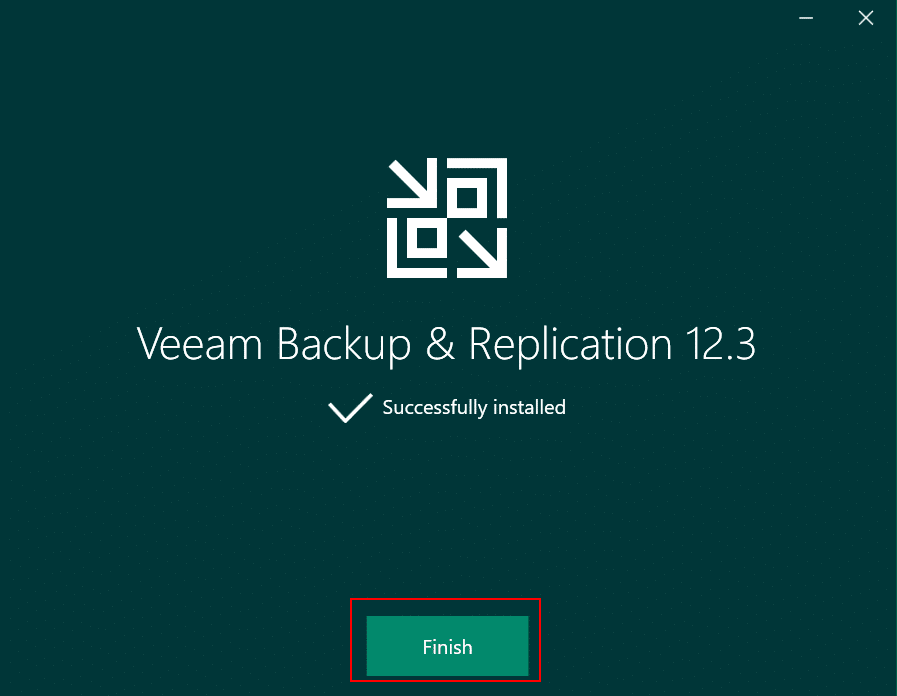
The installation process may take some time to complete.
Once finished, click Finish to exit the setup wizard.
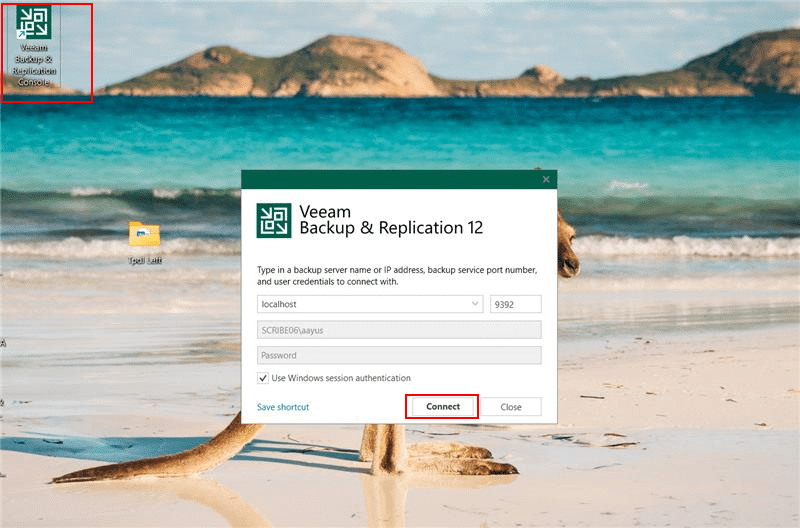
Now, you will see Veeam Backup & Replication icon on the desktop. Double click on the icon to launch Veeam Backup & Replication console.
Click Connect.
It may take a few seconds for the Veeam user interface (UI) to appear.
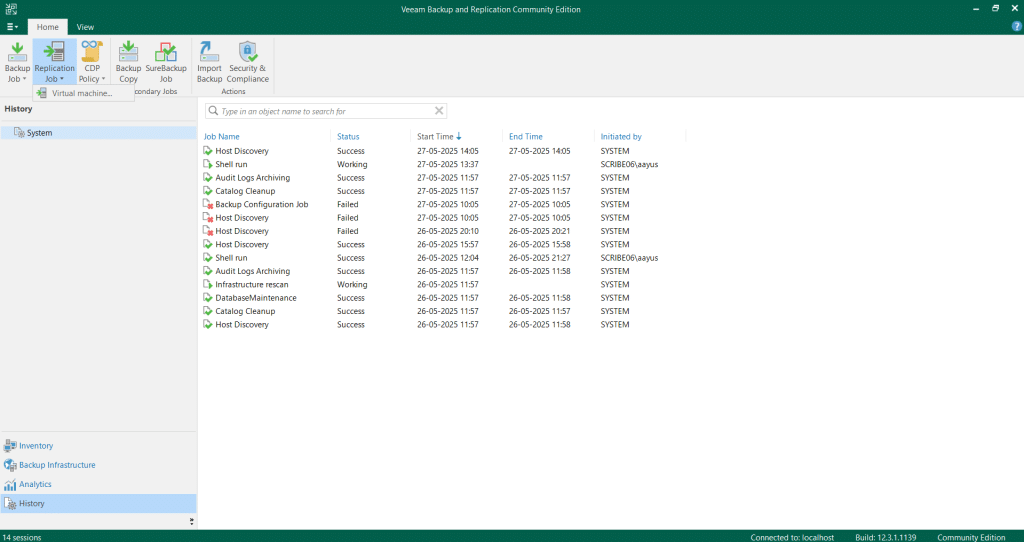
Below is the user interface of Veeam Backup & Replication that is designed to let you quickly find commands that you need and perform data protection and disaster recovery tasks.
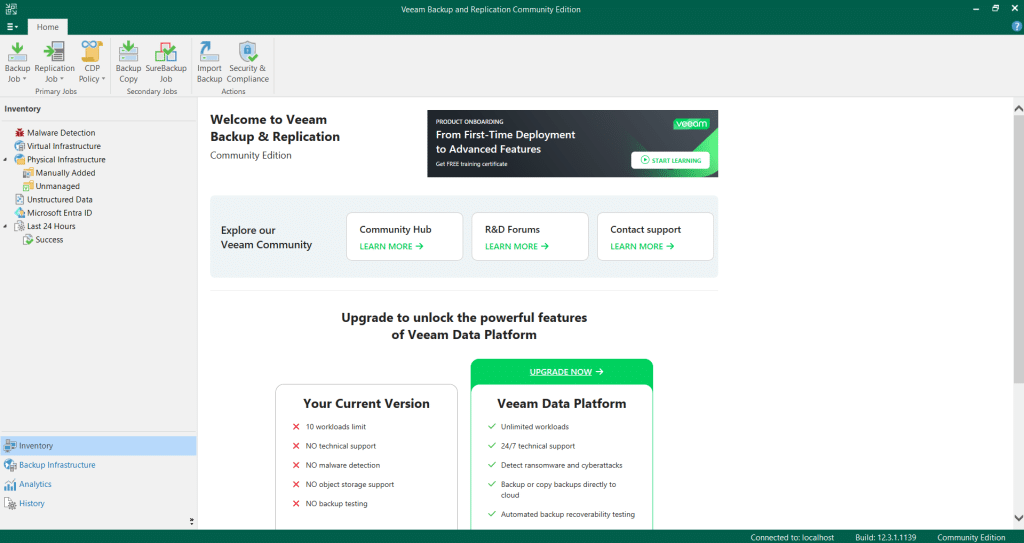
Backup Infrastructure in the Veeam console refers to the section where you configure and manage the components that support backup operations—such as backup repositories (storage locations), backup proxies.
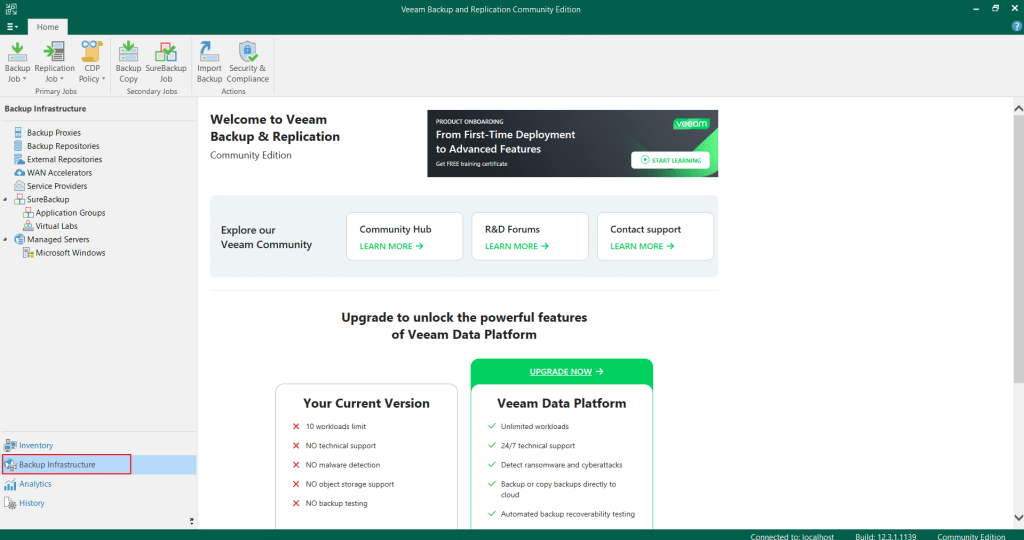
Now, we need to add a backup destination for all our backups. Locate the Backup Infrastructure option from the bottom-left menu of the Veeam console and click on it to proceed.
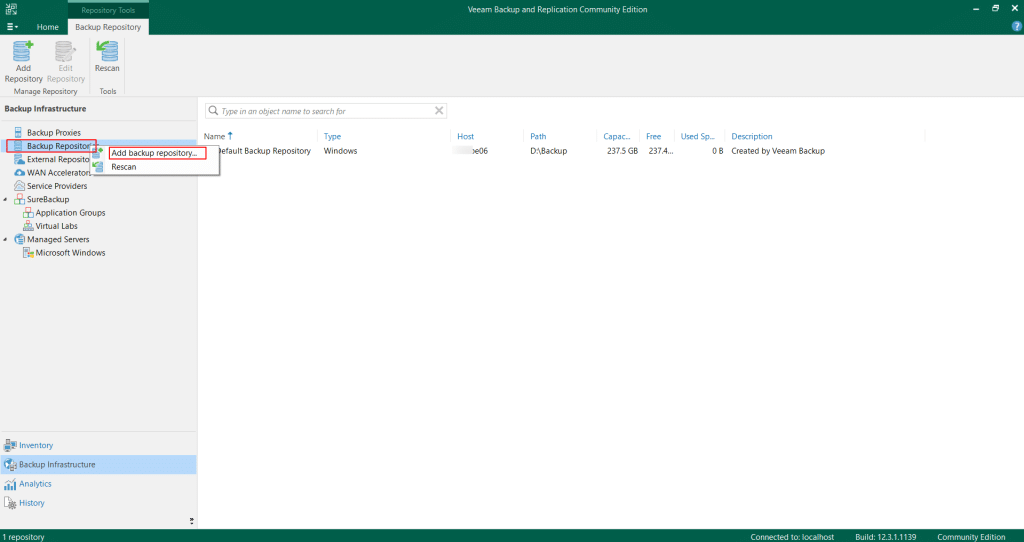
Then, click on Backup Repositories on the top-left menu. Right-click and select Add Backup Repository. This will launch the wizard to help you configure a new storage location where your backups will be saved.
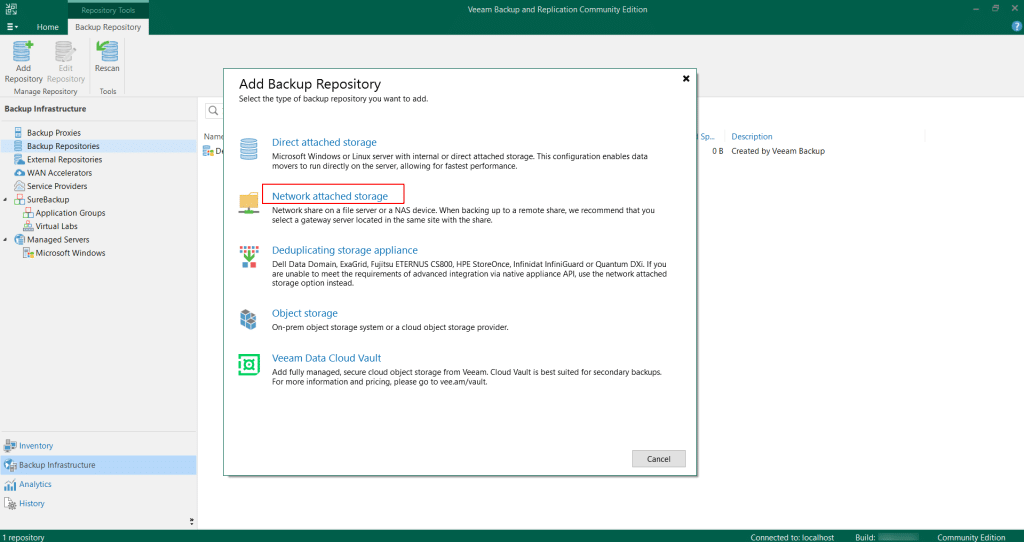
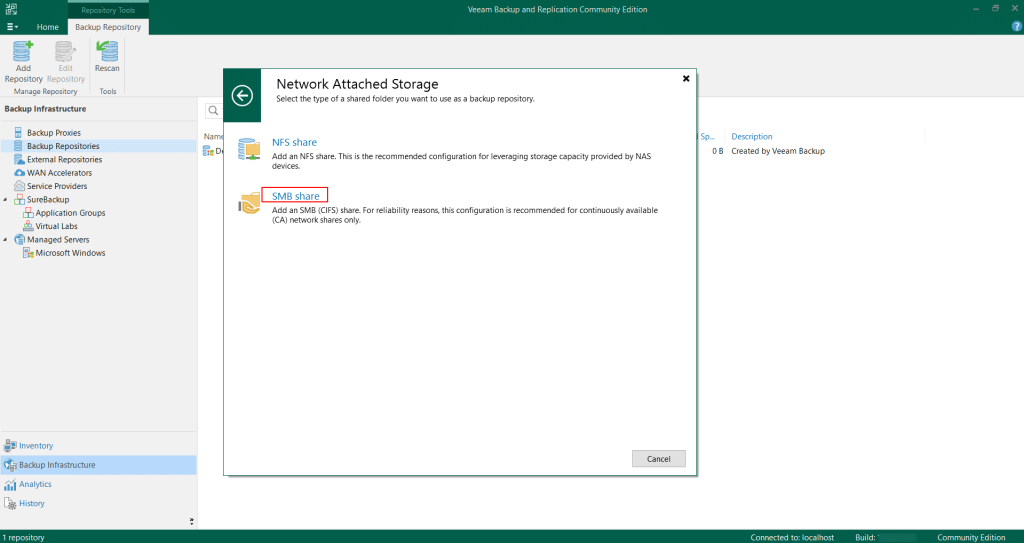
In the Add Backup Repository wizard, select the Network Attached Storage option to configure a network-based backup destination.
Next, click on SMB Share to configure a shared folder over the network as your backup repository.
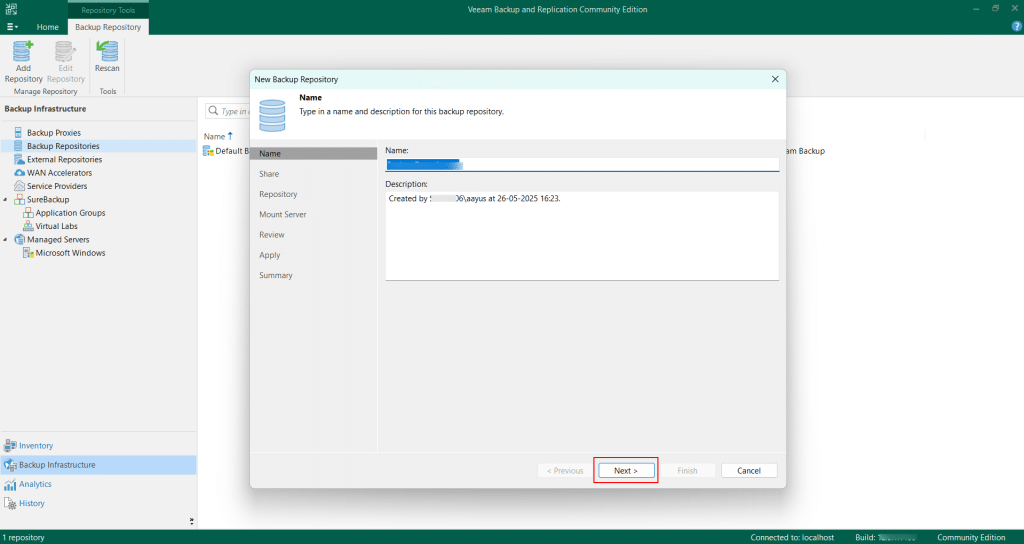
Follow the wizard to configure the backup destination. Provide a name and an optional description for the repository, then click Next to continue.
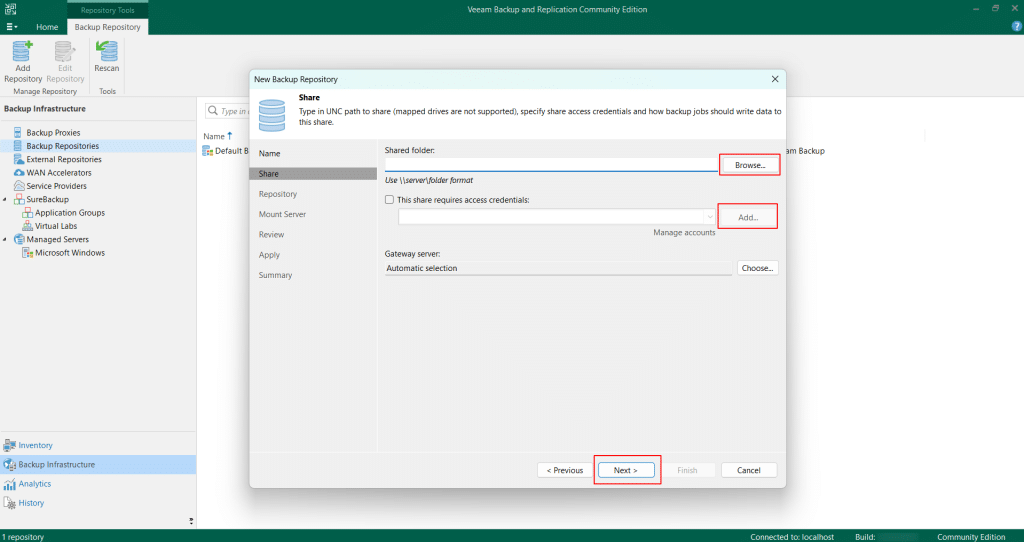
To access the destination path, click Browse and enter the full path of the shared folder. Then, click Add to provide the necessary access credentials. Once configured, click Next through the remaining steps of the wizard. The software will automatically set up the new backup repository.
Note: When prompted, you will have the option to move the configuration backup to the new backup repository by clicking ‘Yes’ or ‘No’. It is considered a best practice to store the configuration backup in a separate location for added redundancy and disaster recovery.
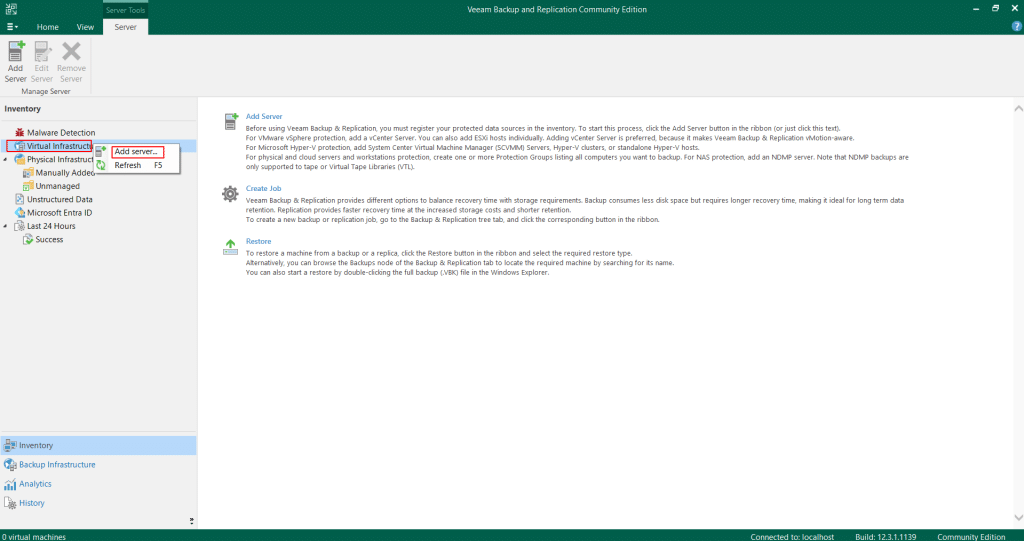
Inventory in the Veeam Backup & Replication console is the section where you add and manage virtual infrastructure components—such as VMware vSphere or Microsoft Hyper-V hosts. This allows Veeam to discover and access the virtual machines (VMs) you intend to back up.
In the bottom left-hand menu, click on the Inventory option. Here, you can add your hypervisor server (e.g., vSphere or Hyper-V) so that Veeam can access and back up its virtual machines.
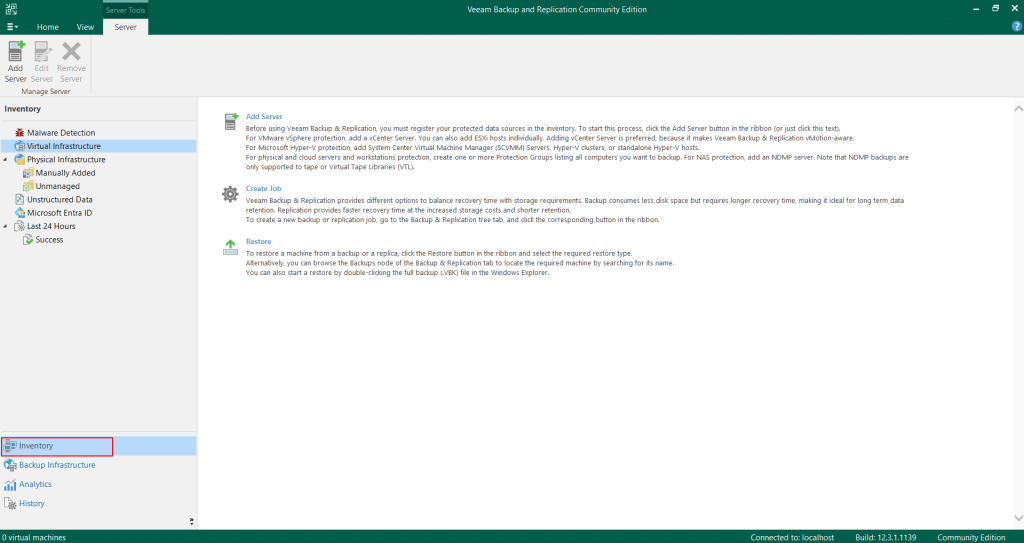
Select Virtual Infrastructure from the top-left menu. Then, right-click on it and choose Add Server to begin adding your hypervisor host or management server (e.g., Hyper-V).
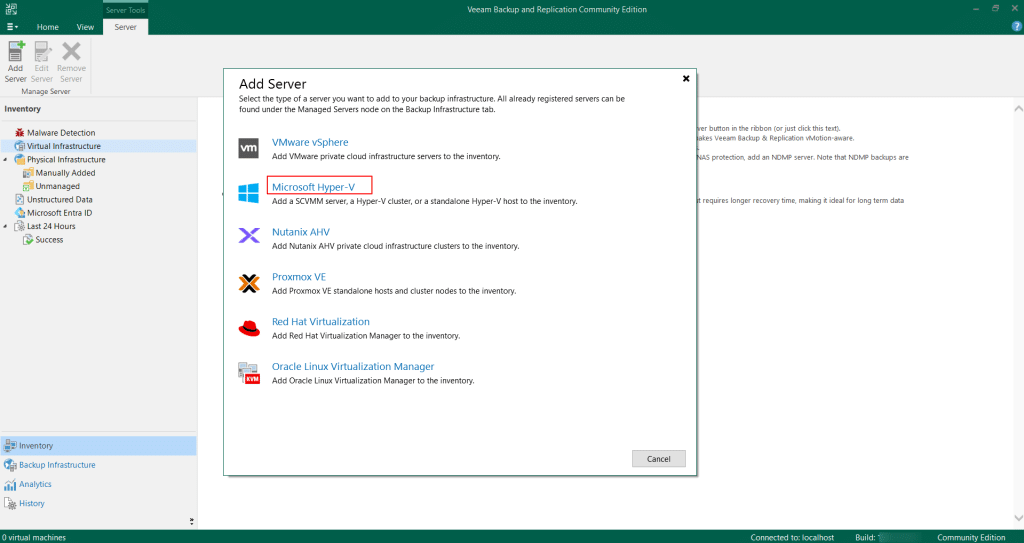
Now, select Microsoft Hyper-V Server from the list of available server types to begin configuring it as a source for virtual machine backups.
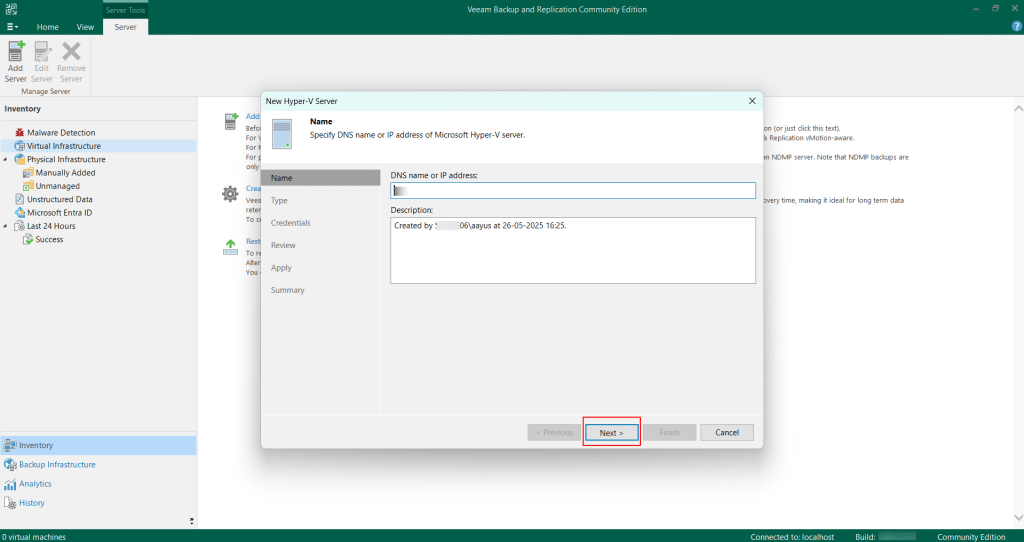
Follow the wizard to add your server to the configuration. Enter your server’s name and provide the necessary credentials, then click Next through all the remaining steps. Once the wizard is complete, the server will be added to your Veeam configuration. After this, the virtual machines hosted on the newly added server will appear in the left-hand menu.
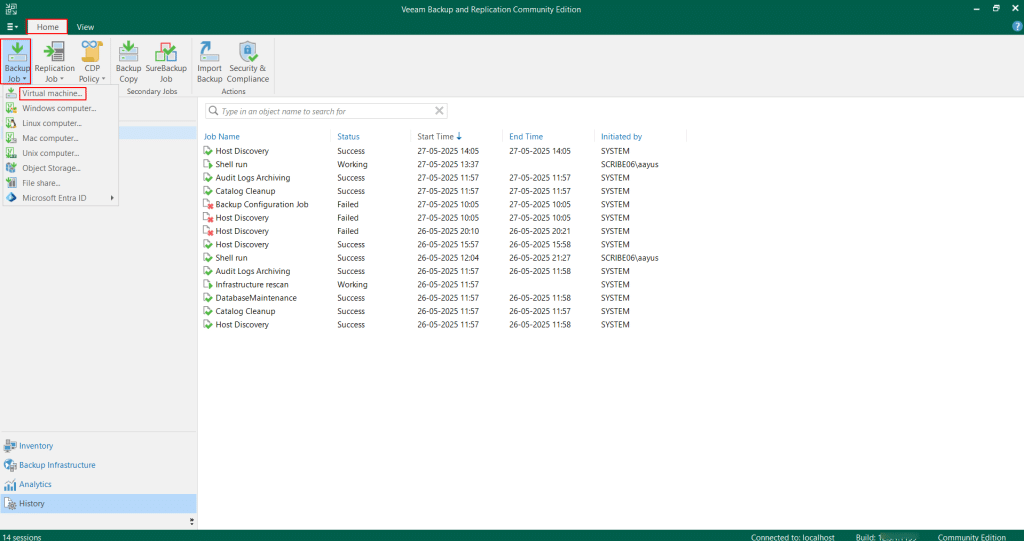
Creating a new backup job:
Click Home->Backup Job-> Virtual machine on the ribbon.
This will open the Backup Job Wizard. Begin by entering a name for your backup job and, optionally, a description to help identify its purpose. Click the Add button to select the virtual machines or resources you want to include in the backup. You can browse your connected infrastructure (e.g., vSphere or Hyper-V) to choose the VMs. After adding the VMs, proceed to configure settings and make necessary changes as per your requirements. You can also define a schedule for the backup job as required. Once all configurations are complete, review the summary and click Finish to create and activate the backup job.
Creating a Replication job
Click Home->Replication Job->Virtual machine on the ribbon
This will launch the Replication Job Wizard. Start by giving the job a clear name and an optional description. Then, click Add to select the virtual machines you want to replicate from your infrastructure (such as vSphere or Hyper-V). Follow through the wizard to the end and make the necessary changes as per your requirements. Finally, define a schedule for the replication job and review the configuration summary. Click Finish to save and activate the replication job.
And that’s it! You have successfully deployed Veeam Backup on your Kamatera server. Deploying Veeam Backup offers a reliable solution for protecting cloud-based workloads. With Veeam’s advanced features and Kamatera’s flexible infrastructure, you can ensure efficient backups, fast recovery, and strong disaster recovery capabilities—all in a cost-effective setup.