


When trying to access a website, you may sometimes encounter the dreaded ERR_CONNECTION_TIMED_OUT error. This message indicates that your browser was unable to establish a connection with the server within the expected time frame. While this issue can be frustrating, it usually doesn’t mean the website is permanently down. Instead, it often points to temporary problems with your device, internet connection, or server settings.
As a global cloud services provider, Kamatera helps businesses maintain reliable, high-performance hosting environments but understanding and troubleshooting common errors like this one is essential for users and administrators alike.
In this guide, we’ll walk you through a step-by-step process to resolve the ERR_CONNECTION_TIMED_OUT error.
1. Check your Internet connection
- Verify network connection:
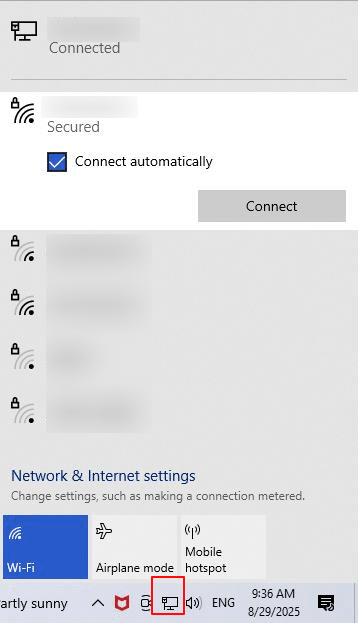
On your computer, check the wi-fi icon or network status bar. If it shows disconnected or no internet, you’ll need to reconnect.
- Reconnect or restart wi-fi:
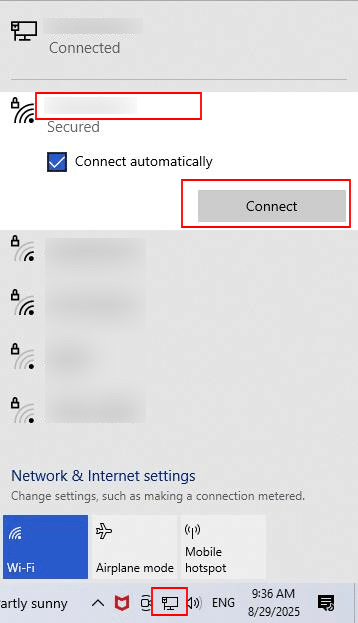
On Windows, click the wi-fi icon in the taskbar-> select your network-> click Connect. On macOS, click the wi-fi icon in the menu bar-> turn wi-fi off-> wait 5 seconds-> turn it back on.
- Restart your router:
Before diving into system configurations, restart your internet modem or router by powering off the device, waiting for 10-15 seconds, and then powering it back on. Once restarted, try accessing the website again.
- Switch to a different network:
If available, try connecting to another wi-fi
2. Restart your browser
Sometimes the error may be caused by a temporary glitch in your browser. Close all open browser windows and restart the application, then try reloading the website. You can also open the site in an incognito/private browsing window, which disables cached data and extensions that might interfere with loading. If the issue persists, test the website on a different browser such as Chrome, Firefox, Edge, or Safari to rule out browser-specific problems.
3. Restart your device
Sometimes, background processes or temporary system glitches can interfere with your internet connection and cause errors like ERR_CONNECTION_TIMED_OUT. Performing a full restart clears the system memory and resets active processes, which often resolves these issues. To do this, simply reboot your computer or laptop. After the device powers back on, reconnect to the internet and try accessing the website again.
4. Clear browser cache and cookies
Over time, cached files and cookies stored by your browser can create conflicts that prevent websites from loading properly.
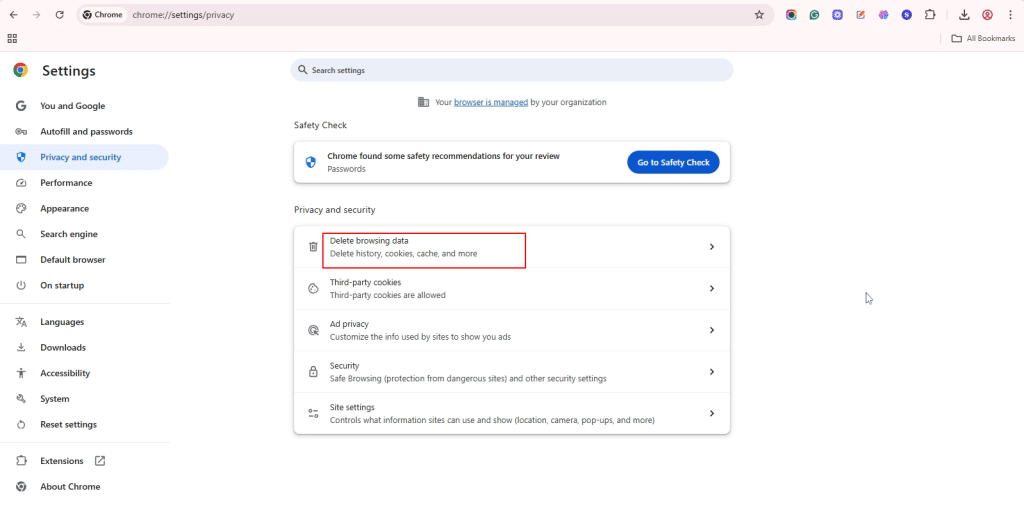
To clear them in Google Chrome address bar, type chrome://settings/privacy. Under Privacy and security section, click Delete browsing data. Alternatively, you can press Ctrl + Shift + Delete to open the Delete browsing data window directly.
network. This helps confirm whether the issue is with your device or your main internet connection.
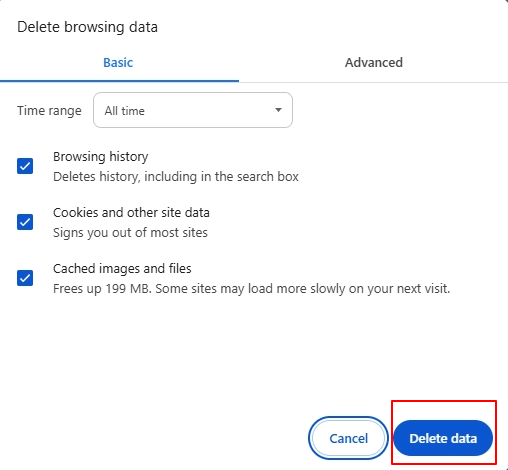
Beside Time range, use the drop-down menu to select All time. Then check Cookies and other site data and Cached images and files. Click Clear data, restart your browser, and try accessing the website again.
Once complete, restart your browser and try reloading the website to see if the error is resolved.
5. Flush DNS cache
Your computer stores DNS information locally to speed up website loading, but if these entries become outdated or corrupted, they can block connections and cause errors. Flushing the DNS cache clears these records so your system can fetch fresh information from the DNS server.
On Windows
- Press Win + R, type cmd, and hit Enter.
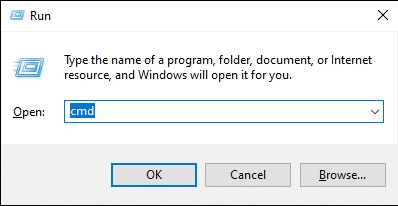
- In the Command Prompt, type:
Command:
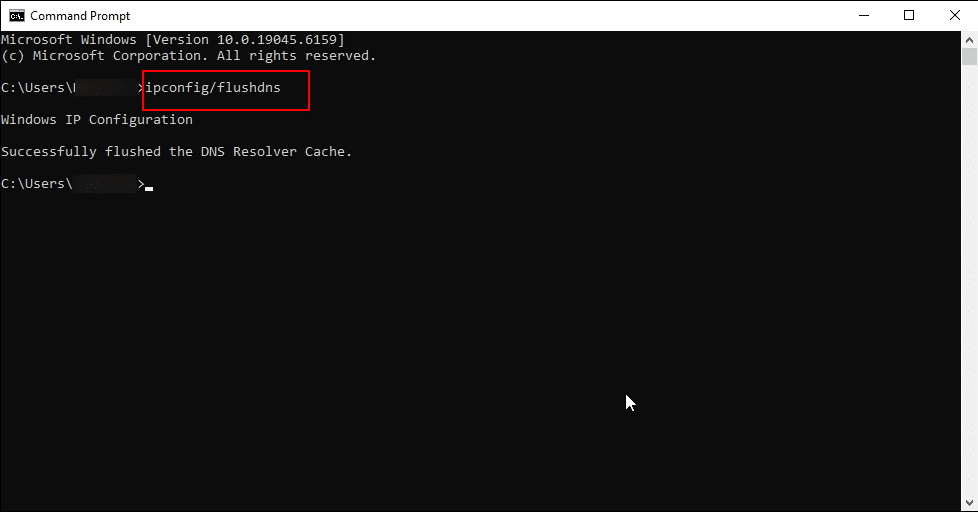
ipconfig /flushdns
Press Enter and wait for the confirmation message.
On macOS
Open Terminal, type sudo killall -HUP mDNSResponder, press Enter and provide your password if prompted. Once complete, restart your browser and test the connection again.
On Linux
Open your terminal, log in via SSH as the root user, and run the following commands:
If your system uses systemd-resolved for DNS resolution, you can check if the service is active by running:
Command:
systemctl is-active systemd-resolved

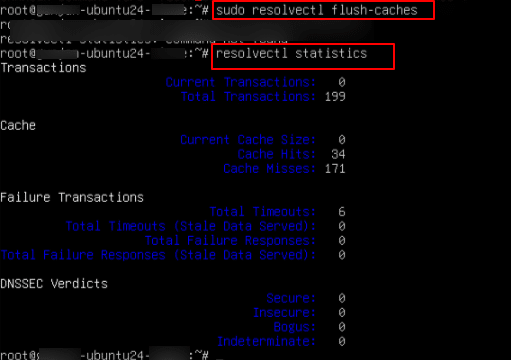
If the service is active, use the following command to flush the DNS cache:
Command:
sudo resolvectl flush-caches
To verify that the cache has been flushed, you can run:
Command:
resolvectl statistics
6. Change DNS servers
Sometimes, the DNS server provided by your Internet Service Provider (ISP) may be slow or unresponsive, which can lead to connection errors. Switching to a reliable public DNS server often resolves the issue and improves browsing speed.
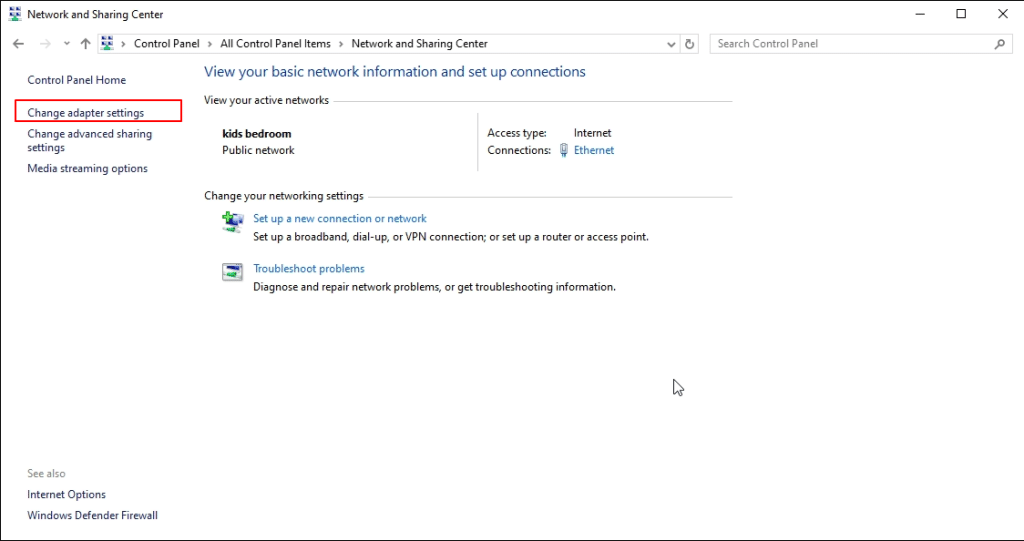
On Windows
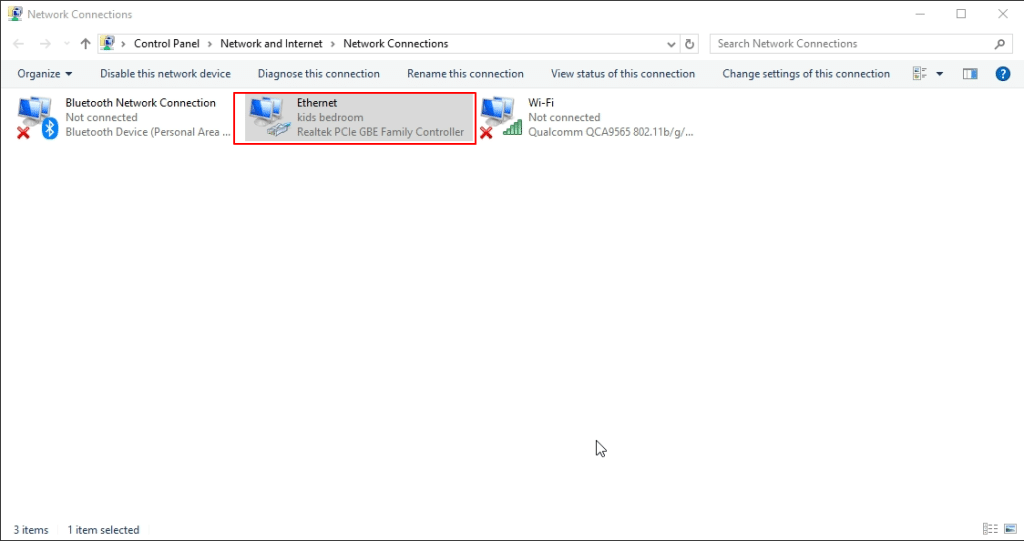
- Press Windows + R, type ncpa.cpl, and press Enter to open Network Connections. Alternatively, go to Control Panel -> Network and Sharing Center -> Change adapter settings.
- Right-click your active network adapter and select Properties.
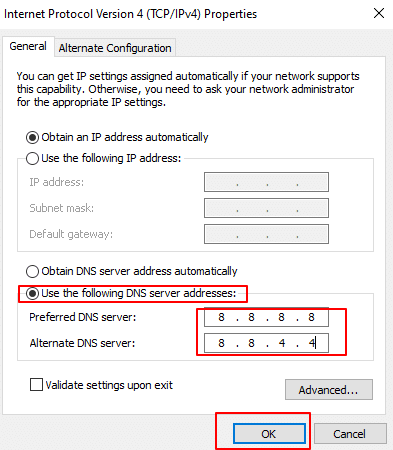
- Select Internet Protocol Version 4 (TCP/IPv4) and click Properties.

- Choose Use the following DNS server addresses, and enter:
- Preferred DNS: 8.8.8.8
- Alternate DNS: 8.8.4.4 (Google)
- Click OK and restart your browser.
- After updating, restart your connection and try accessing the website again.
On macOS
- Click the Apple menu and go to System Preferences → Network.
- Select your active network (Wi-Fi or Ethernet) and click Advanced.
- Open the DNS tab.
- Click the + button and enter the new DNS addresses:
- 8.8.8.8 and 8.8.4.4 (Google DNS), or
- 1.1.1.1 and 1.0.0.1 (Cloudflare DNS).
- Remove any old or unresponsive DNS entries by selecting them and clicking –.
- Click OK, then Apply, and restart your browser.
On Linux
Open your terminal, log in via SSH as the root user, and run the following commands:
- Edit the /etc/resolv.conf file (temporary change) by running the following command:
Command:
sudo nano /etc/resolv.conf
Add the following lines:
nameserver 8.8.8.8
nameserver 8.8.4.4
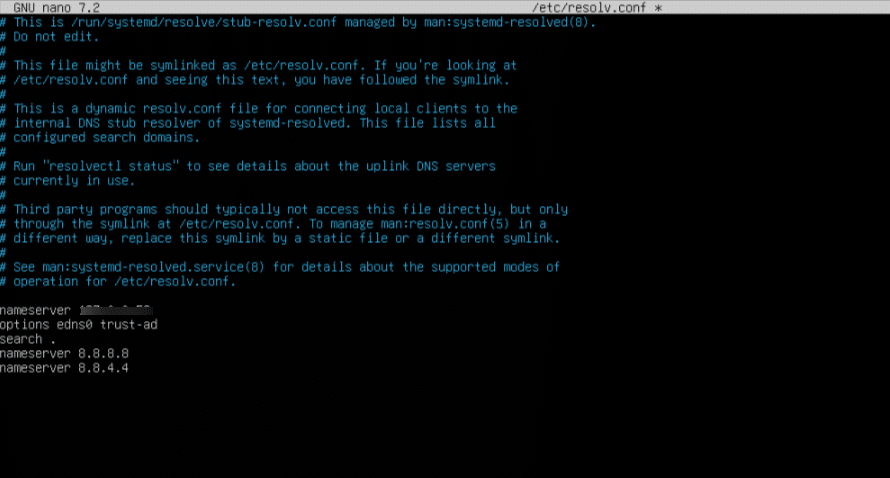
Save and exit by pressing Ctrl + X, then Y and Enter.
Note: You may see a line like nameserver 127.0.0.53. Do not remove this manually. This address is a local DNS stub resolver provided by systemd-resolved, which forwards queries to upstream servers (like 8.8.8.8) based on your system’s DNS configuration.
- Set DNS Using resolvectl (Recommended for systemd-resolved)
Run the following command to configure DNS servers:
Command:
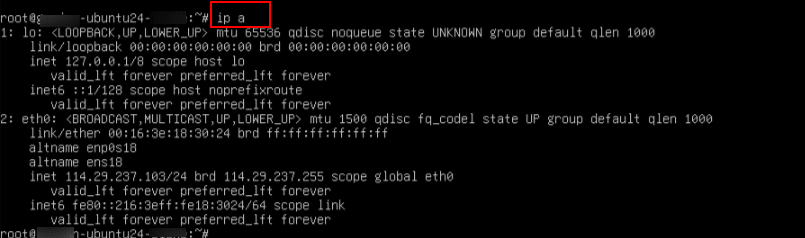
sudo resolvectl dns eth0 8.8.8.8 8.8.4.4
Note: Replace eth0 with your actual network interface
To know your network interface, run
Command:
ip a
- Use NetworkManager (if you’re on a desktop Linux)
If you’re using a desktop environment with NetworkManager, you can run
Command:
nm-connection-editor
- Now, Go to your active connection → IPv4 Settings
- Set Method to Automatic (DHCP) addresses only
- Enter DNS: 8.8.8.8, 8.8.4.4
- Save and reconnect
Then apply the changes, by running the below command
Command:
sudo systemctl restart NetworkManager
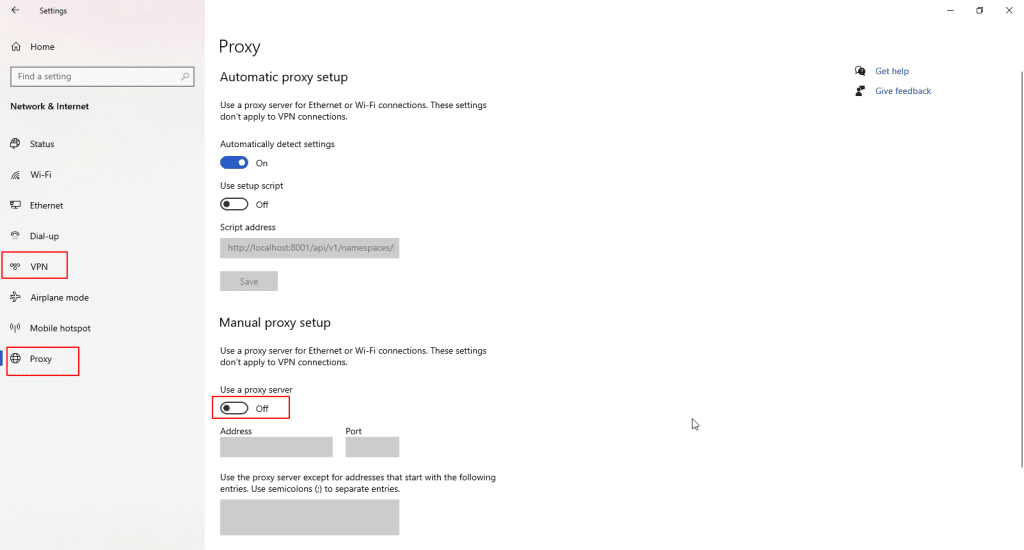
7. Disable VPN or proxy settings
If you are using a VPN or proxy service, it may interfere with your internet connection and cause errors like ERR_CONNECTION_TIMED_OUT. VPNs can sometimes route traffic through congested or blocked servers, while misconfigured proxy settings may prevent your browser from reaching the website. To rule this out, temporarily disable your VPN or proxy and try accessing the site again.
On Windows
Go to Settings -> Network & Internet -> Proxy
(or)
Settings -> Network & Internet -> VPN and disable any active proxy.
On macOS
- Go to System Preferences-> Network.
- Select your active network, click Advanced-> Proxies.
- Uncheck any selected proxy options and click OK.
On Linux
Check for proxy settings in environment variables or network configuration tools.
8. Disable Antivirus or firewall temporarily
Antivirus software and firewalls are designed to protect your device from threats, but sometimes they can mistakenly block safe websites or prevent certain connections. If you suspect this is the case, temporarily turn off your antivirus program or firewall and then try loading the website again.
On Windows
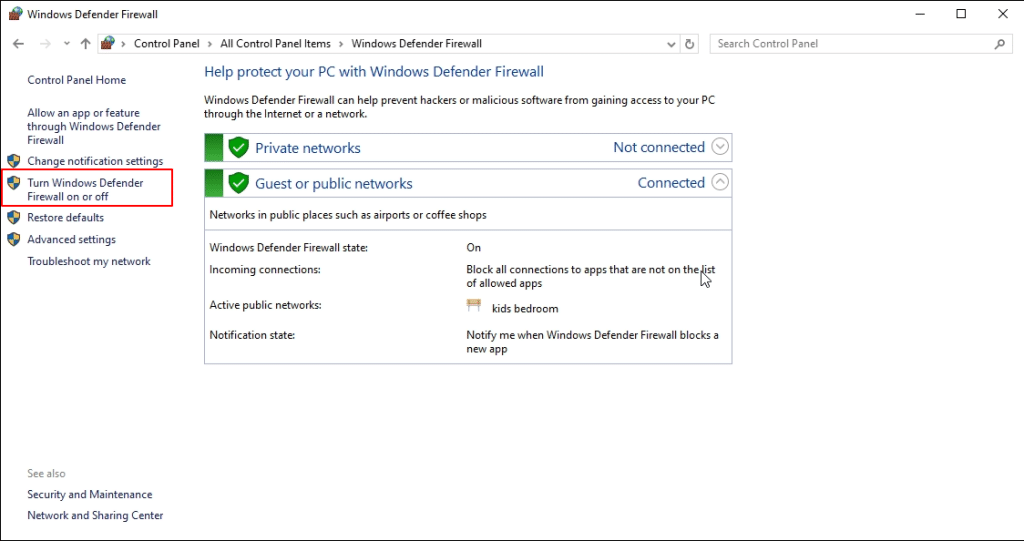
- Disable Windows Defender Firewall
Press Win + R, type control, and hit Enter to open Control Panel. Go to System and Security/ Windows Defender Firewall. In the left menu, click Turn Windows Defender Firewall on or off.
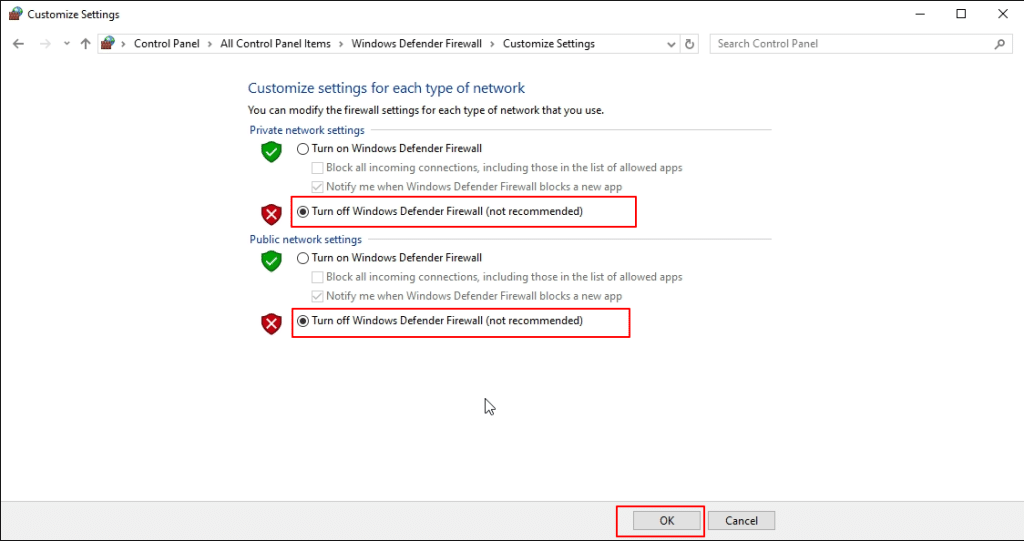
Under both Private and Public network settings, select Turn off Windows Defender Firewall (not recommended). Click OK and test your connection.
- For third-party antivirus (e.g., Avast, Norton, McAfee)
Locate the antivirus icon in the system tray at the bottom-right corner of the taskbar. Right-click the icon (as shown for McAfee in your screenshot) and explore the available options. Look for additional menus or settings within the antivirus dashboard that allow you to temporarily disable protection, pause real-time scanning, or turn off the antivirus.

Note: After testing, be sure to re-enable both your antivirus and firewall to maintain system security. Let me know if you want Linux-specific instructions as well.
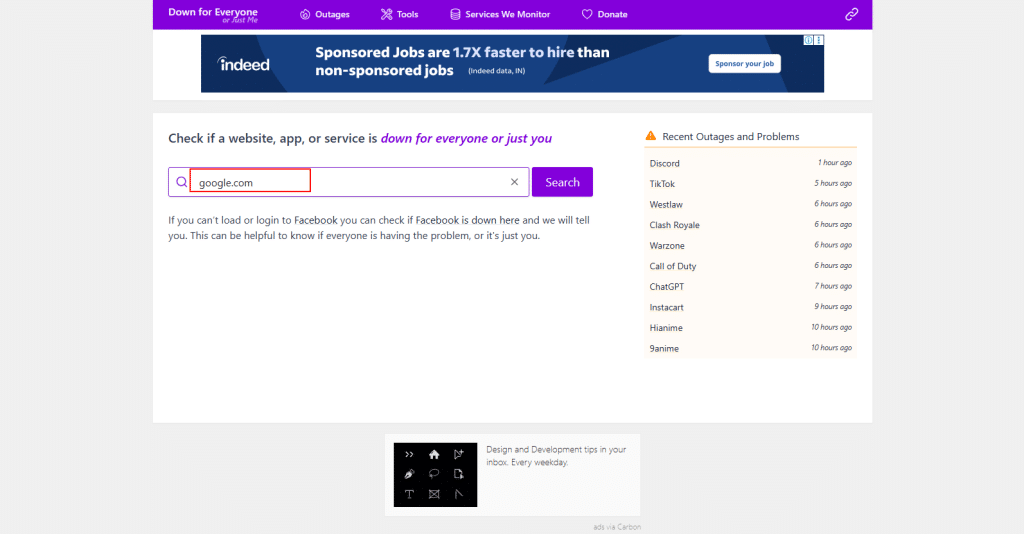
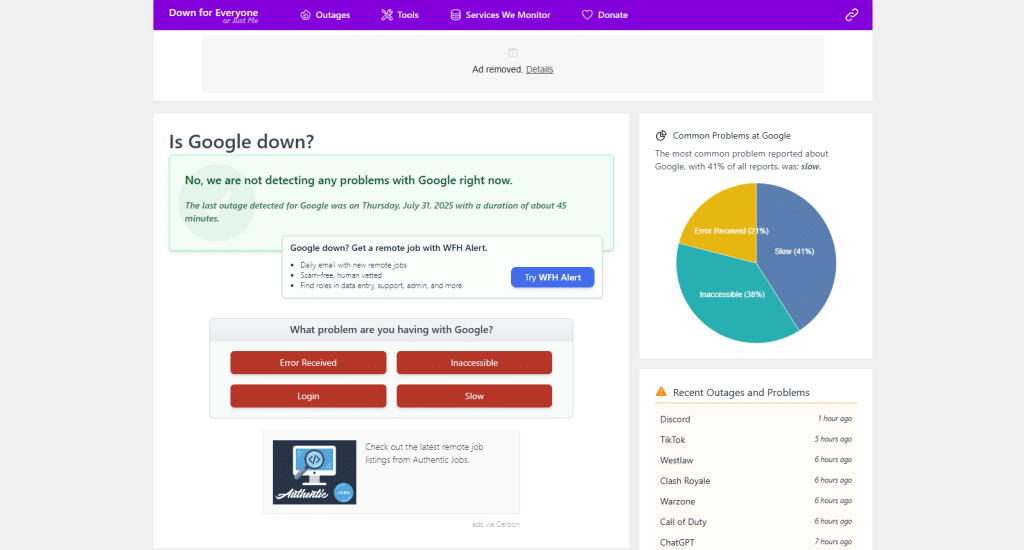
9. Check website status
Sometimes the error isn’t caused by your device or network at all. The website itself may be experiencing downtime or server issues. In such cases, no amount of local troubleshooting will fix the problem. To confirm whether the issue is on your end or the website’s, you can use online monitoring tools such as DownForEveryoneOrJustMe.com or IsItDownRightNow.com. These services check the site from multiple locations worldwide and let you know if it’s down for everyone or just you.
If the tool shows the website is down globally, the only option is to wait until the site’s administrators or hosting provider restore service. However, if the site appears to be working for others, then the problem is likely related to your own internet connection, DNS, or device settings.
10. Check your hosts file
Your computer uses a local file called the hosts file to map domain names to IP addresses. If this file contains incorrect or outdated entries, it can block access to certain websites by overriding DNS resolution. Checking and correcting the hosts file can often resolve connection errors.
- The hosts file may contain incorrect entries blocking access.
- On Windows:
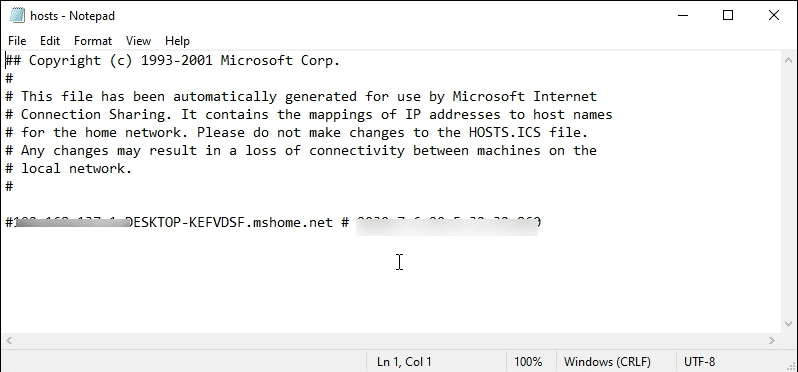
- Open C:\Windows\System32\drivers\etc\hosts with Notepad.
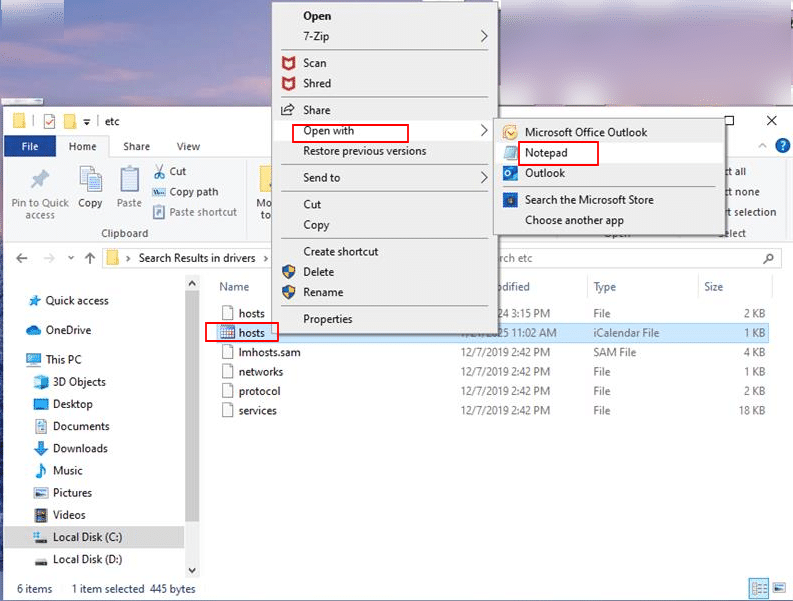
Look for the domain you’re trying to access in the hosts file. If you find it, remove the entry. The file usually contains some default lines that begin with the “#” symbol (comments). Any blocked or manually added websites will appear below these lines. Delete the unwanted entries, then press ctrl+s to save your changes.
On macOS
- Open the Terminal. Enter your admin password if prompted.
- Type sudo nano /private/etc/hosts and press Enter.
- Review the file for the domain you’re trying to access. If you see any list of websites appearing below the “::1” entry and if you find any conflicting entries (e.g., your domain pointing to the wrong IP), delete them.
- Save and exit, then restart your browser.
Note: Only edit the hosts file if you’re confident about the changes. Deleting or altering the wrong entries may affect how your system resolves other websites.
On Linux
- Open the Terminal. Enter your username and password when prompted.
- Type sudo nano /etc/hosts and press Enter.
- Review the file for the domain you’re trying to access. In this example, the file only shows default localhost and IPv6 entries, and no additional websites are listed below the “::1” entry. If you find any conflicting entries (e.g., your domain pointing to the wrong IP), delete them and save the file.
- To exit the Nano editor, press ctrl+x. When prompted to save changes, press Y. Nano will then ask for a filename. Press Enter to confirm the existing name or type a new name.

11. Update network adapter drivers
Outdated or corrupted network drivers can sometimes cause connectivity problems, including errors like ERR_CONNECTION_TIMED_OUT. Updating your drivers ensures your network adapter is running with the latest fixes and compatibility improvements.
On Windows
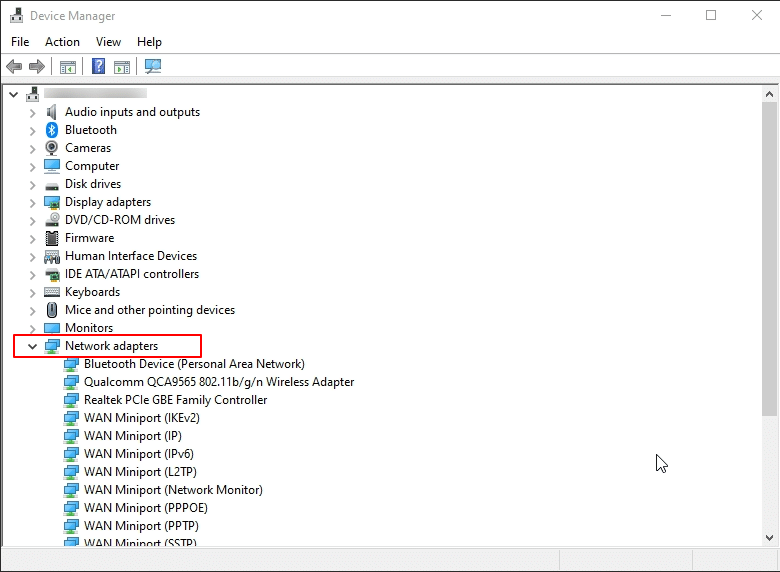
- Press Windows + X on your keyboard and select Device Manager. Alternatively, go to Control Panel-> Device Manager.
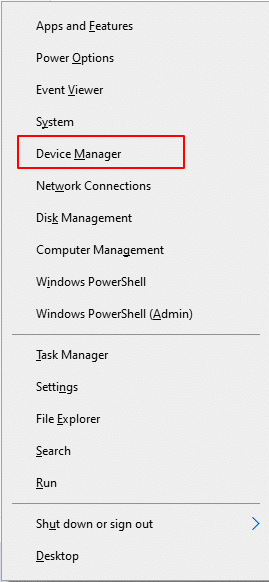
- In the list, expand Network adapters.
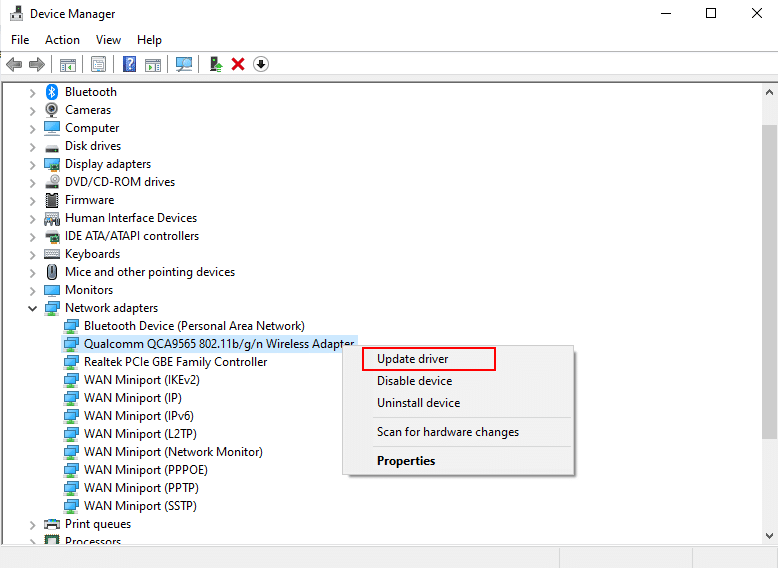
3. Right-click your active network adapter and choose Update driver.
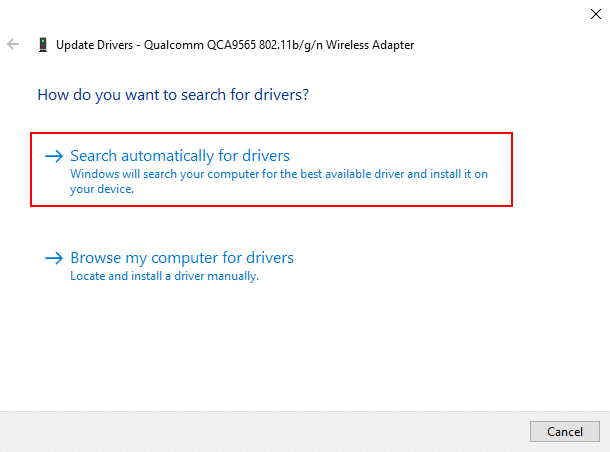
4. Select Search automatically for updated driver software. Windows will look online for the latest version and install it if available.
After updating, restart your device to apply the changes and test your connection again.
On macOS
macOS manages network drivers through regular system updates. To update, go to Menu-> System Preferences-> Software Update and install any available updates. This will ensure your network adapter is using the most recent version supported by your system.
After updating, restart your device to apply the changes and test your connection again.
On Linux (Ubuntu/Debian-based distributions)
Linux users also update their network drivers to fix connectivity issues like ERR_CONNECTION_TIMED_OUT. Unlike Windows/macOS, Linux drivers are usually bundled with the kernel or package manager updates, but manual updates may be required in some cases.
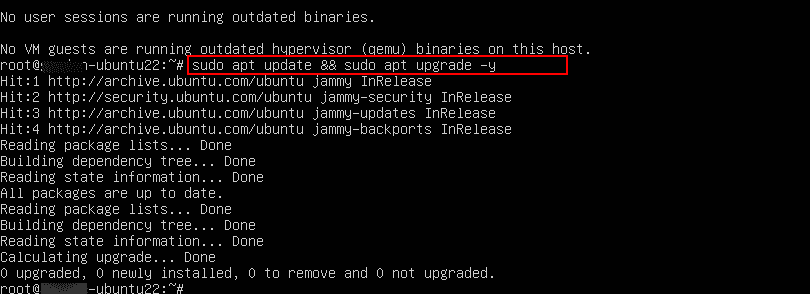
- First, update all system packages to ensure you have the latest drivers:
Command:
sudo apt update && sudo apt upgrade –y
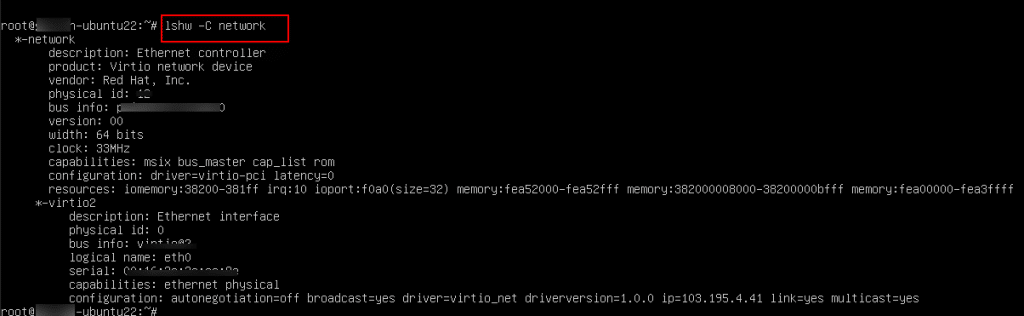
- The below command displays details about the system’s network adapters and their drivers.
Command:
lshw –C network
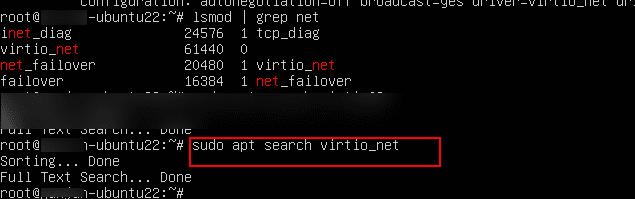
- If you know your network adapter model, you can search for drivers with:
Command:
sudo apt search <driver-name>
(For example: sudo apt search virtio_net)
- To apply changes, reboot your system:
Command:
sudo reboot
12. Contact your hosting provider
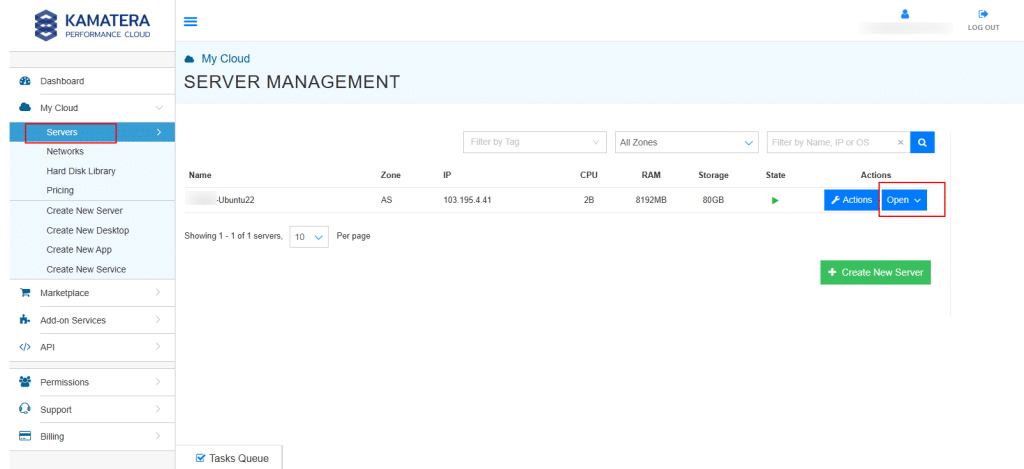
If none of the above solutions resolve the issue, the problem may be server-side. In this case, contact Kamatera support directly. Their team can review server logs, check configurations, and determine if there is downtime or a network-related issue affecting your service.
- From the left-side menu, select Servers. When the list of servers is displayed, click Open next to the server you want to access.
2. Select NETWORKS as shown in the screenshot below.
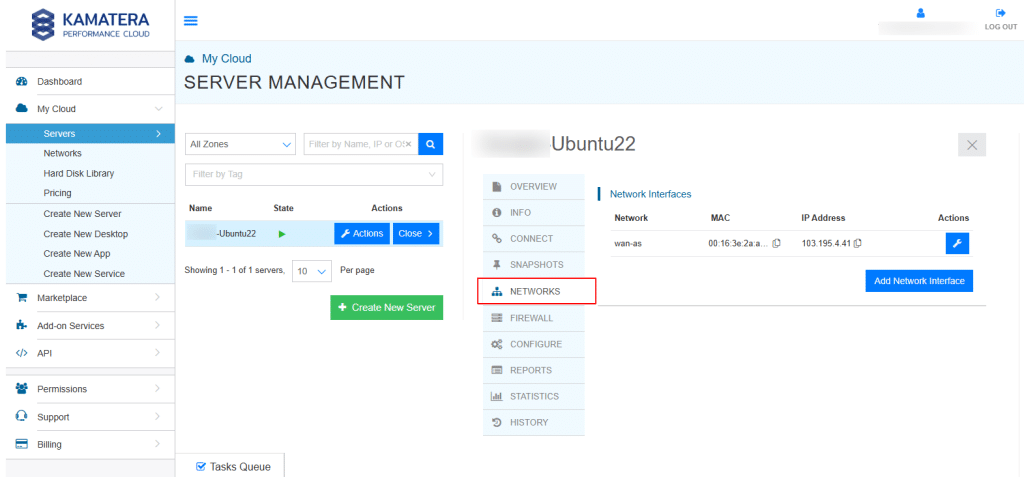
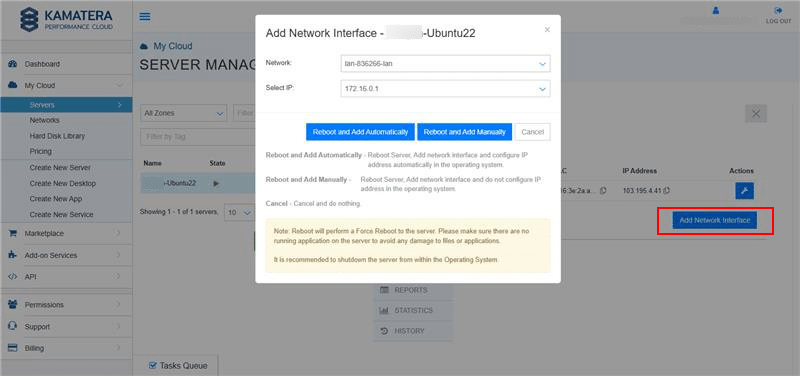
- When you click the Add Network Interface button, you can attach an additional network interface (NIC) to your server. This action opens a dialog box where you can configure the network details and choose how the new interface will be added.
In the dialog box (as shown in the screenshot), you can:
- Network: From the drop-down menu, choose which network the new NIC will connect to.
- Select IP: Pick a specific IP address for the new NIC (or let the system handle it).
You are then given three options for proceeding:
- Reboot and Add Automatically: The server will reboot, add the new NIC, and configure the IP address automatically in the operating system.
- Reboot and Add Manually: The server will reboot, add the new NIC, but you must manually configure the IP address within the operating system.
- Cancel: Abort the action without making changes.
Note:
- Adding a NIC requires a forced reboot of the server.
- Make sure there are no running applications or critical processes, as this could cause data loss or application issues.
- It is recommended to shut down the server safely from inside the operating system before proceeding with the reboot.
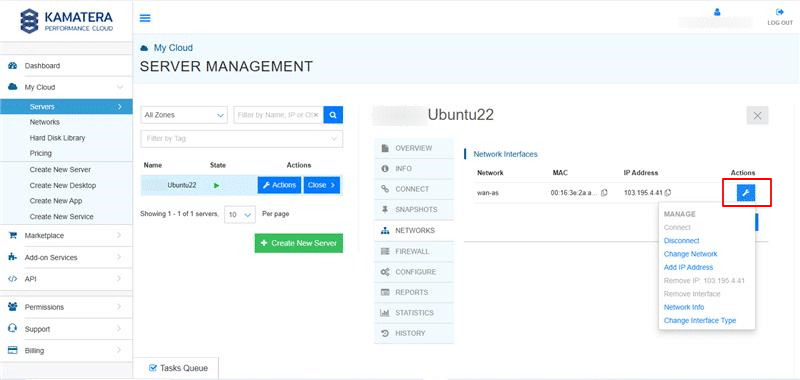
- Click on the Actions button to open a drop-down menu with different management options.
- Connect: Attach and activate the network interface.
- Disconnect: Detach and deactivate the network interface.
- Change network: Reassign the interface to another available network.
- Add IP address: Assign an additional IP address to the interface.
- Remove IP: 103.195.44.91: Delete the specific IP address from the interface.
- Remove interface: Permanently remove the network interface from the server.
- Statistics: View traffic and usage statistics for the interface.
- Change interface type: Modify the type of the interface (e.g., public/private).
Let’s discuss each option in detail:
- Connect: This option allows you to establish a secure connection between your local system and the Kamatera cloud environment. By using this feature, you can quickly access your virtual machines, applications, or services hosted on Kamatera. Depending on your setup, the connection can be made through different methods such as SSH (for Linux servers), RDP (for Windows servers), or a web-based console provided in the Kamatera management panel.
- Disconnect: This option allows you to safely terminate the active connection between your local system and the Kamatera cloud server. Using this ensures that the session is properly closed without leaving any open connections that could pose security or performance risks.
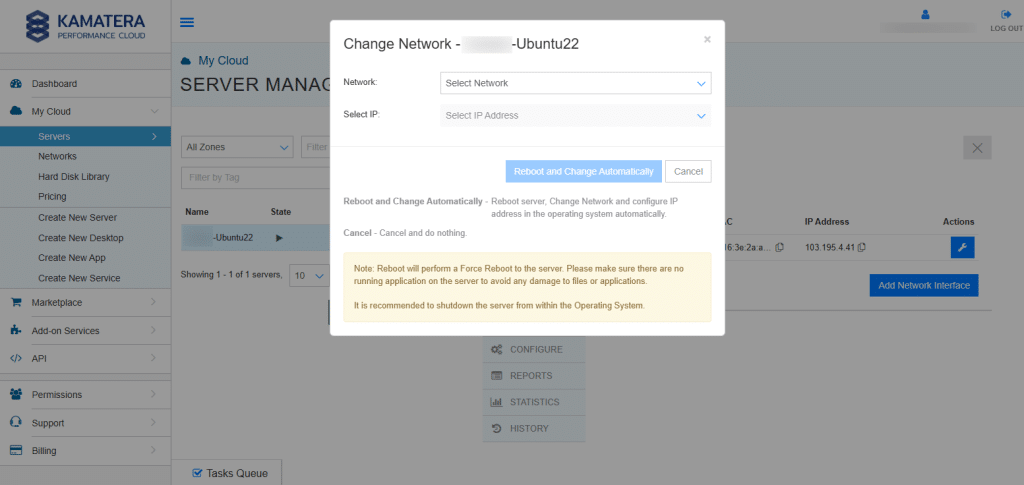
- Change network: The Change network option allows you to move your server’s network interface from one network to another within the Kamatera Cloud environment. This is useful if you need to:
- Assign your server to a different VLAN or subnet.
- Switch between private and public networks.
- Allocate a new IP address from a different network pool.
When you select Change network, a dialog box opens (as shown in the screenshot). Here you can select the network and IP from the drop-down menu.
- Network: Choose the target network you want to connect your server to.
- Select IP: Assign an available IP address from the chosen network.
By clicking on Reboot and Change Automatically, the server will perform a forced reboot, automatically switching the network and configuring the IP in the operating system. Click Cancel to abort the process and keep the current network settings unchanged.
Note: Clicking on Reboot and Change Automatically, will perform force reboot of the server. So, ensure that no critical applications or processes are running to avoid data loss or corruption. It’s recommended to shut down the server gracefully from the operating system before applying this change.
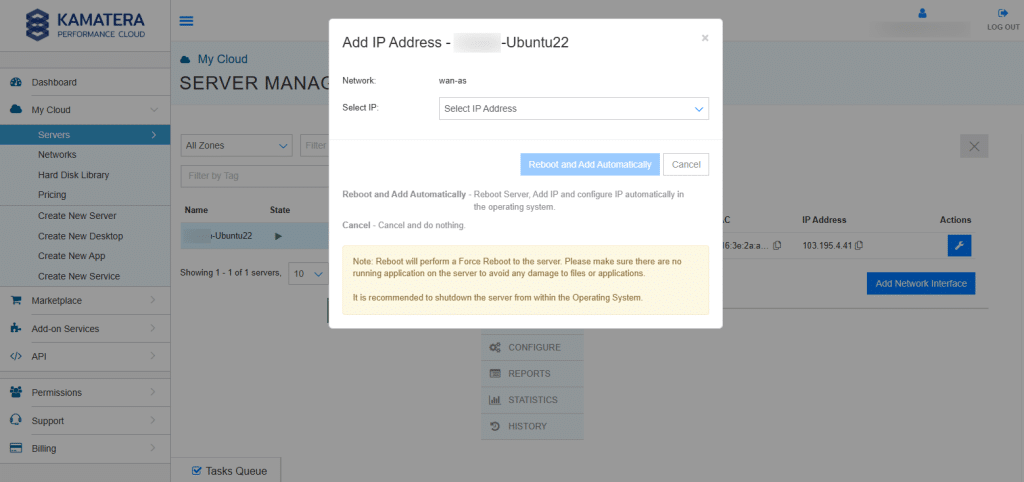
- Add IP Address: This option allows you to assign an additional IP address to your server’s existing network interface. This is useful when you need multiple IPs for hosting different applications, SSL certificates, or separating traffic.
When you choose this option, a dialog box appears (as shown in the screenshot):
- Network: Displays the current network the interface is connected to (e.g., wan-as).
- Select IP: Lets you select an available IP address from the chosen network’s pool.
After selecting the IP, you can either click on Reboot and Add Automatically, by which the server will perform a forced reboot, add the selected IP, and automatically configure it within the operating system or click Cancel to abort the process without making any changes.
Note: Clicking on Reboot and Add Automatically will trigger a Force Reboot. So, ensure that no critical or running applications are active to prevent data loss or corruption. Kamatera recommends shutting down the server gracefully from within the operating system before applying this change.
- Remove IP: 103.195.44.91: Deletes the selected IP address from the current network interface. The interface itself remains active, but the removed IP will no longer be available for use on this server.
- Remove Interface: Permanently detaches the entire network interface (NIC) from the server, including all associated IP addresses. Once removed, the server will no longer be able to use this interface unless it is re-added.
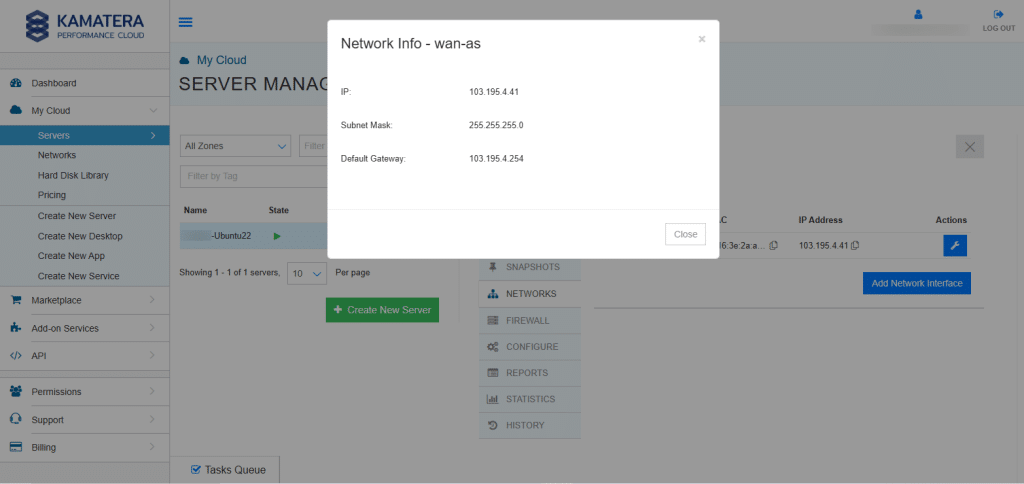
- Network Info: It provides detailed information about the server’s current network configuration. This is useful for administrators who need to troubleshoot connectivity issues, configure firewalls, or verify server networking details.
From the screenshot, the displayed details include:
- IP Address: 103.195.4.41
The current public IP address assigned to the server. - Subnet Mask: 255.255.255.0
It defines the network’s size, and which IPs are part of the same subnet. In this case, it allows up to 254 usable IP addresses within the 103.195.4.x range. - Default Gateway: 103.195.4.254
The gateway through which the server communicates with external networks, such as the internet.
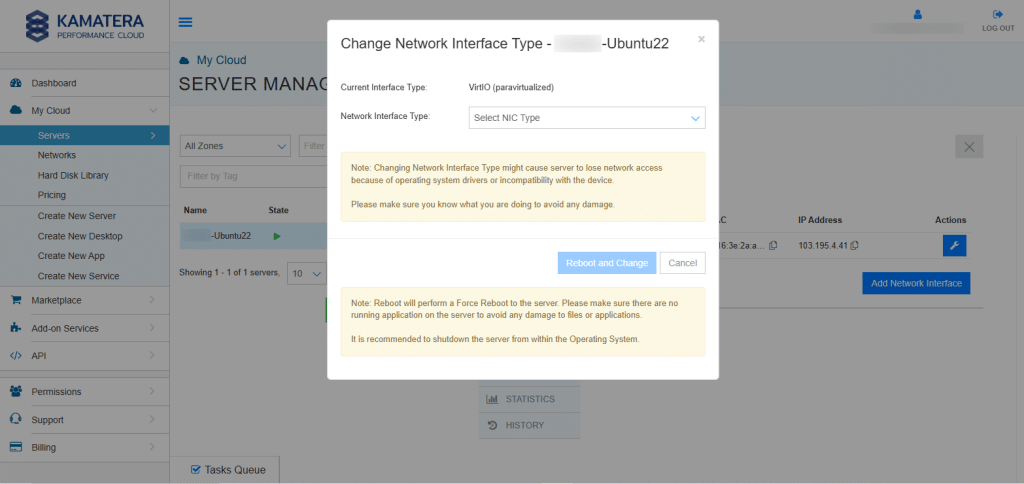
- Change Network Interface Type: This option allows you to switch the type of virtual network interface (NIC) assigned to your server. This is important when optimizing performance, ensuring compatibility with the operating system, or troubleshooting networking issues.
When you choose this option, a dialog box appears (as shown in the screenshot):
- Current Interface Type: VirtIO (paravirtualized) This is a high-performance NIC commonly used in virtualized environments. It provides better throughput and lower latency compared to emulated NICs, but it requires VirtIO drivers to be installed in the operating system.
- Network Interface Type: From the drop-down menu, you can choose a different NIC type (e.g., e1000, rtl8139, etc.), depending on compatibility and requirements.
Note:
- Changing NIC type might cause network issues. For example, the server could lose network access if the operating system does not have the proper drivers or if the new NIC type is incompatible. It is strongly recommended that you fully understand the implications before applying this change.
- When you click Reboot and Change, the server will undergo a forced reboot. To avoid potential damage to files or applications within the operating system, it is recommended to first shut down the server before rebooting.
- Select a new NIC type only if necessary (e.g., due to driver issues, OS compatibility, or performance tuning). Always ensure that drivers for the selected NIC are available in the operating system before making the change.
And that’s it! By following these steps, you’ll be better equipped to handle this common hosting challenge in the future. Resolving this issue can bring your website back online and improve its overall performance.