


WordPress is the world’s most popular content management system (CMS), but its popularity also makes it a frequent target for hackers. A hacked WordPress site can disrupt your business, compromise sensitive data, and harm your reputation. With the right steps, you can clean up the infection and also harden your site against future attacks.
Before you make changes to your configuration, it’s a good idea to back up all critical databases and configuration files. We recommend doing this by taking a server snapshot. Here are the step-by-step instructions to create the snapshot.
Once you have identified a breach, free security plug-ins are indispensable for both cleaning the infection and preventing future attacks. These tools automate the process of scanning thousands of files for malicious code and closing common entry points used by hackers.
Wordfence security
Wordfence is one of the most robust “all-in-one” solutions. Its free version includes an endpoint firewall that blocks malicious traffic at the server level and a comprehensive malware scan that checks core files, themes, and plug-ins against the WordPress.org repository to ensure integrity. Additionally, it strengthens your login security by offering Two-Factor Authentication (2FA) and XML-RPC protection to stop unauthorized access attempts.
Solid security (formerly iThemes security)
Solid Security focuses heavily on proactive hardening. It allows you to enforce strong Passwords across your entire user base and adds a critical layer of defense with two-factor authentication. Its brute force protection is particularly effective, automatically banning IP addresses that attempt to guess credentials repeatedly, effectively locking the “front door” of your website.
Sucuri security
Sucuri is a highly respected name in the industry, and its free plug-in provides a powerful toolset for auditing and monitoring. It features a remote malware scanner that checks your site’s public-facing code and blocklist status. The security hardening section of the plug-in offers a one-click interface to implement best practices, such as removing the WordPress version display and protecting your sensitive uploads directory from script execution.
Download MalCare
- Go to MalCare’s website and click on Pricing.
- The free plan includes Prepend Firewall, Login Protection, Daily Malware Scan, Vulnerability Scanner, Centralized Updates, Bot Protection, and Customer Support.
- The paid plans offer additional features such as AI-powered Malware Scans, Automatic Backups, Activity Logs, Advanced Monitoring, and more.
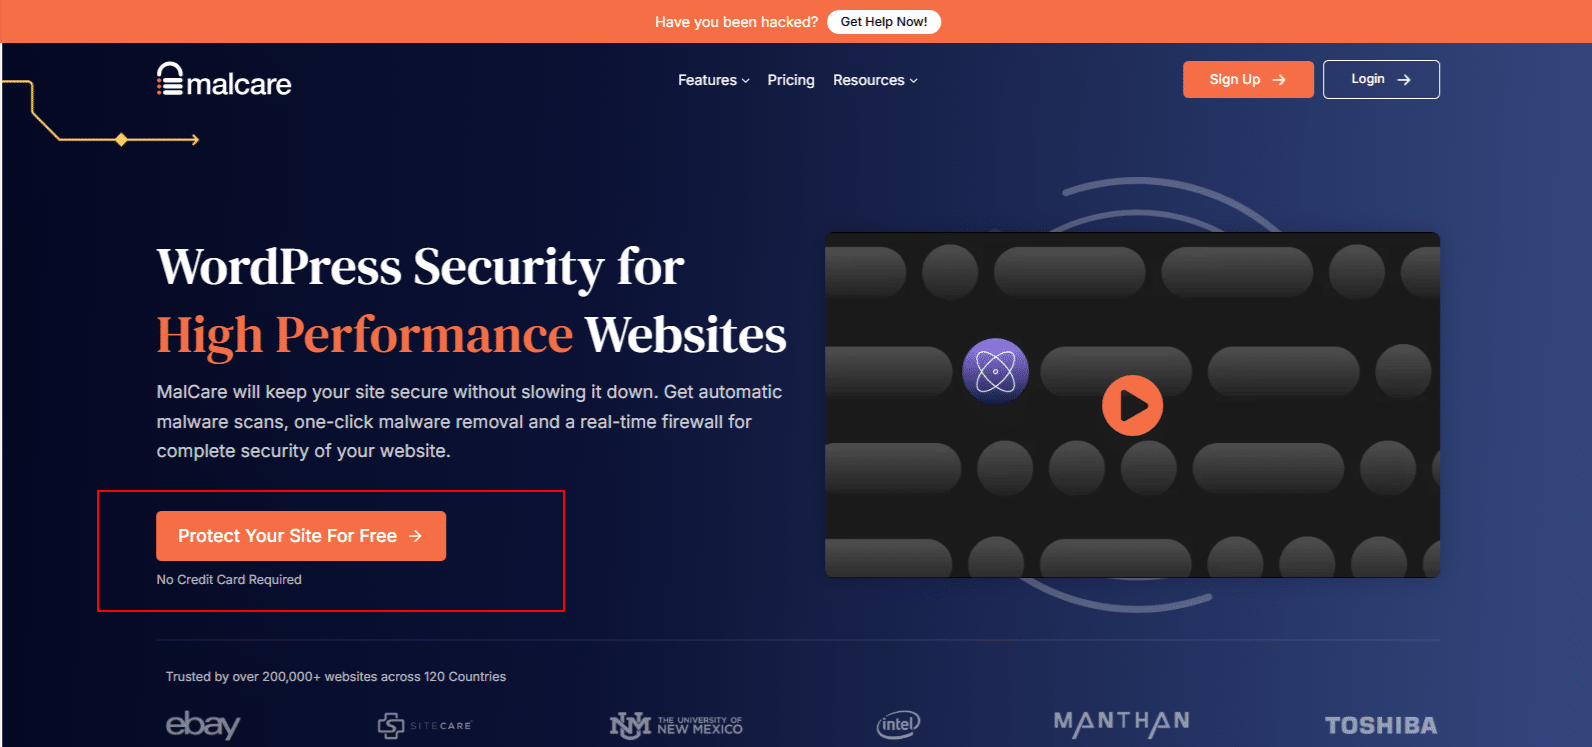
Click on the “Protect Your Site For Free” button as shown in the screenshot below.
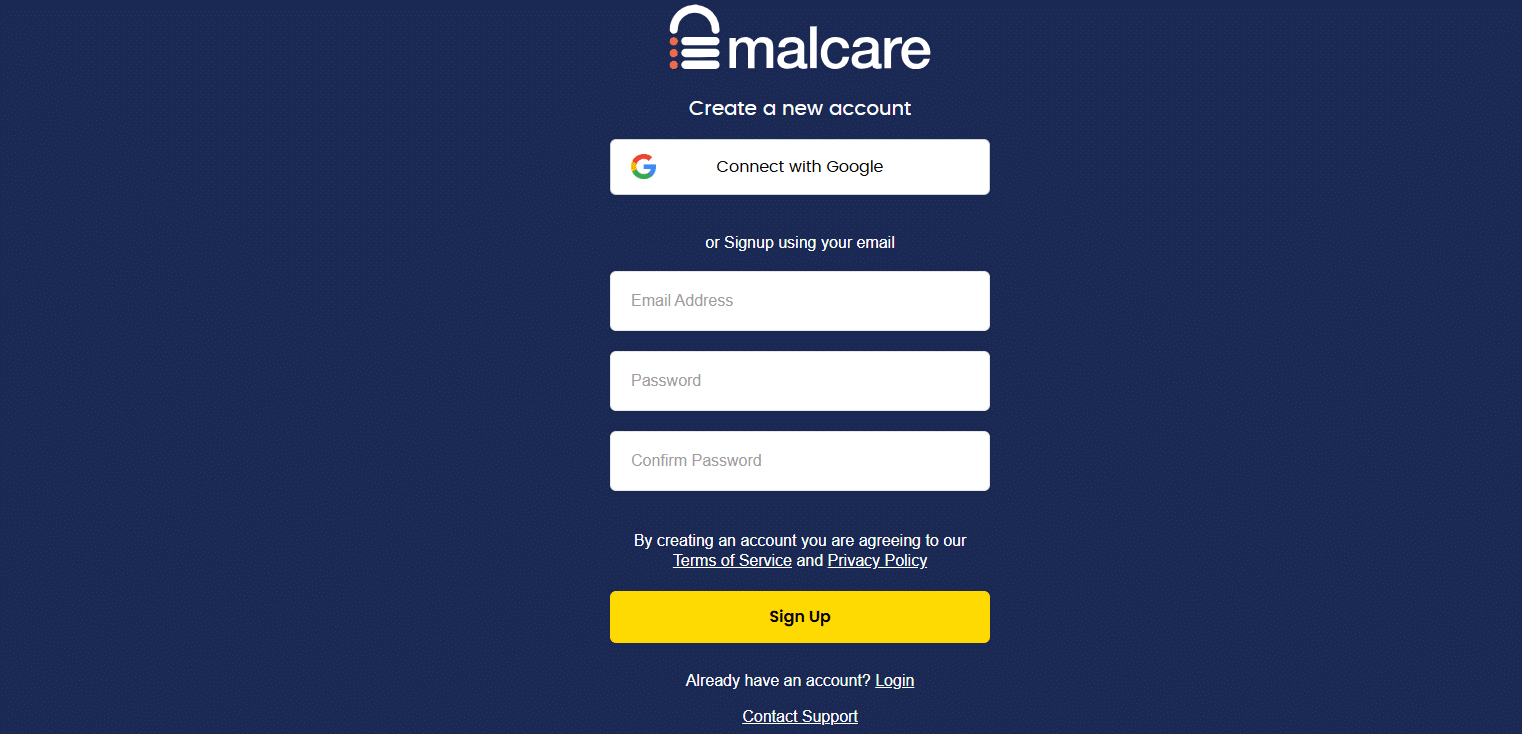
2. You can sign up by entering your Email Address, Password, and Confirm Password, or choose Connect with Google to sign in with your Google account. After signing up, verify your email using the confirmation link sent to our inbox.
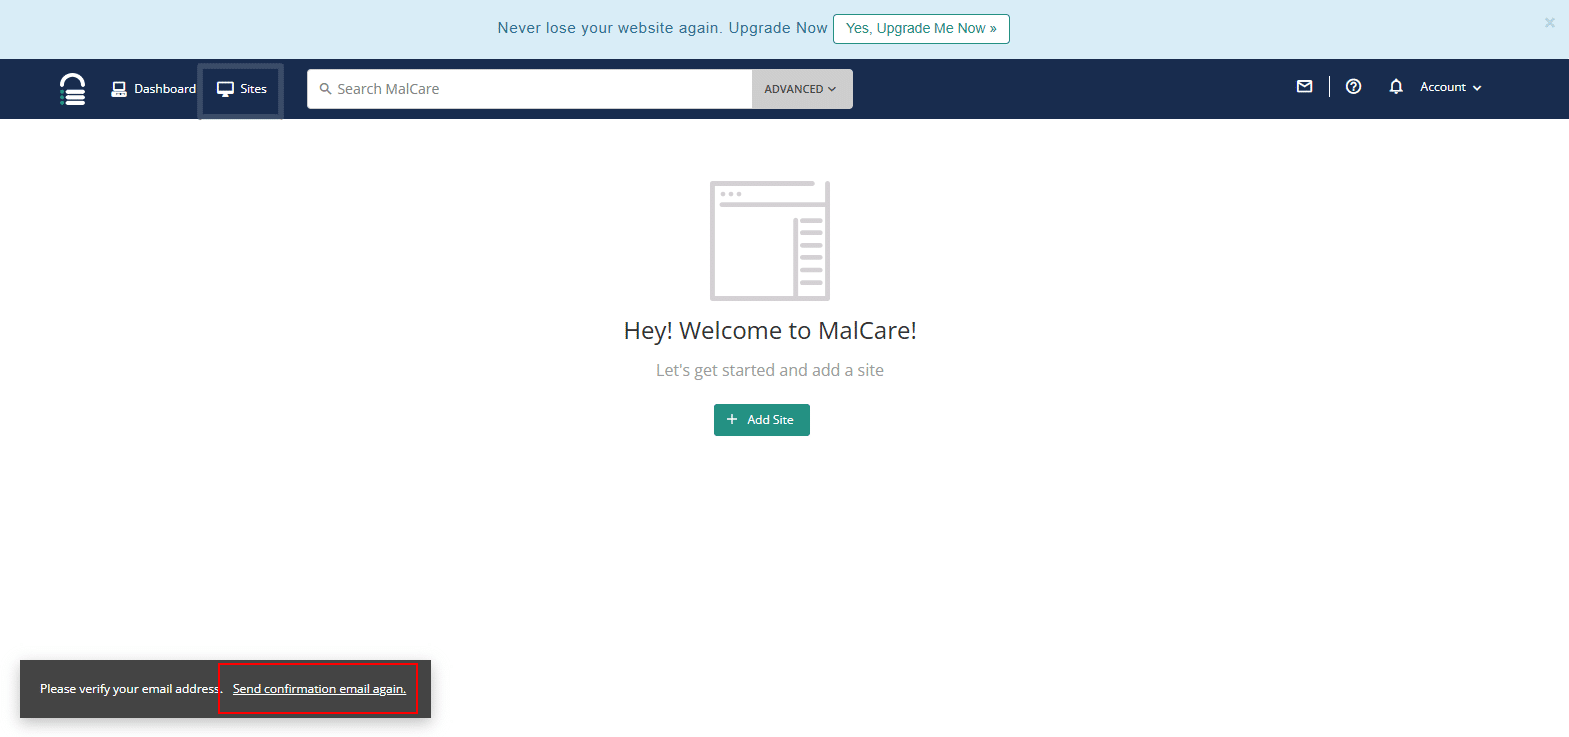
3. From the MalCare dashboard, click on Send confirmation email again as shown in the screenshot below.
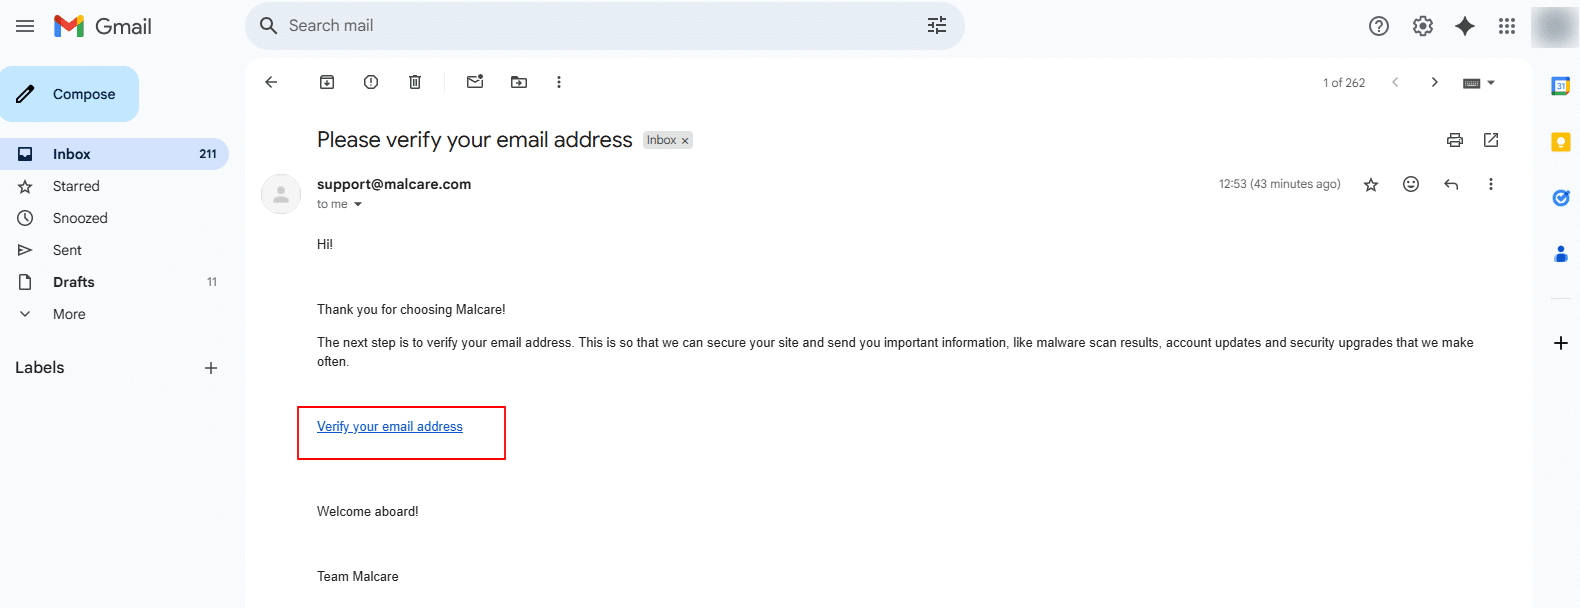
4. Check your inbox and click on “Verify your email address.”
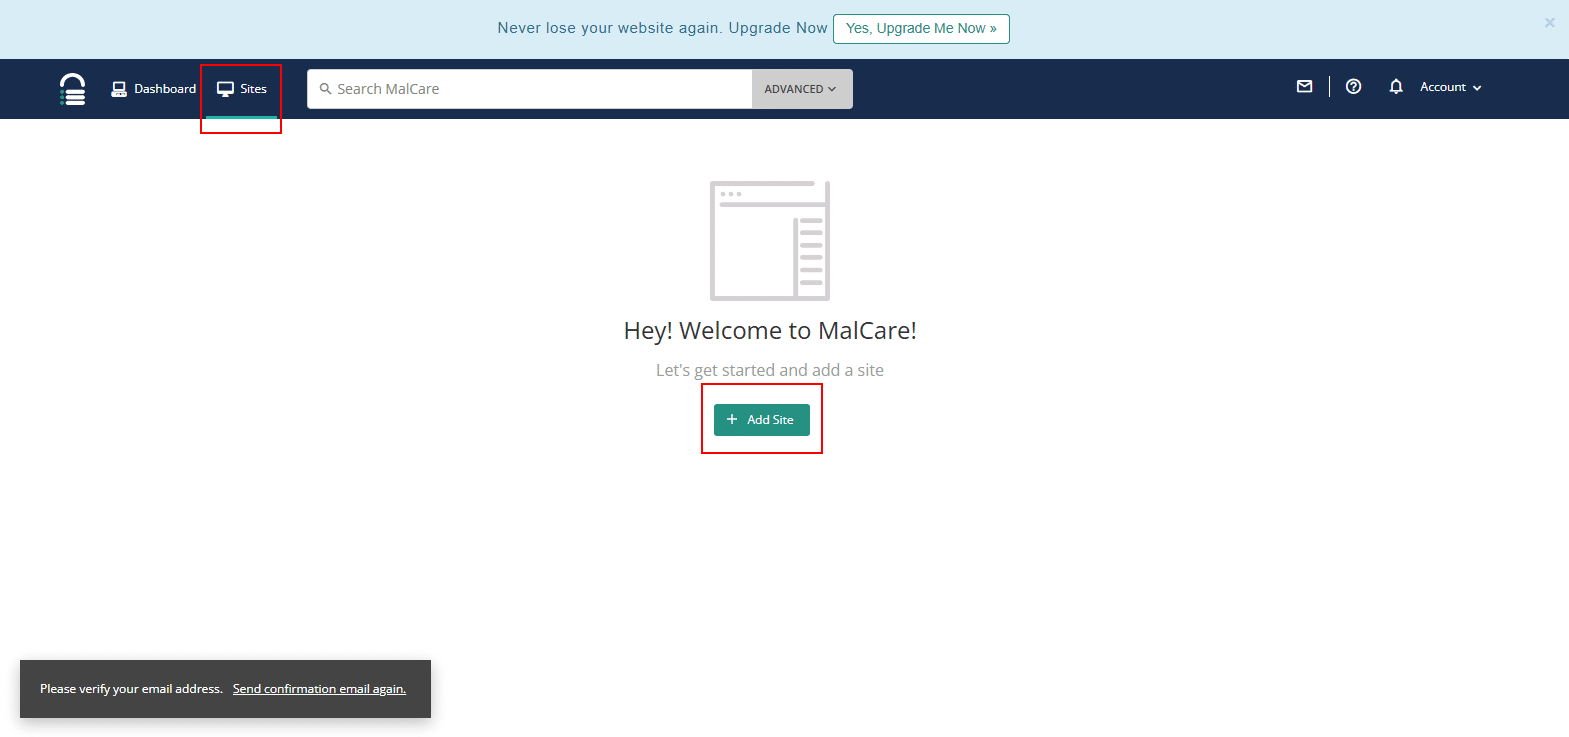
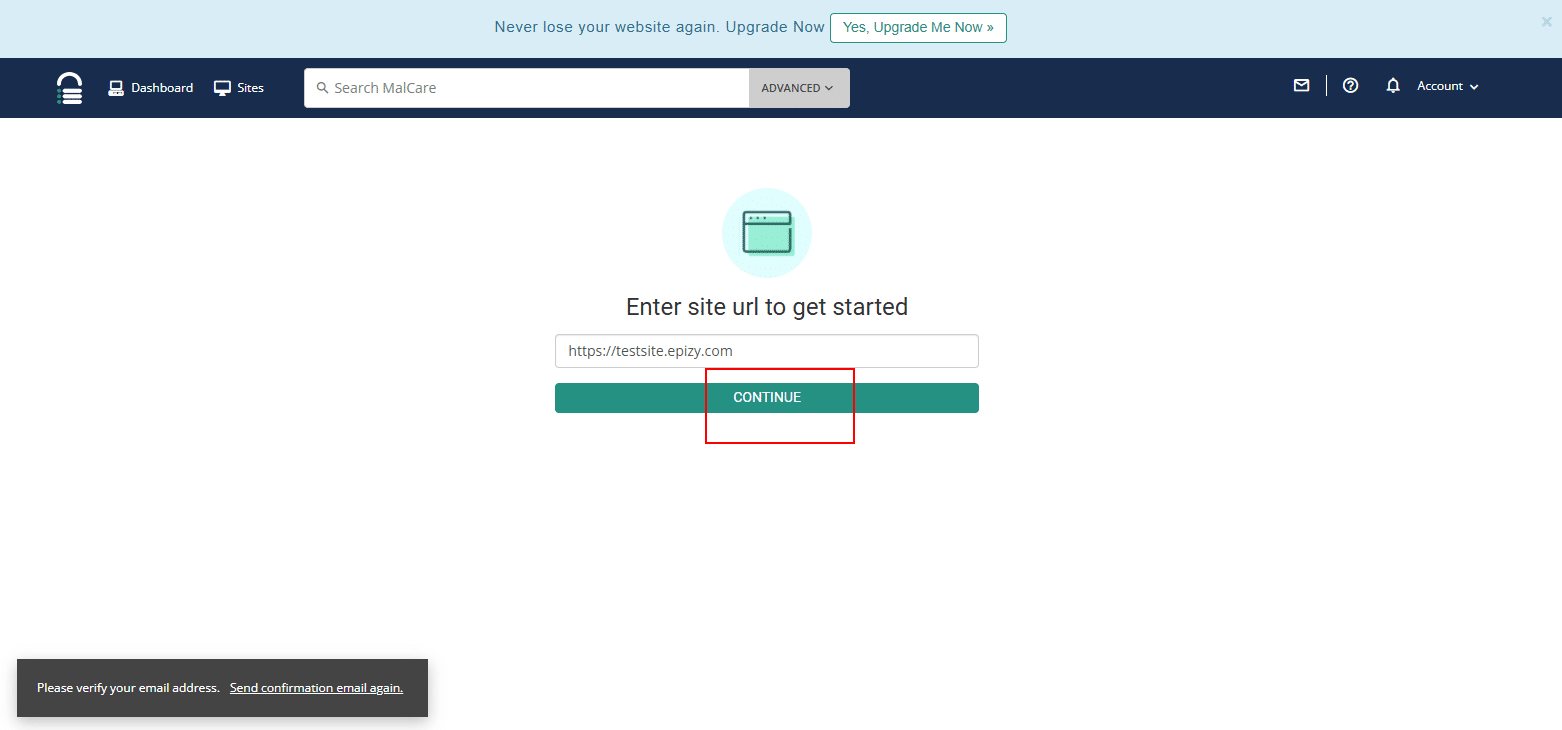
5. You will be then redirected to MalCare Dashboard. Here, select Sites and click on Add Site. Enter your full site URL (e.g., https://yoursite.com).
6. Enter the site name and click Continue.
Configure MalCare
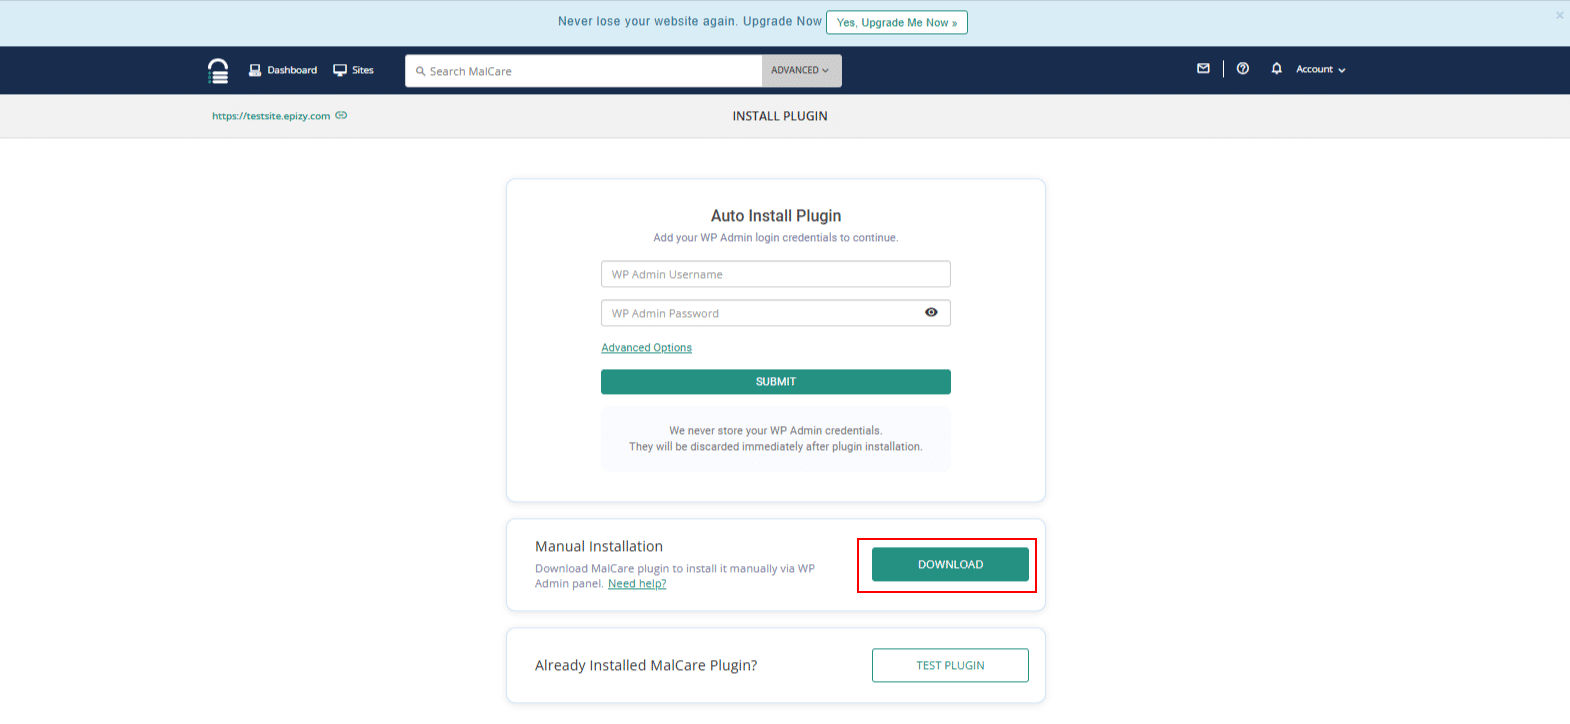
7. Here, you will have 2 options:
- Option A: Auto-Install Plugin: Enter your WordPress Admin Username & Password. MalCare will install the plugin automatically.
- Option B: Manual Installation: Click on Download as shown in the screenshot below to download the plugin zip file.
Note: Here, Manual installation is selected.
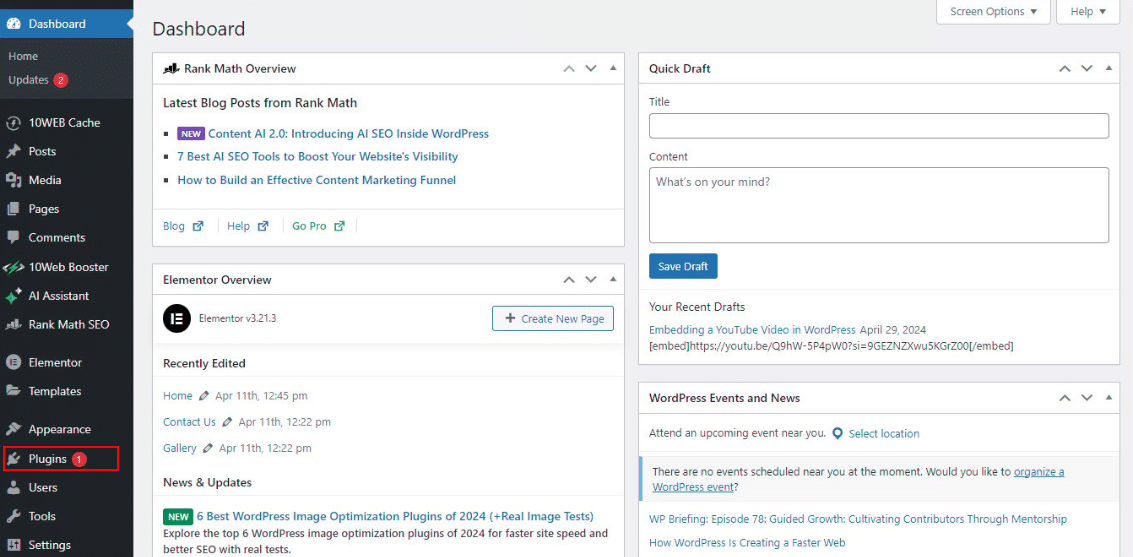
 8. Now, Log in to your WordPress admin panel (/wp-admin). Navigate to Plugins from the left-side menu.
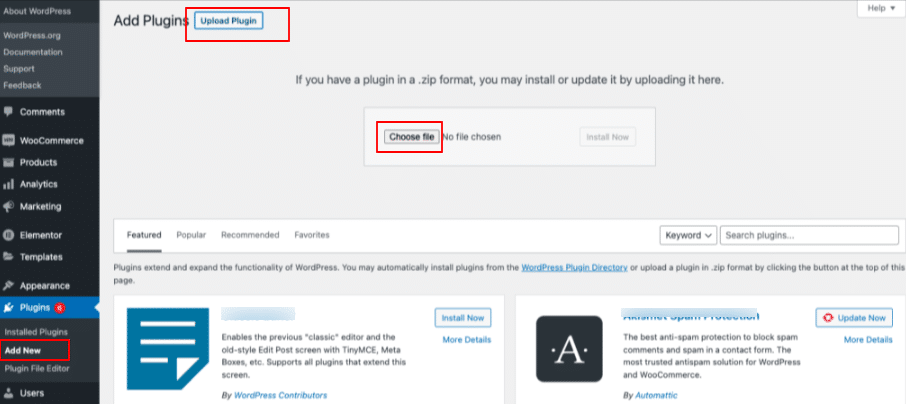
9. Choose Add New and click on Upload Plugin. Now, click on Choose file to upload the MalCare zip that is downloaded. Once the zip file is uploaded, click Install Now.
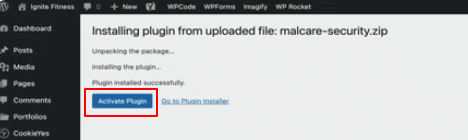
10. Now, click on Activate plugin.
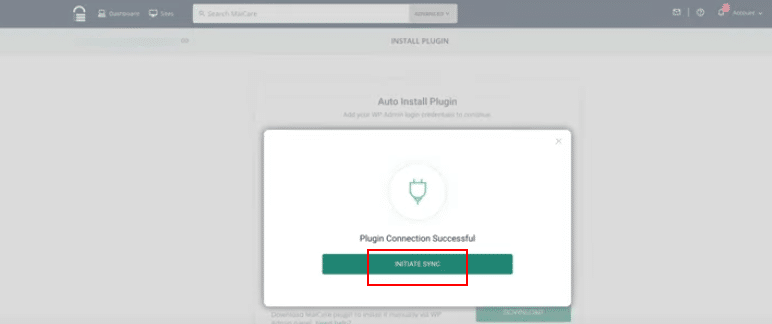
11. Otherwise, return to the INSTALL PLUGIN page and click on TEST PLUGIN.

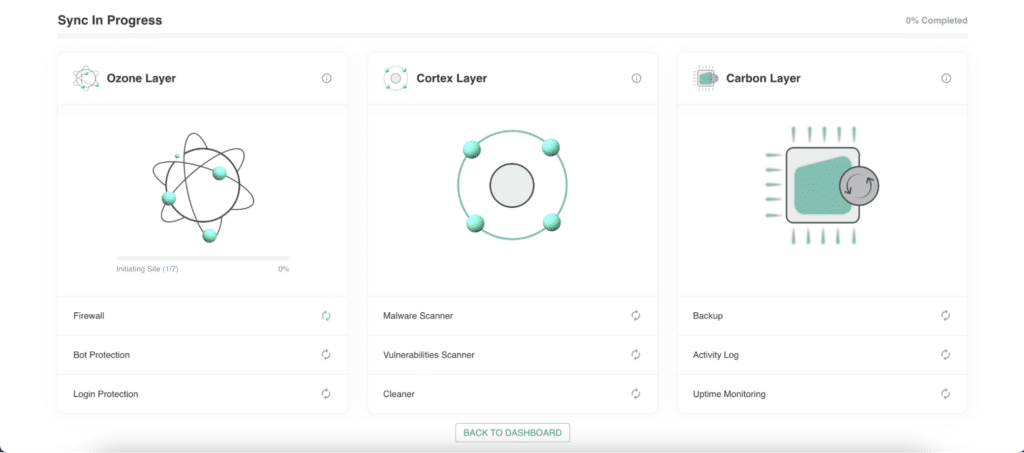
12. Once connected, click on INITIATE SYNC to scan your website.
Start security scan
13. Malware performs an initial security scan across 3 layers:
- Ozone Layer: Firewall, login protection, bot protection
- Cortex Layer: Malware scanner, vulnerability scanner, malware cleaner
- Carbon Layer: Backups, activity logs, performance monitoring
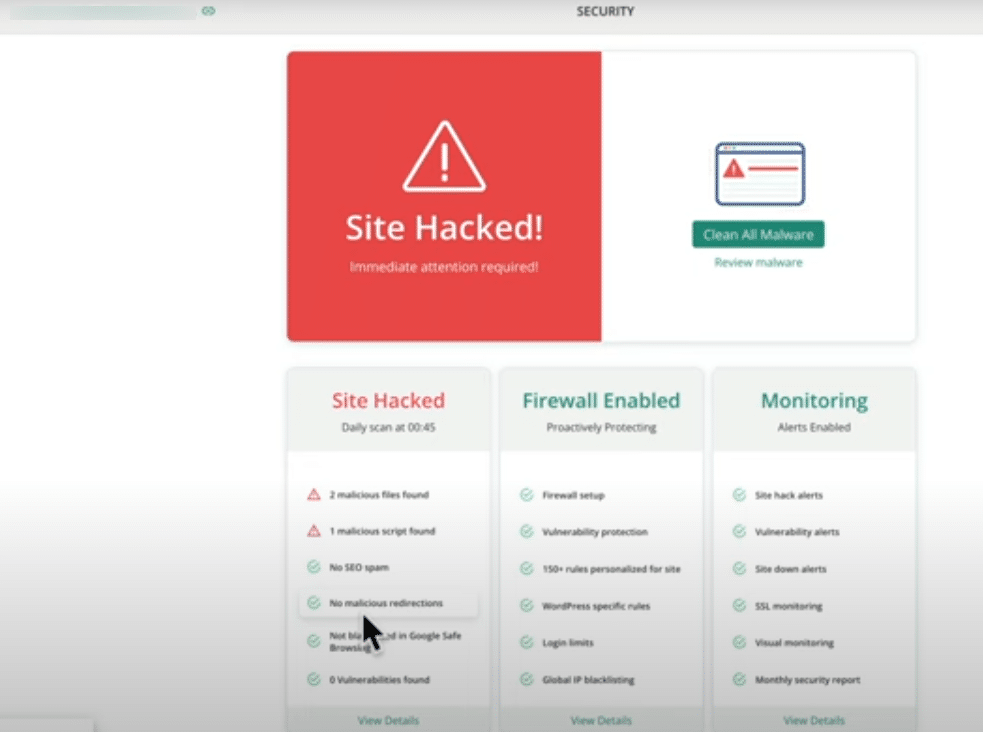
14. After a few minutes, the initial scan will reveal whether your site is: Clean or Infected with malware.
If infected, you’ll see details such as:
- Hacked files (PHP, JS, etc.)
- Malicious scripts injected into the database
- Outdated or vulnerable plugins and themes
Note: In the screenshot below, you can see 2 malicious files and 1 malicious script found.
15. Scroll down to the Ozone Layer and check whether there are any infected files. Here, you can
- Enable Firewall (included in free plan).
- Activate Login Protection:
- Enforce strong passwords
- Limit login attempts
- Enable two-factor authentication
- Enable Bot Protection (premium) to block malicious crawlers.
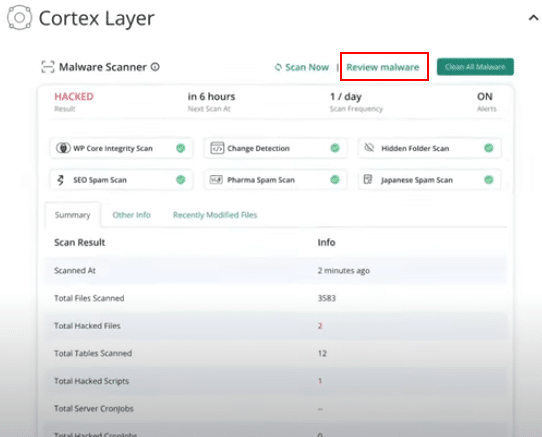
16. Scroll down to the Cortex Layer to view the scan results. In this layer, you will find the infected files. If the site is hacked, the results will clearly show as ‘Hacked.’ To proceed, click on Review Malware to examine the details.
Note: If you scroll further down, you will also find the Vulnerability Scanner section, where you can keep your plugins and themes updated.
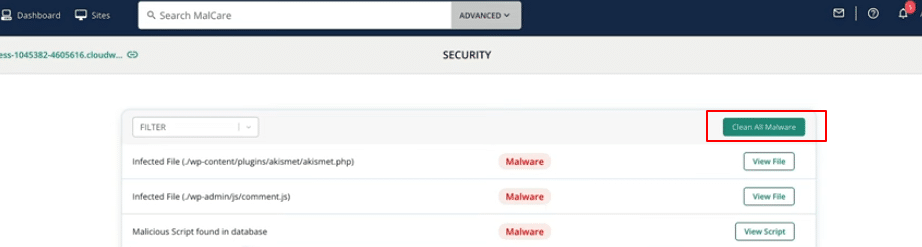
17. You can view the infected files by clicking View File. Alternatively, click Clean All Malware to remove all infected files at once.
MalCare automatically:
- Cleans infected files
- Removes malicious scripts from the database
- Resets WordPress security keys
- Clears cached files
- Updates compromised user passwords
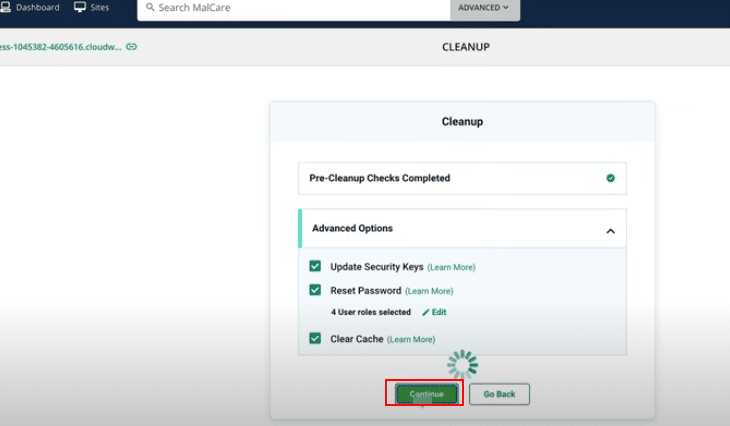
18. You will be redirected to the CLEANUP page, where you can select the checkboxes as per your requirements and then click Continue.
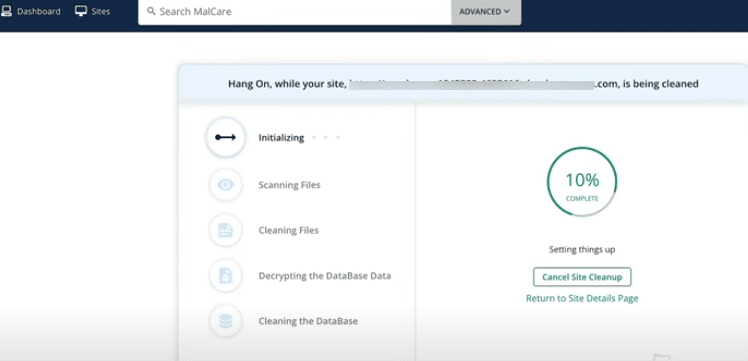
19. As you can see, the cleanup has been initiated. It may take a few moments to complete.
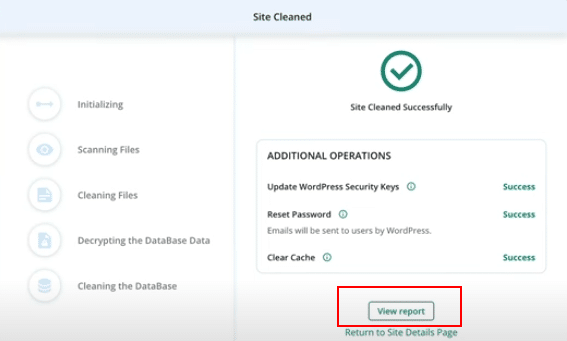
20. Once completed, click on the View report button to see a detailed report.
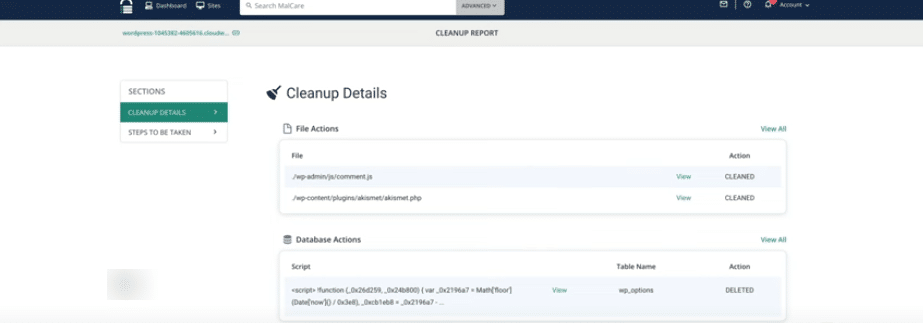
21. The detailed report shows:
- Files cleaned
- Database entries removed
22. Now, return to your site by clicking on the site name in the top-left corner, and then select Review Security.
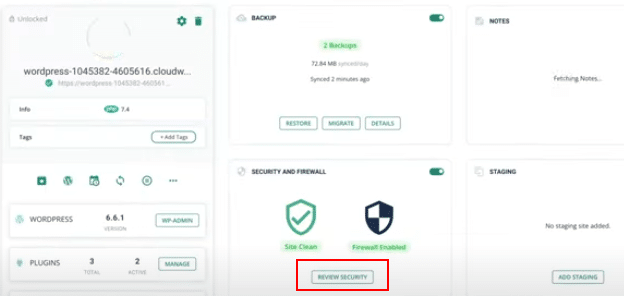
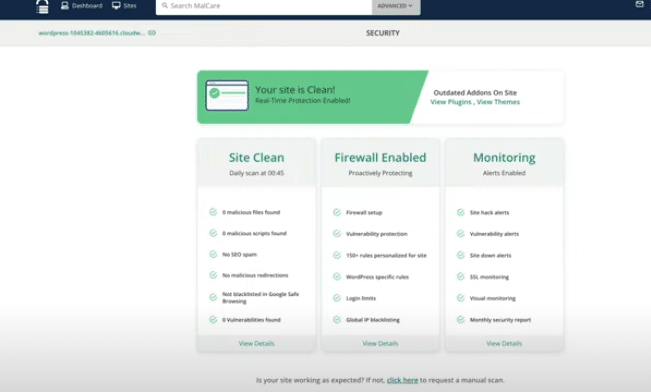
23. Now you will see the message: Your site is clean. This confirms that the cleanup process was successful, and your site is free from malware.
24. Scroll down to check if there are any infected files in the Carbon Layer as well.
Harden your WordPress site
- Even after cleaning, it’s critical to strengthen defenses:
- Enable firewall (included in free plan).
- Activate login protection:
- Enforce strong passwords
- Limit login attempts
- Enable two-factor authentication
- Change the WordPress default login page URL, typically yourdomain.com/wp-login.php, to a custom name like yourdomain.com/axb2zo.php.
- Enable bot protection (premium) to block malicious crawlers.
- Run daily malware scans (every 24h on free, instant on premium).
- Keep plugins & themes updated using MalCare’s centralized updates.
- Schedule backups (premium) for disaster recovery.
- Regularly check MalCare’s activity log to track suspicious changes.
- Strengthen user permission management using the principle of least privilege. That means you deny access to users by default, unless specific privileges are authorized based on their job requirements. It applies not only to human users but also to machine identities, such as applications, systems, and IoT devices.
- Use vulnerability scanner to detect outdated plugins/themes.
- Enable uptime monitoring to receive alerts if your site goes offline.
- For mission-critical sites hosted on Kamatera, consider upgrading to premium for real-time protection and instant malware removal.
Going forward, ensure your WordPress version is always up to date to further strengthen your site. And that’s it! We have covered the process of fixing and securing your hacked WordPress site, using MalCare, along with ways to harden your site so you never get hacked again.