


As a Kamatera reseller, setting your own pricing is essential to maximizing your revenue and catering to diverse clients. This article is your complete guide to creating, customizing, and managing price lists within your reseller panel.
Price lists are the backbone of your billing structure. With these lists, you can determine the exact rate your clients pay for every resource they consume, from vCPU and RAM to storage and bandwidth. Mastering this process allows you to implement strategies like offering volume discounts, applying regional markups, and ensuring you always maintain a healthy profit margin.
Let’s dive into the platform and learn how to create and manage pricing lists.
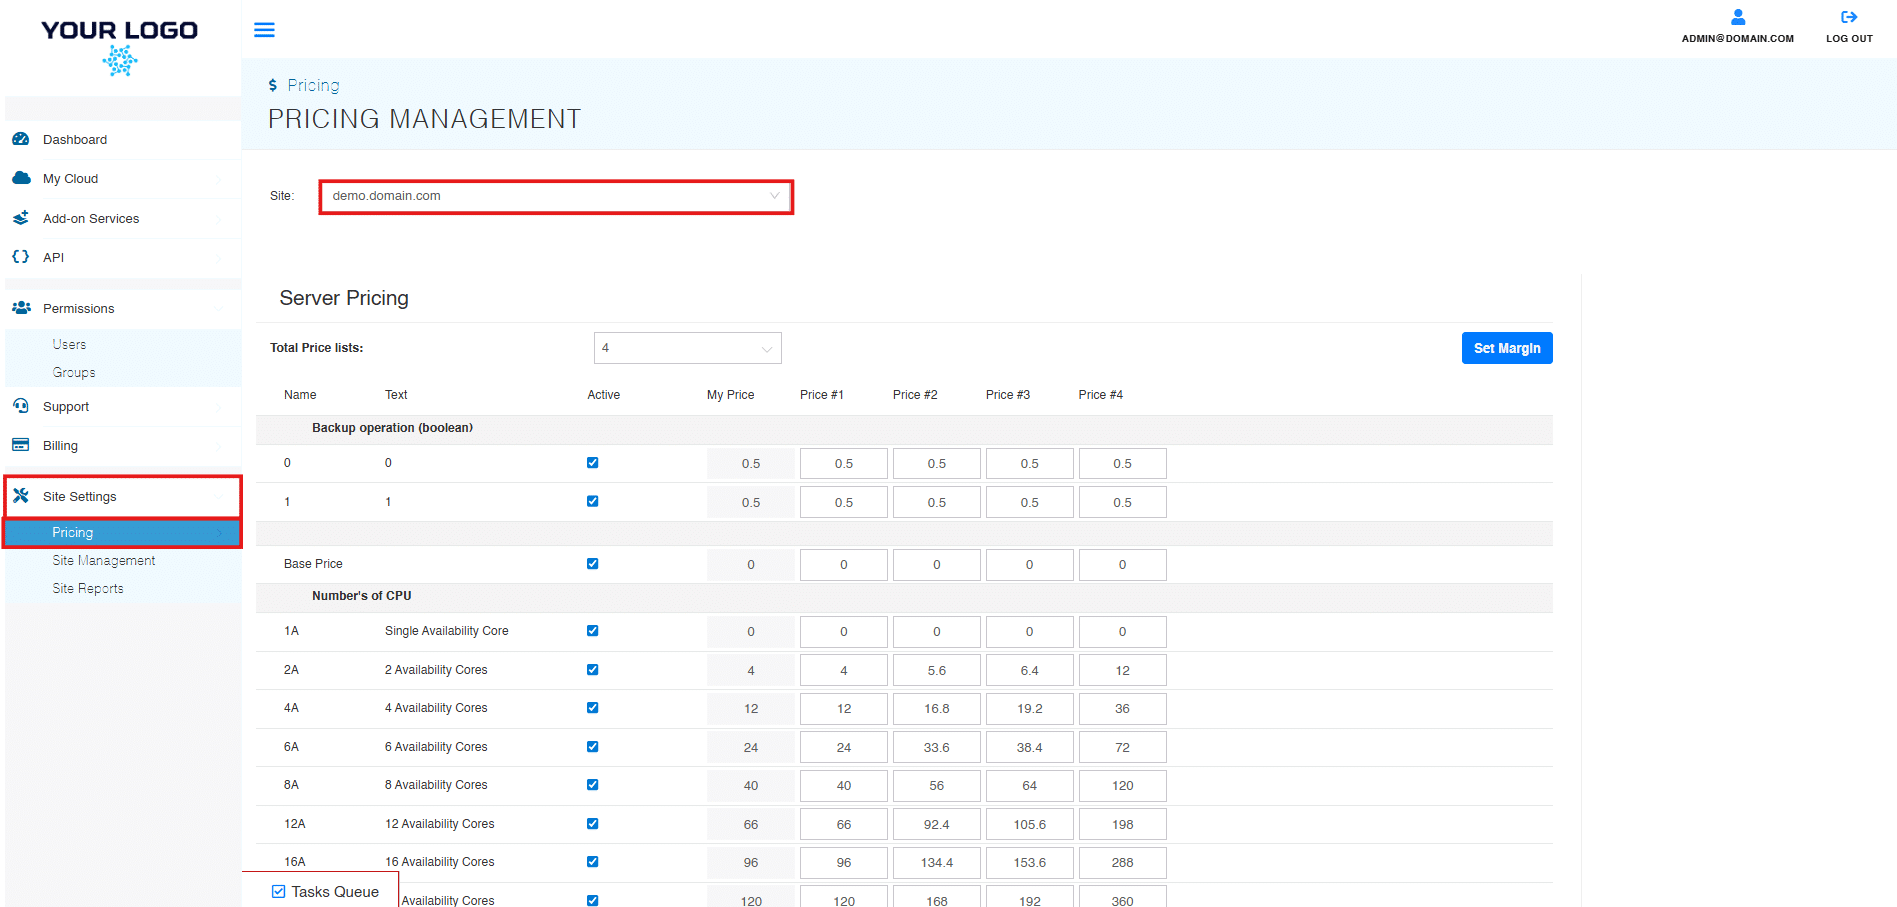
- To create a price list, go to the “Pricing” tab of the platform, which can be found under “Site Settings” in the left panel.
- Select your site under the “Site” dropdown.
- “Server Pricing” will now appear. This is where you can configure different price lists for distribution across users and groups. You can adjust prices manually or set a margin to help automate pricing across all resources.
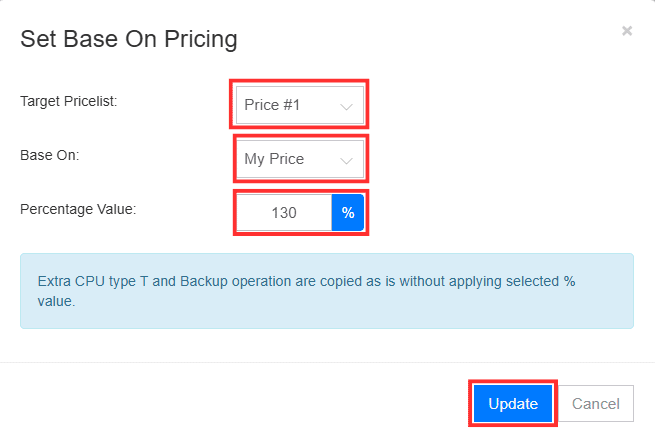
4. To set margins, select “Set Margins.” Choose the “Target Pricelist,” source to be based on, and margin value from the dropdown. Select “Update” to finish.
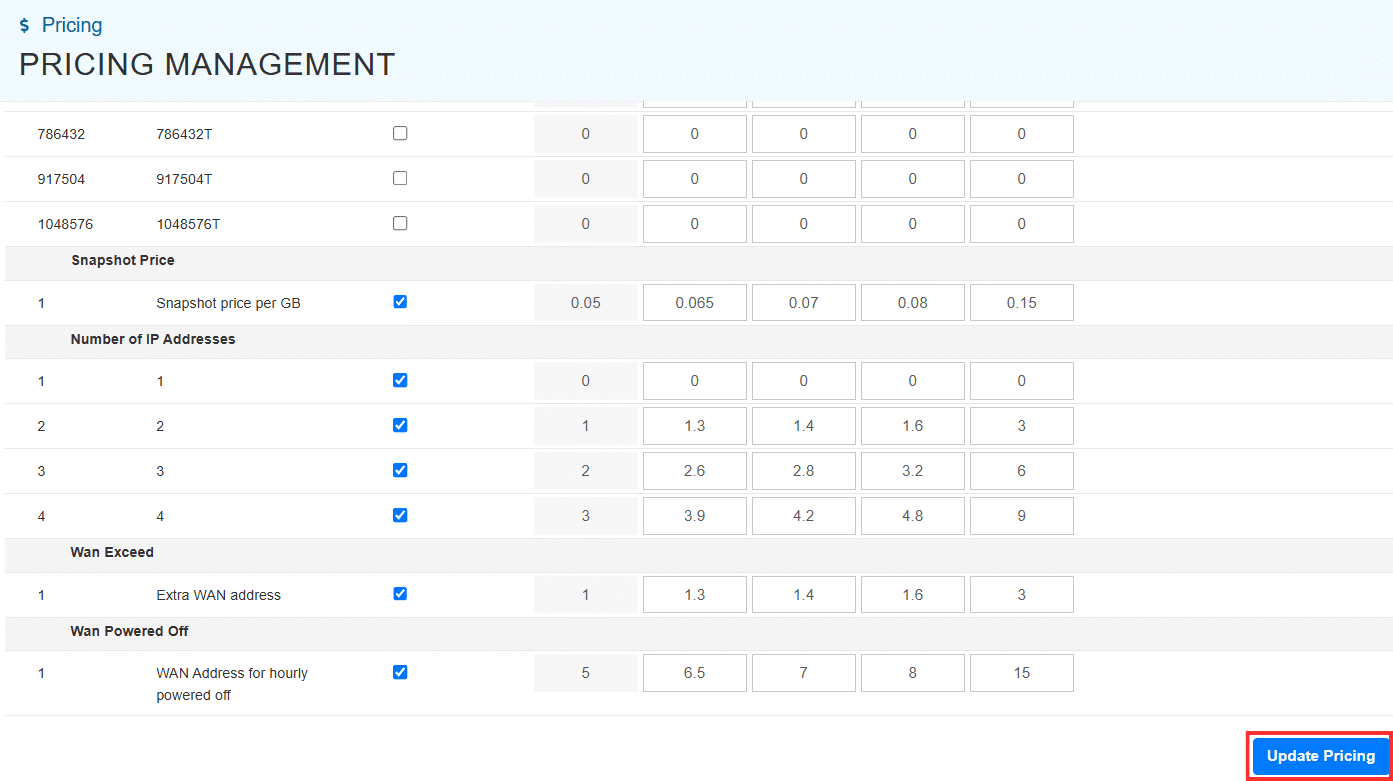
5. To finalize pricing changes, scroll all the way to the bottom of the screen and select “Update Pricing.”
And that’s it! You can now confidently create pricing tiers, offer competitive discounts to high-volume clients, and effortlessly adjust your margins to meet market demands—all while leveraging Kamatera’s enterprise-grade infrastructure.