


A secure, scalable private network is vital for today’s cloud deployments, especially for distributed teams, remote access, and hybrid setups. UTunnel VPN provides an easy-to-deploy, cloud-ready solution that streamlines private networking. Manage user access, site-to-site tunnels, and private IP routing effortlessly from its intuitive web dashboard. UTunnel’s seamless integration ensures quick, hassle-free VPN gateway deployment, so you can easily launch, configure, and manage secure VPN gateways directly in your cloud.
Create your Kamatera account
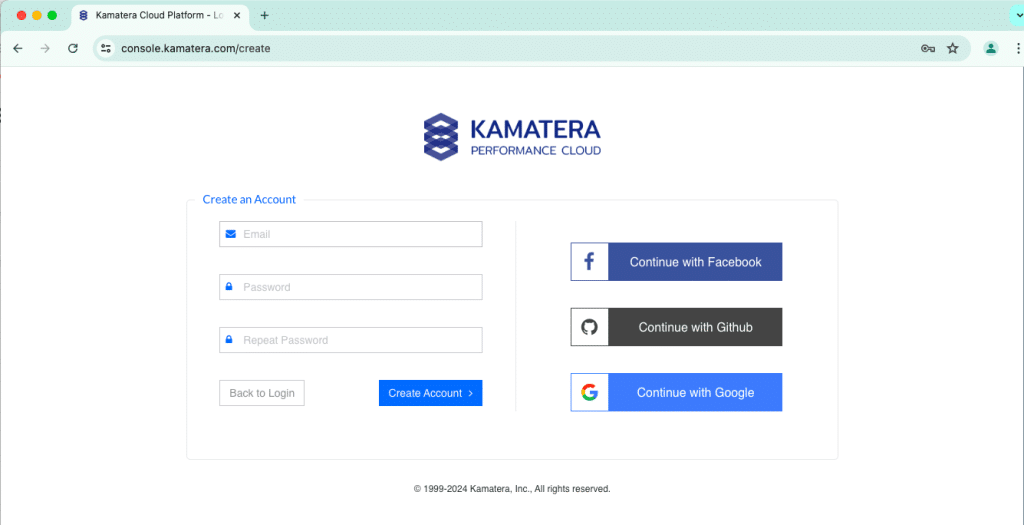
Go to https://console.kamatera.com and sign up for an account by providing the following information:
- Verify your email: Click the verification link sent to your email by Kamatera.
- Password: Enter your password.
- Repeat password: Re-enter your password and click Create Account.
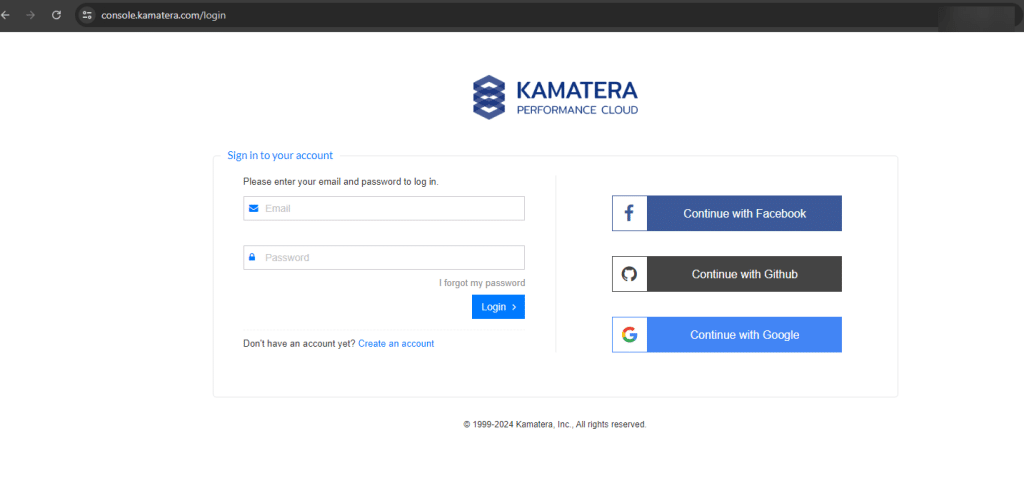
- Enter your username and password and click Login to access the Kamatera management console.
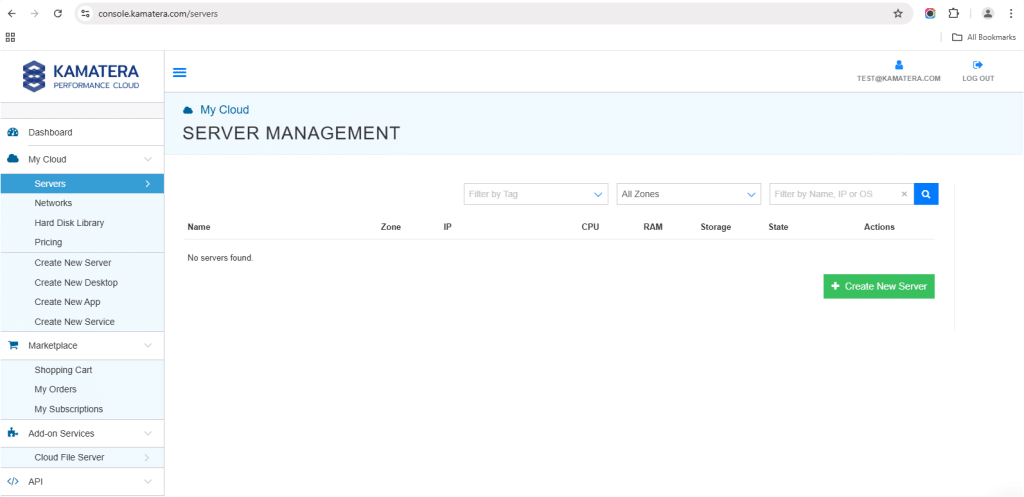
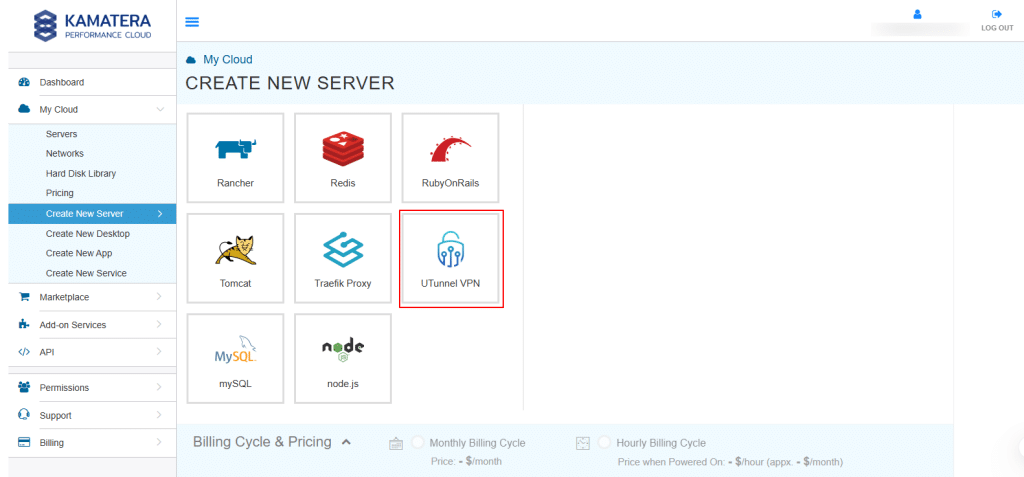
2. Navigate to My Cloud on the left pane, select Servers and click on Create New Server.
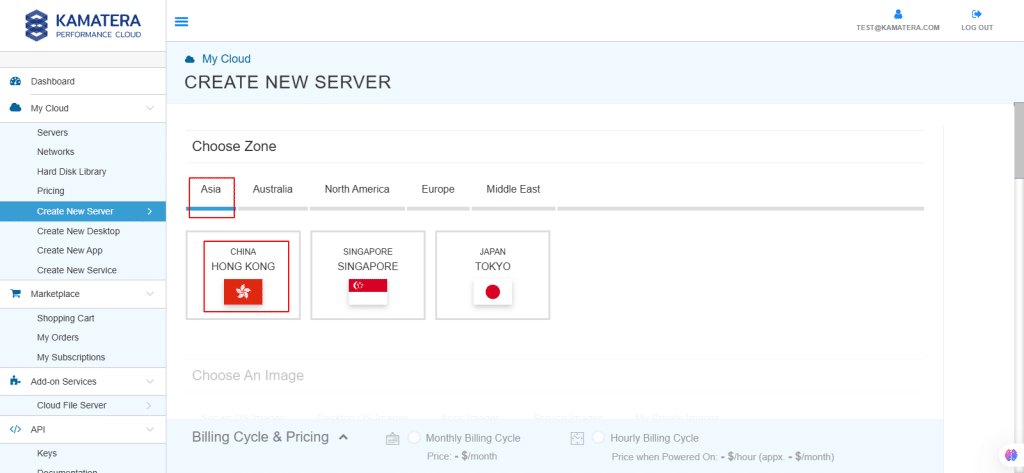
3. Choose zone
Choose the zone from the following options:
- Asia
- North America
- Europe
- Middle East
Note: For this setup, we used the Asia server domain to set up the Windows Server.
4. Choose an image
Kamatera offers a variety of app and server images to help users set up preconfigured resources. Users can explore options such as:
- Server OS Images
- Desktop OS Images
- App Images
- Service Images
- My Private Images
For our purposes, select service images and UTunnel VPN.
Install UTunnel
5. Choose the latest version of UTunnel VPN.
Note: Always select the latest version.
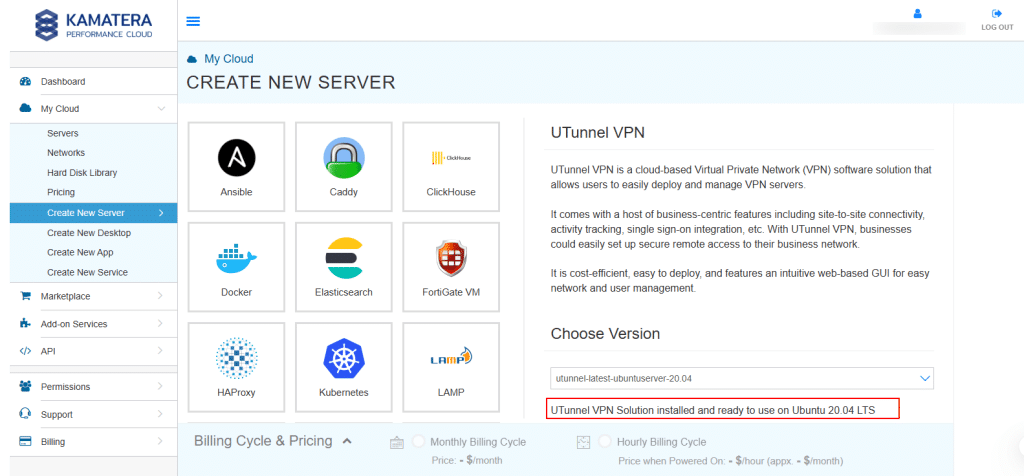
Once the version is selected, you can see message as: “UTUnnel VPN Solution installed and ready to use on Ubuntu 20.04 LTS”.
6. Toggle the Detailed view button to enable you to view the detailed description, including the price.
For this use case, the following server specifications are used. You can select the specs that you’ll need for your project.
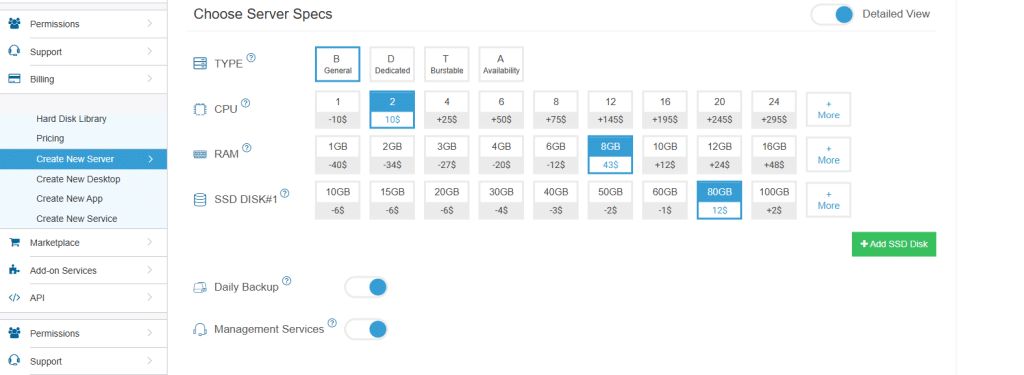
Choose server specs
| Field | Description |
| Type | Type B-General Purpose: Server CPU are assigned to a dedicated physical CPU thread with reserved resources guaranteed.
Type D–Dedicated: Server CPU are assigned to a dedicated physical CPU Core (2 threads) with reserved resources guaranteed. Type T-Burst: Server CPU are assigned to a dedicated physical CPU thread with reserved resources guaranteed. Exceeding an average usage of 10% will be extra charged for CPUs usage consumption. Type A-Availability: Server CPUs are assigned to a non-dedicated physical CPU thread with no resources guaranteed. Note: More information on CPU types is available on the My Cloud-Pricing page. |
| CPU | Choose the number of vCPUs that will be installed on the server. Type B/T can be configured with up to 104 vCPUs per server. Based on Intel’s latest Xeon Processors, 2.7 GHz+. |
| RAM | Choose the amount of RAM that will be installed on the server. Type B/T/D can be configured with up to 512GB RAM per server. |
| NVMe SSD DISK | Choose NVMe SSD storage size. You can add up to 15 NVMe SSD Disk. NVMe SSD storage includes unlimited IOPS and unlimited storage bandwidth, free of charge. |
| Daily Backup | Toggle the switch to enable extended daily backups of your server’s storage to external backup storage. |
| Management Services | Toggle the switch to enable managed services to the server’s operating system by Kamatera’s technical support team. |
7. Choose Networking
Users can select the network they wish to use, whether it is a public Internet network or a private local network.
Simple mode:
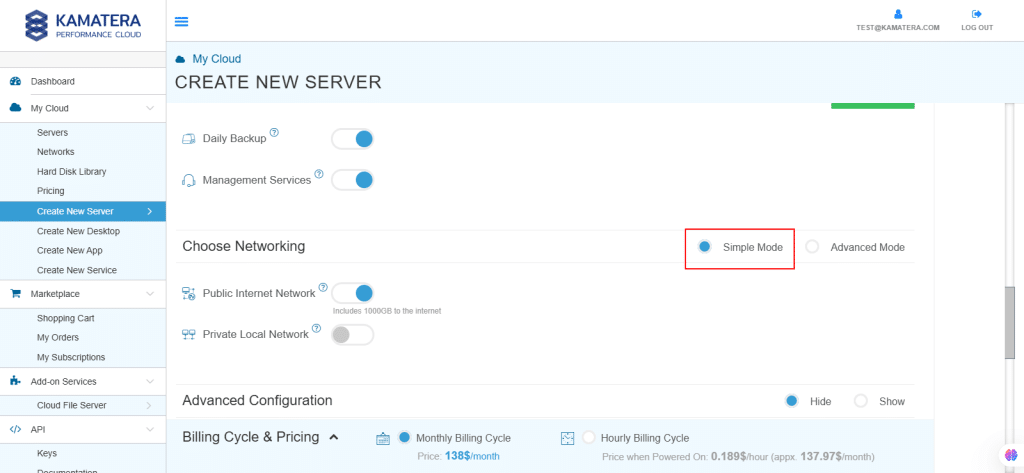
| Field | Description |
| Public Internet Network | Check to connect the server to a network interface connected to Public Internet Network. |
| Private Local Network | Check to connect the server to a network interface connected to Private Local Network. |
Advanced mode:
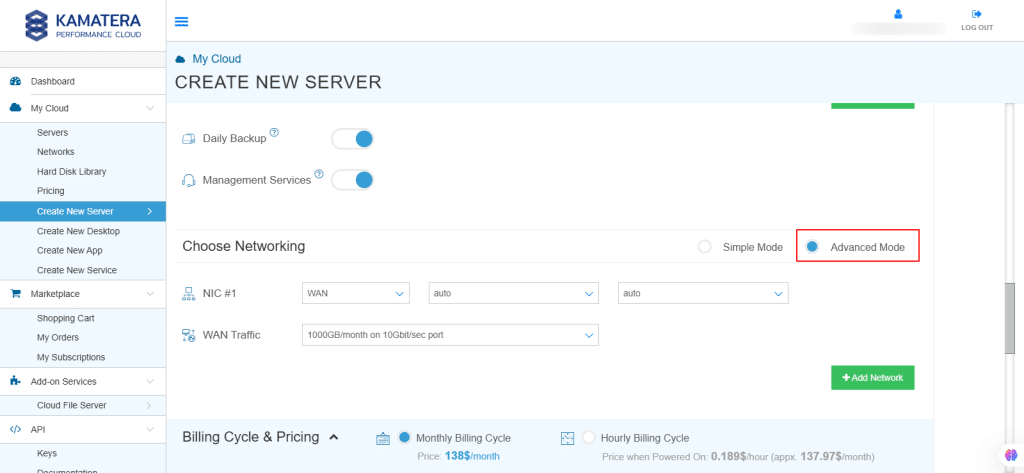
| Field | Description |
| NIC #1 | Select WAN from the options available in the drop-down menu.
Select auto from the options available in the drop-down menu.
Select auto from the options available in the drop-down menu.
|
| WAN Traffic | Select 5000 GB per month on 10 Gbit per second port. |
8. Advanced configuration
Hide: If you want to hide the advanced configuration.
Show: If you want to see the advanced configuration.
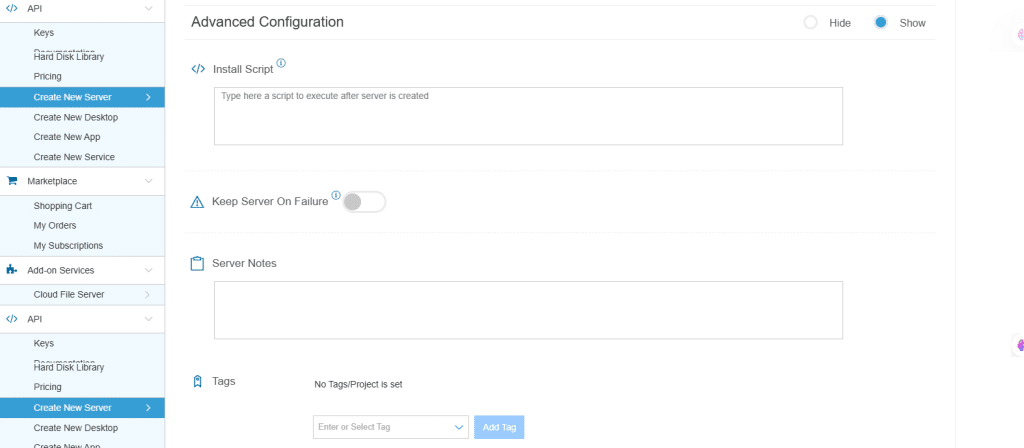
| Field | Description |
| Install Script | Enter the script here to execute once the server is created.
Note: For Windows system use Power Shell. |
| Keep Server On Failure | Do not terminate server if start up script or provisioning fails |
| Server Notes | Enter any server notes to be noted. |
| Tags | Select the tags from the drop-down menu and click Add Tag. |
9. Finalize settings
Finalize settings by setting the password, re-validating it, selecting the number of servers, specifying the server’s name, and enabling the Power On Servers option.
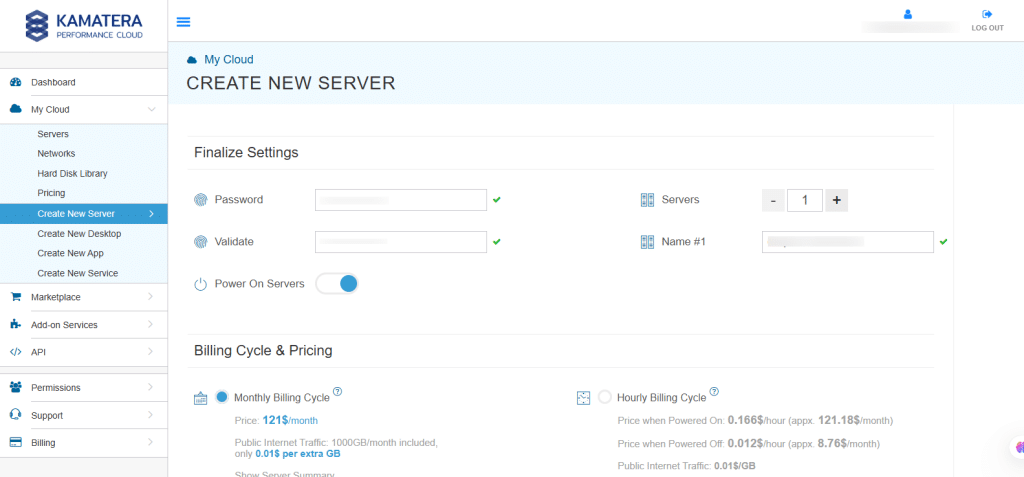
| Field | Description |
| Password | Select password
Password allowed characters: a-z, A-Z,0-9 !@#$^&*()~ and must need the following requirements: At least 14 characters At most 32 characters At least one lowercase character At least one upper case character At least one number Includes allowed characters only |
| Validate | Re-enter the password to validate. |
| Servers | Select the number of servers the user wants. |
| Name # 1 | Enter the name of the server. |
| Power On Servers | Switch on the toggle button to see the details |
Note: Once the user enters the details in Finalize Settings, they can select either monthly or hourly billing.
10. Billing cycle and pricing
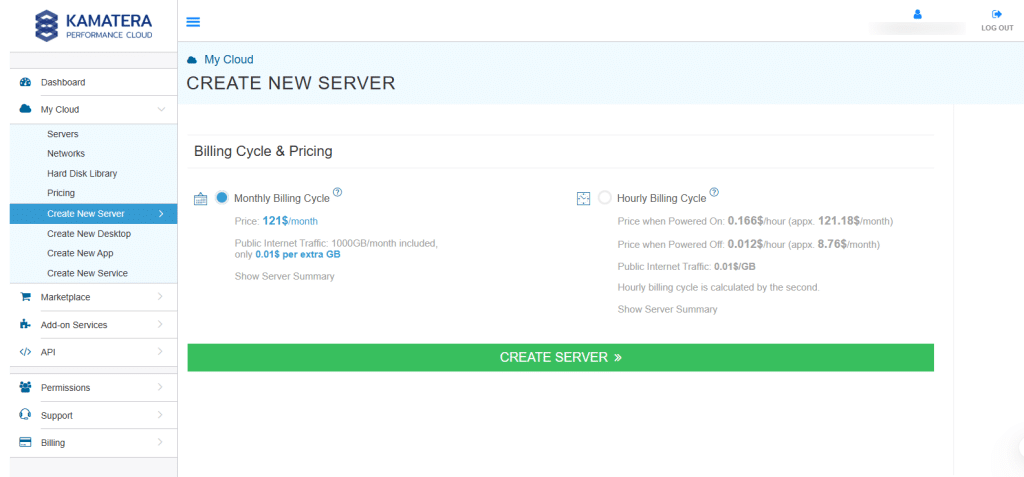
The user can choose between the Monthly Billing Cycle and Hourly Billing Cycle.
Note: The Server Summary displays the location, operating system (including server specifications), add-on services, servers, and pricing.
Click Create Server.
Configure UTunnel image
11. In Tasks Queue, you can see the UTunnel VPN is downloading.
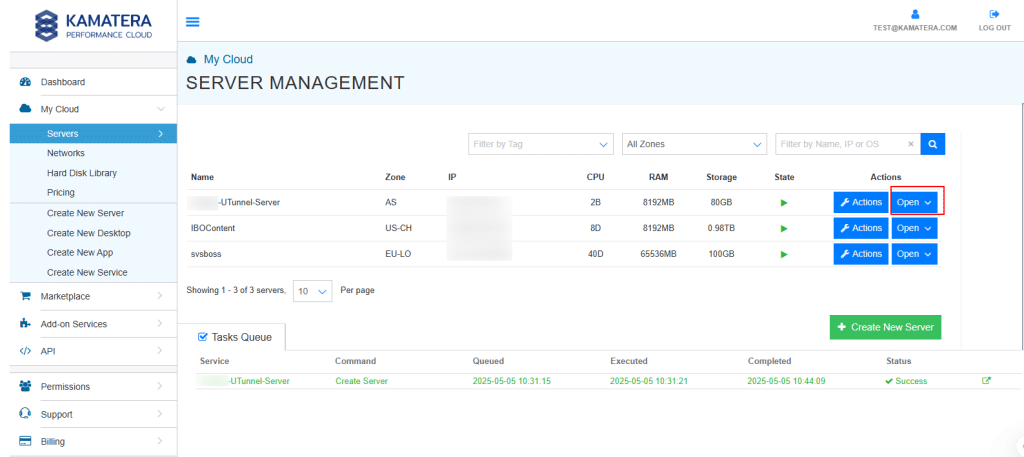
Once the installation is successful, you will see the message as Success beside the server’s name. UTunnel VPN will be reflected in the Server Management dashboard.
Click Open beside the UTunnel VPN server.
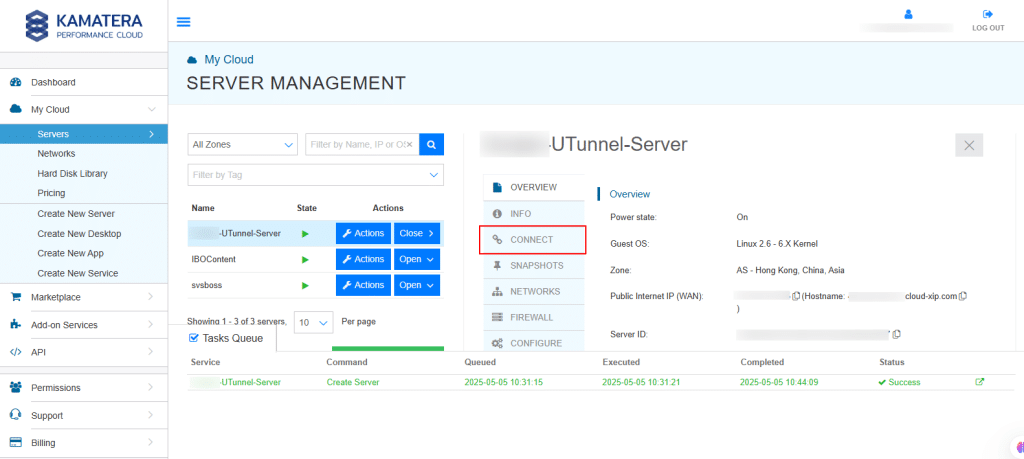
12. A new screen shows up.
Overview tab in the center is selected by default, and it displays information about the server overview: Power state, Guest OS, Zone, Public Internet (WAN), Server ID of the server and Configuration- Number of CPU. Memory Size, Disk 1.
Click on Connect to connect to the server.
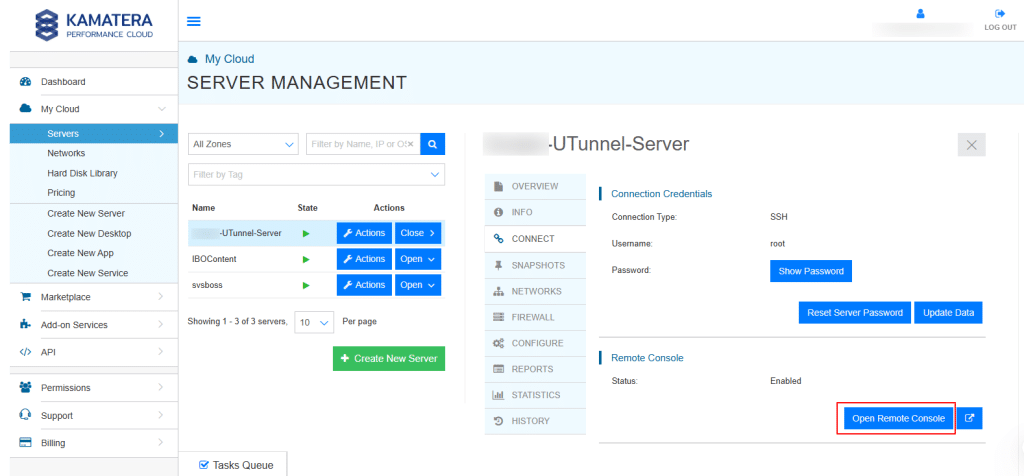
13. Now, click on Open Remote Console.
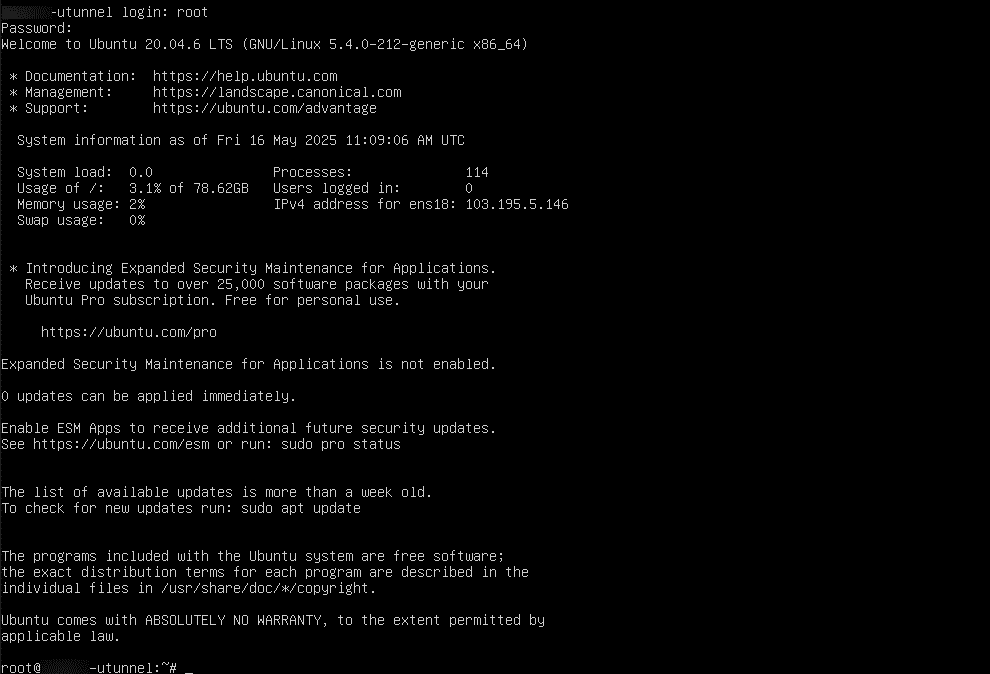
14. In the terminal, enter the Username and Password that you mentioned while creating a server. Under System Information, you will see the IP address, which is necessary while creating access gateway.
15. Navigate to the UTunnel website https://www.utunnel.io/. If you are a new user, click Sign Up to create an account. If you already have an account, click Login to access your dashboard.
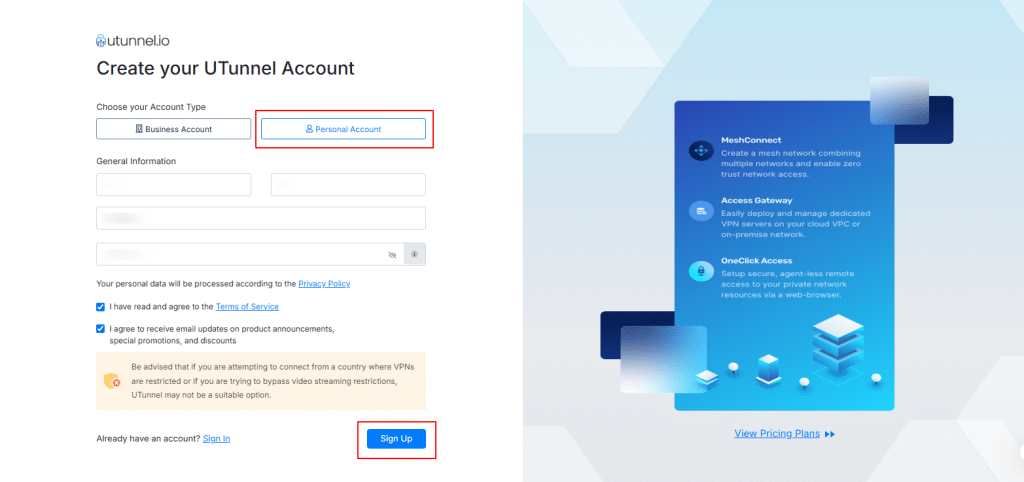
16. After clicking Sign Up, you will be prompted to create your UTunnel account. During the registration process, you will need to choose your account type—either a Business Account or a Personal Account, depending on your intended use.
If you want to create a Business Account:
You will need to provide general information such as your First Name, Last Name, Company Name, Portal Name, Email Address, and Password.
Check the box to agree to the Terms of Service, and check the box to receive email updates about product announcements. Once all the information is entered, click Sign Up to complete the registration.

If you choose a Personal Account:
You will need to enter your First Name, Last Name, Email Address, and Password. Check the box to agree to the Terms of Service, and check the box to receive email updates about product announcements. Once completed, click Sign Up to proceed.
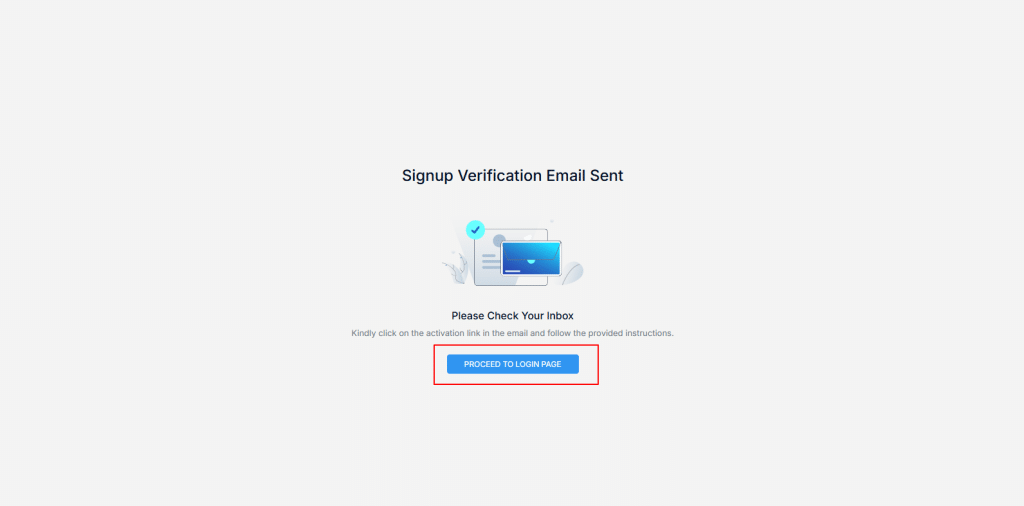
17. Once you have entered your details, an activation link will be sent to your registered email address. Click the link and follow the instructions provided to activate your account. After successful activation, click PROCEED TO LOGIN NOW to access your UTunnel account.
18. The Login screen will appear, where you need to select your preferred account type: either Business Account or Personal Account.
If you are logging in with a Business Account, enter the Portal Name you specified during registration.
The format should be:
portalname.utunnel.io
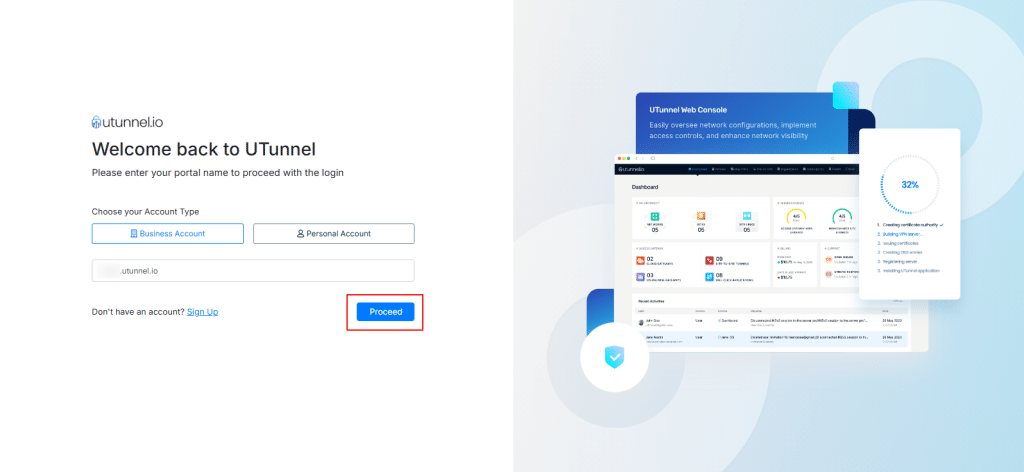
If you are logging in with a Personal Account, enter the Email Address and Password you submitted during registration.
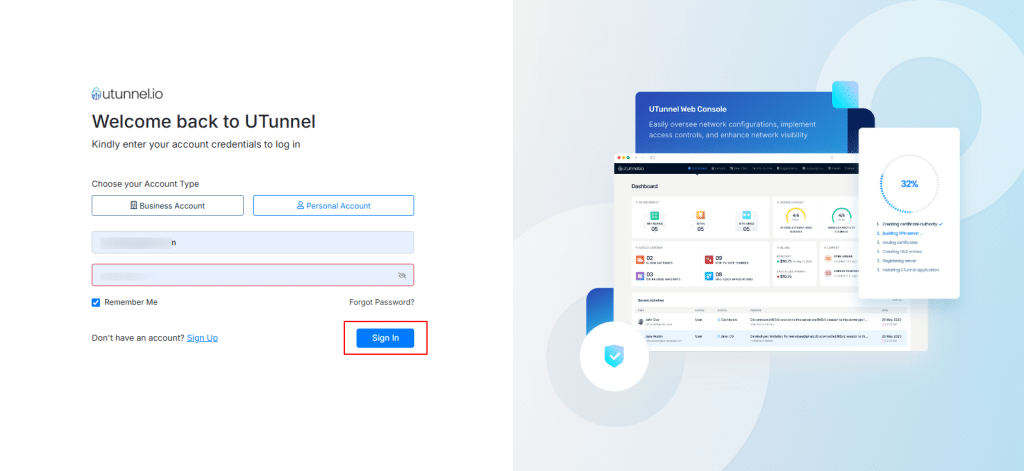
Now, click Sign In.
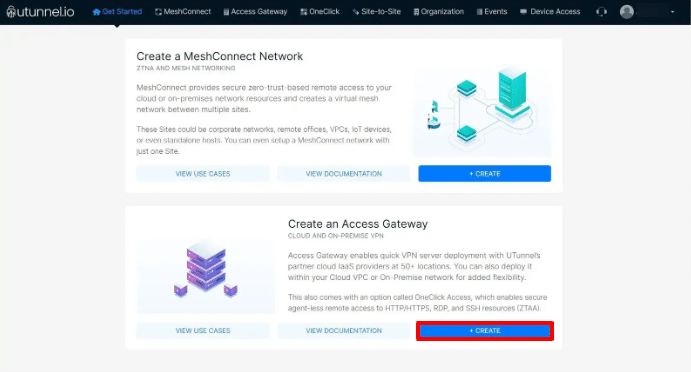
19. From the Get Started page, click the Create button under the Create Access Gateway section if you have just set up a fresh Utunnel account. Otherwise, navigate to the Access Gateway tab and click Create Gateway.
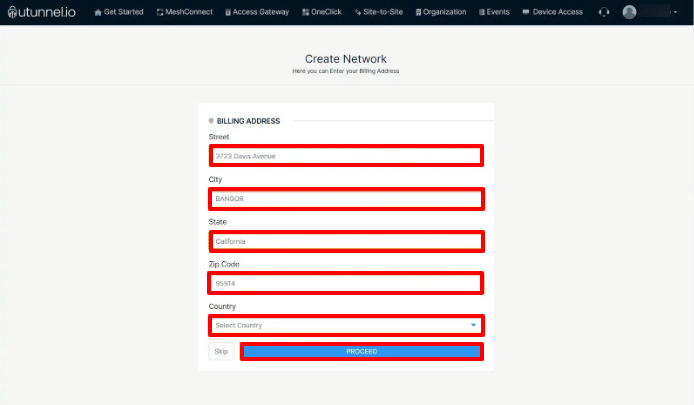
20. If prompted, enter your billing address. You may also choose to skip this step by clicking on Skip and add it later, or you can choose to proceed by clicking on PROCEED.
21. On the Create Access Gateway screen, fill in the required details:
-
- Choose a subscription plan: Standard or Basic.
- Select Cloud as the Access Gateway type.
- Enter a name for your VPN Gateway.
- Choose a cloud provider and a deployment location (region).
- Select the desired cloud VPS specifications and the number of user licenses.
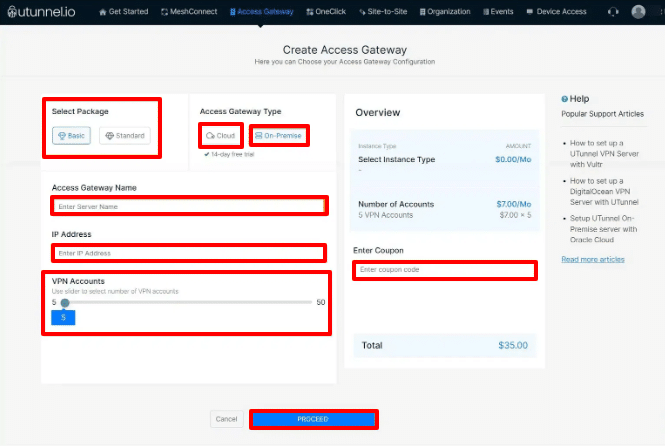
Now, click on PROCEED.
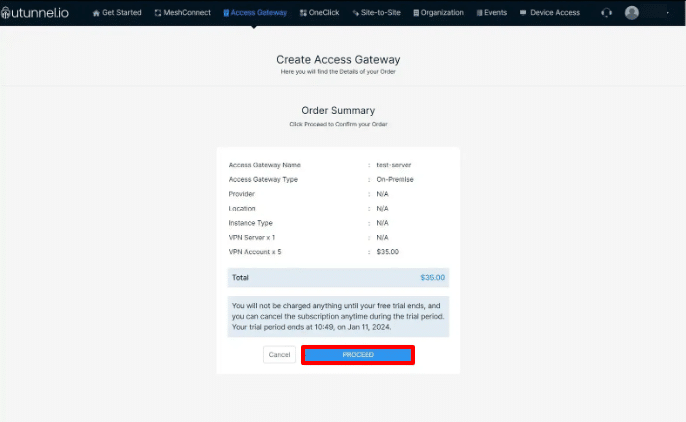
22. Review the order summary and monthly subscription charges. Click on PROCEED.
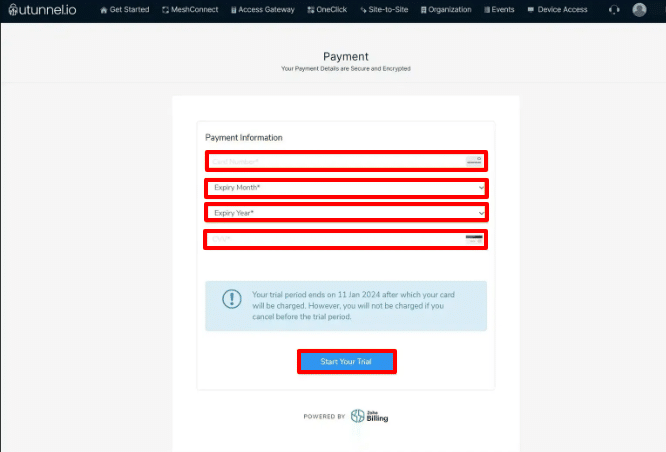
23. Proceed to payment and complete the transaction (you will be asked to enter the details if it is your first subscription). Click Start Your Trial/Pay Now.
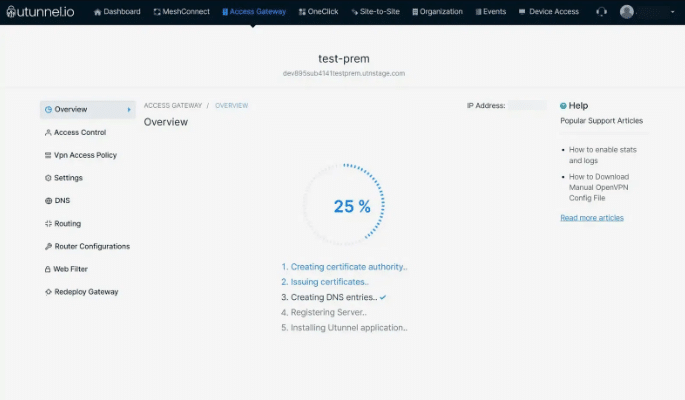
24. After a successful payment, you will be redirected to Access Details Gateway page where you can monitor the server creation progress via the UTunnel web console.
25. Once the Access Gateway deployment is initiated, you will receive a registration token, which you will need to register your Kamatera VPN gateway.

And that’s it! You have now successfully configured a UTunnel VPN on a Kamatera cloud server. Happy networking!