


Configuring additional IP addresses (IP aliasing) on a Linux system is a requirement for isolating or load-balancing services, or simply hosting multiple distinct applications from a single cloud server. This guide details the process of adding secondary IPs using standard Linux utilities. We will show you how to identify your network interface, apply a temporary IP using the ip command, and implement a permanent configuration to maintain stability and persistence after reboot.
Before you begin adding and configuring multiple IP addresses on your Linux server, it’s important to make sure your system and network setup are ready. These commands will be executed in your Linux terminal (either locally or via SSH).
Here are the key requirements, tools, and preparations that should be in place:
- A Linux system with administrative access that is logged in as root or with sudo access.
- An active network interface.
- Basic understanding of IP addressing.
- A back-up of current network configurations.
- Network tools installed, like ip addr add, ip link show (part of the iproute2 package), ifconfig.
- Firewall permissions to allow traffic from additional IP or port or service (Firewall tools depend on which version of Linux you have installed).
Step 1. Check your network interface
Before adding a new IP, you must first identify your network interface name, like eth0, ens33, or enp0s3. If you don’t know the interface name, your command will fail. Linux needs to know where to attach the new IP.
Execute the following command in your Linux terminal (either locally or via SSH) to check your network interface.
Command:
Ip addr show
or
ip a
You will see something like:
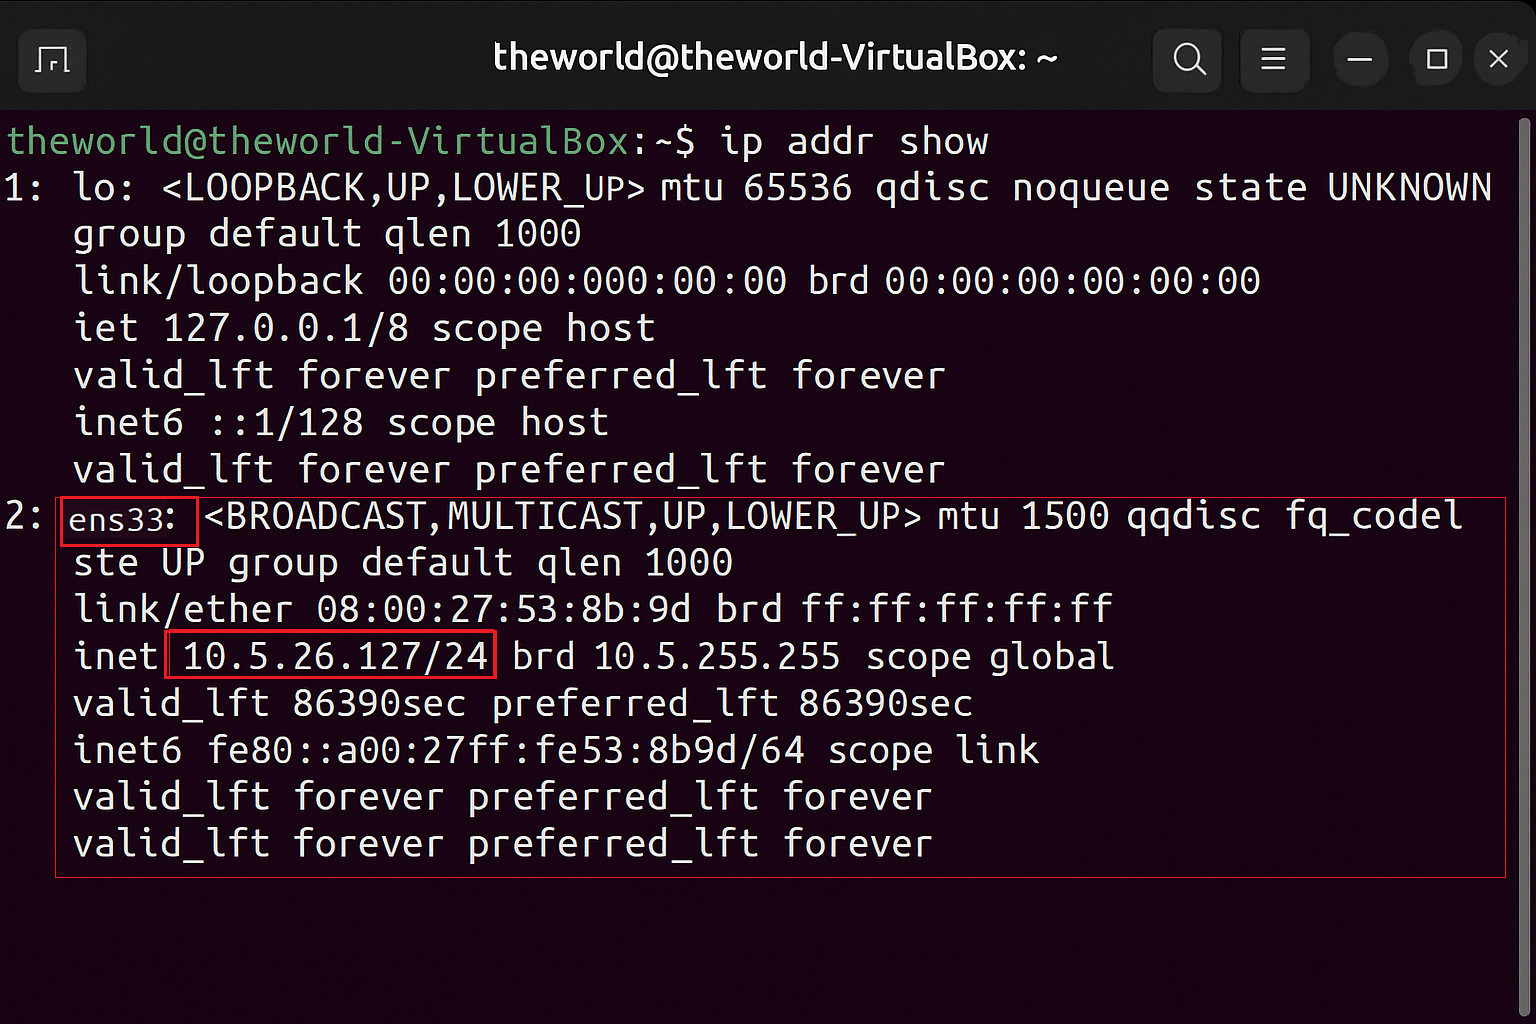
2: eth0: <BROADCAST,MULTICAST,UP,LOWER_UP> mtu 1500
Inet 10.5.26.127/24 brd 10.5.255.255 scope global eth0
In our example, the network interface is eth0 with current IP 10.5.26.127 and subnet mask 24.
Step 2. Add a temporary IP (valid till next reboot)
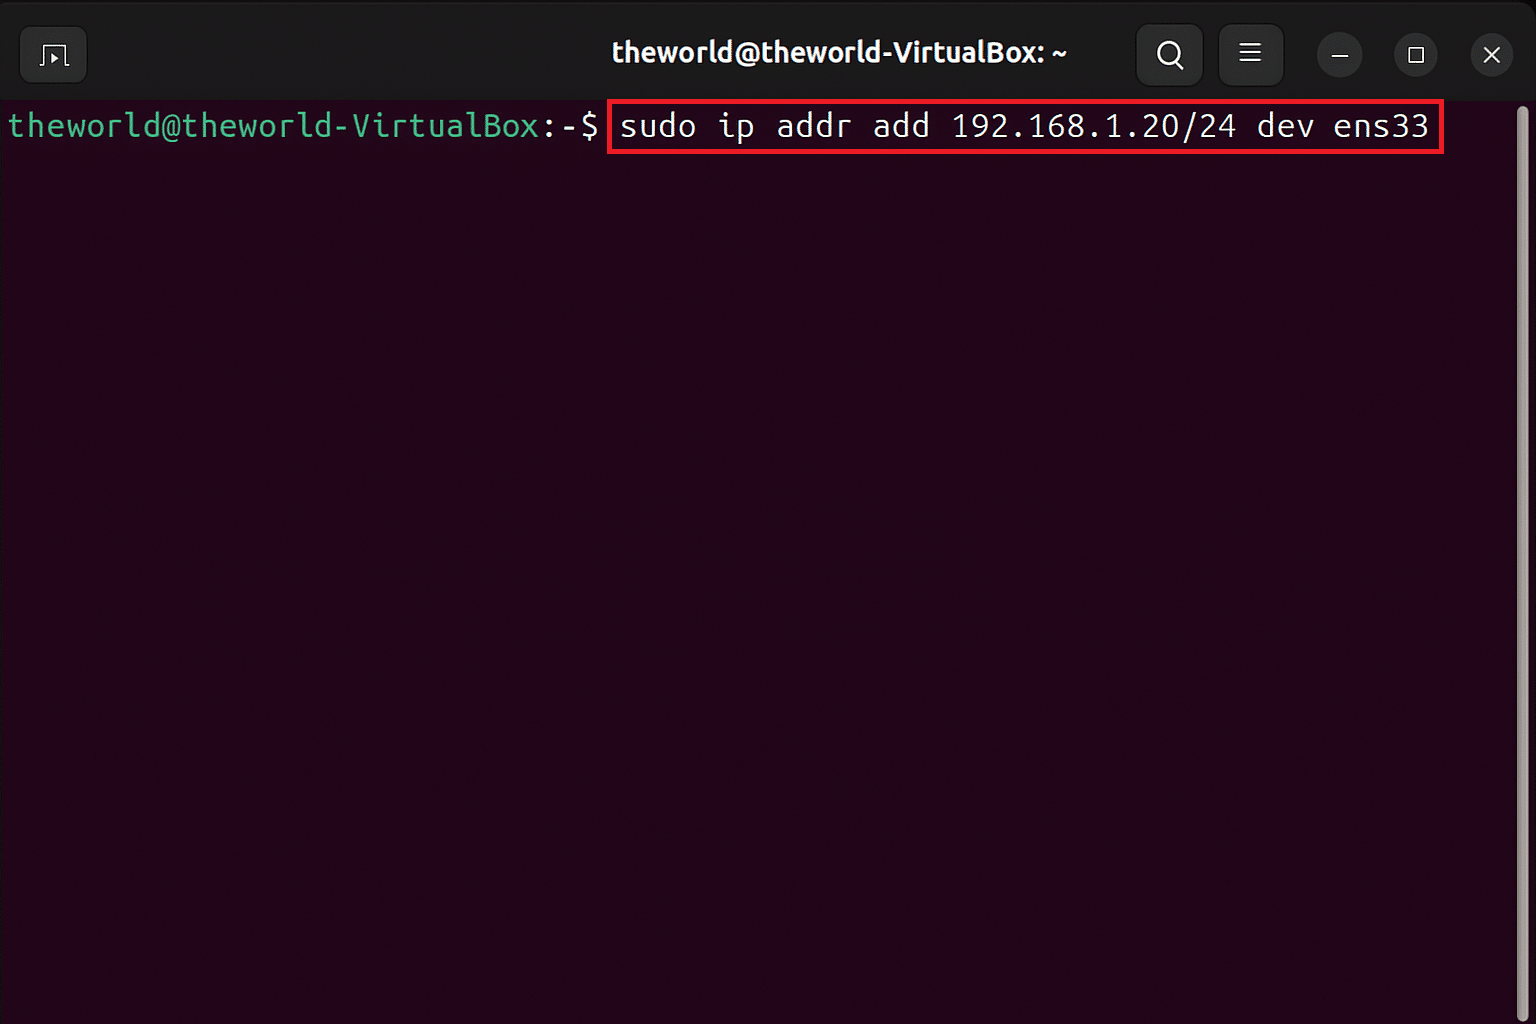
To add an IP, the network tool ip from iproute2 package must be installed. For reference, if your current IP is 192.168.1.10 and you want to add 192.168.1.20 as an additional IP, then use the following command:
sudo ip addr add 192.168.1.20/24 dev ens33
Here is what it does:
-
- sudo: Runs the command as an administrator
- ip: The main Linux command-line tool for network configuration (from the iproute2 package).
- addr: Specifies that you’re working with IP addresses.
- add: To add new IP address.
- 192.168.1.20/24 – The new IP address you want to assign with /24 subnet mask of 255.255.255.0
- Dev ens33 – The network interface for which the IP is to be added.
To verify it has been added use either of the commands below.
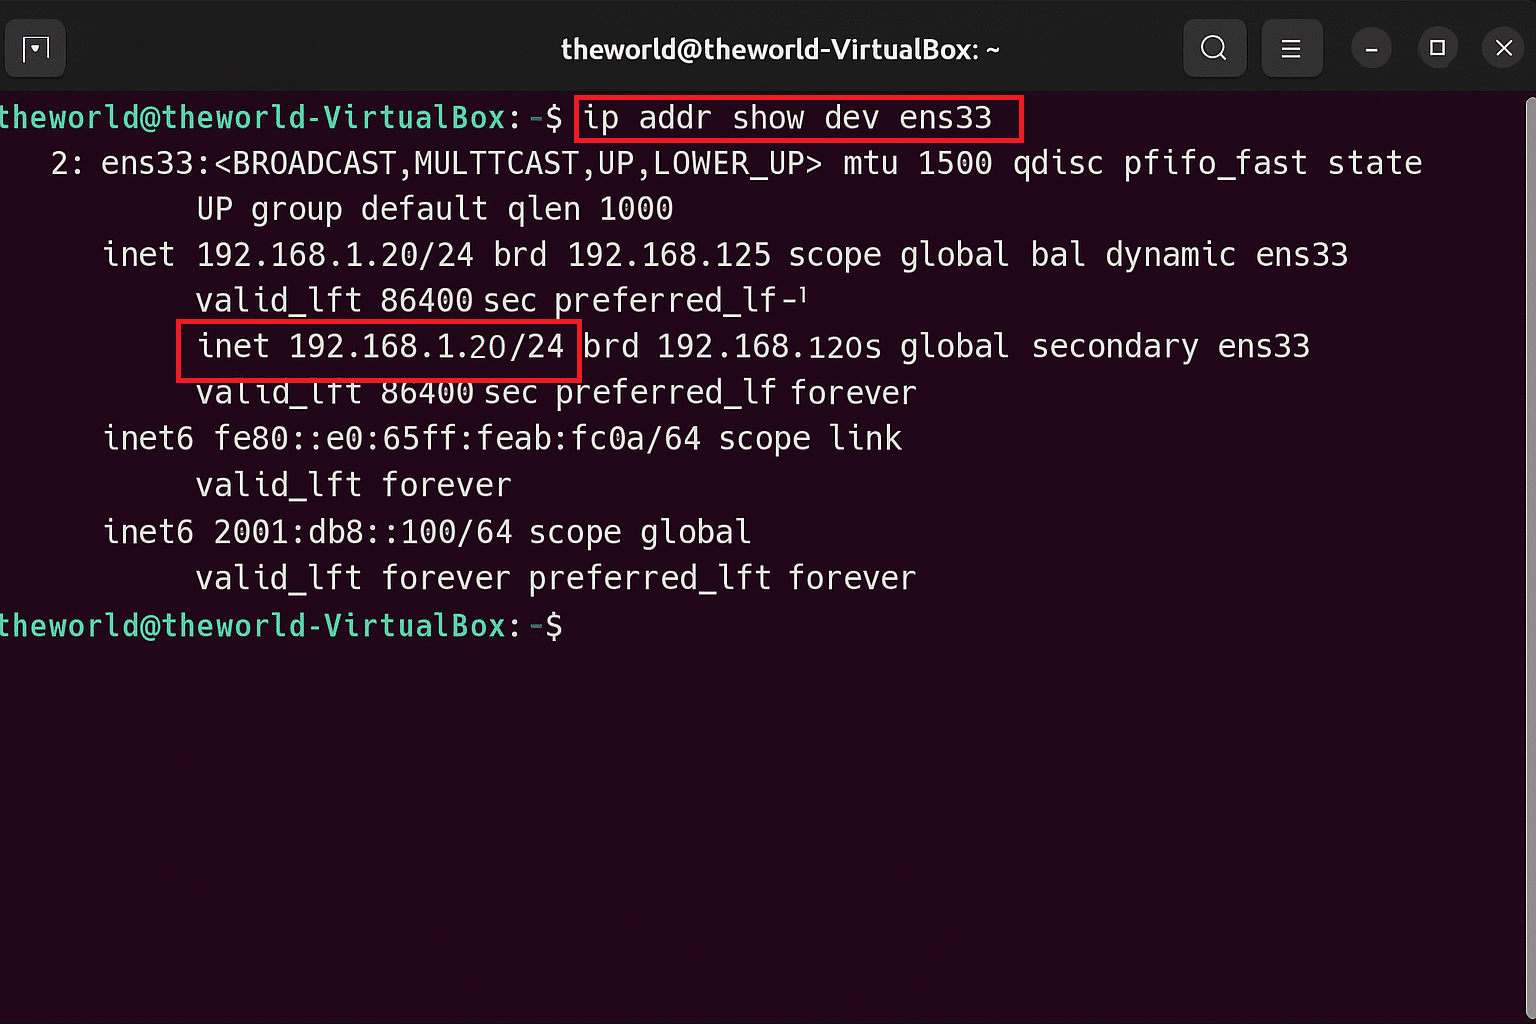
ip addr show dev ens33
or
ip a show ens33
You will see something like:
inet 192.168.1.20/24
Note: Since this change is temporary, it will disappear after the reboot.
Step 3. Permanent additional IP address (Ubuntu/Debian Netplan)
This guide demonstrates how to add an IP address using Netplan, which applies to Ubuntu systems and any other operating system that uses Netplan for network configuration. While other operating systems may use different configuration files and syntax, the underlying networking principles remain the same.
Netplan is a network configuration tool used in modern Ubuntu and Debian systems which lets you define your network settings like IP addresses, DNS, and gateways in a single YAML configuration file.
-
-
- To open the netplan configuration file, type the below command and press enter.
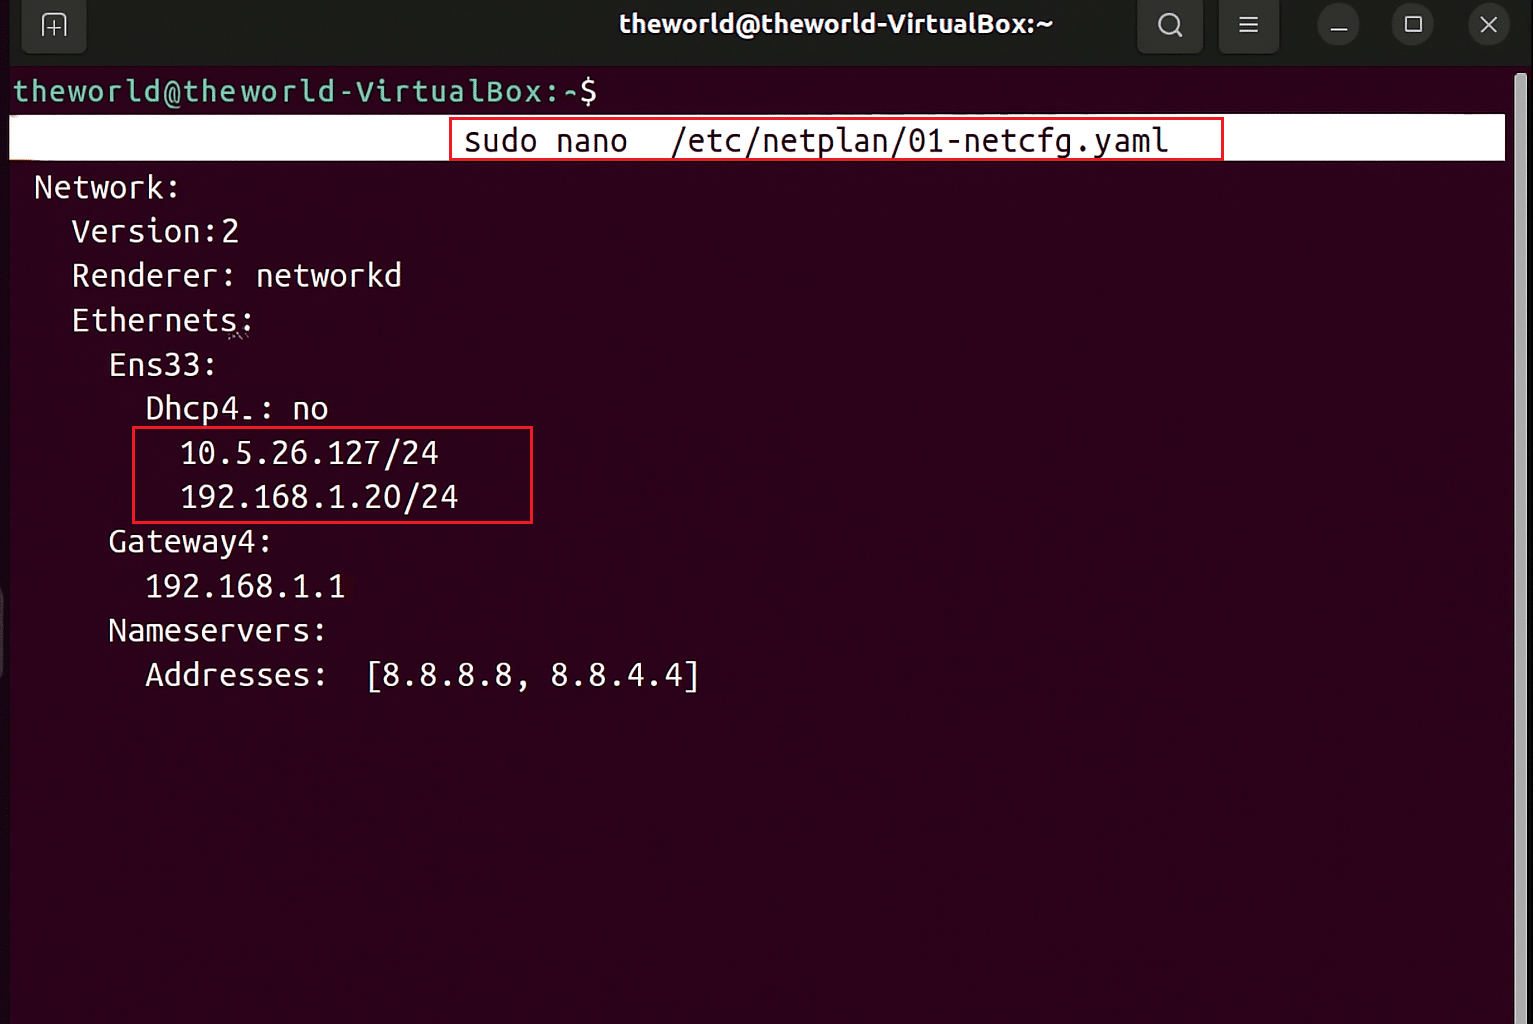
sudo nano /etc/netplan/01-netcfg.yaml
Here is what it does:
-
-
- sudo: Runs the command as an administrator.
- nano: Opens a text editor inside the terminal
- /etc/netplan/01-netcfg.yaml: the file path to Netplan’s network configuration file, where you define or change IP settings
-
-
- Once your yaml file is open in text editor, change or add the static IP as below.
Network:
Version: 2
  Renderer: networkd

  Ethernets:

    Ens33:

      Dhcp4: no

      Addresses:

        - 10.5.26.127/24

        - 192.168.1.20/24

      Gateway4: 192.168.1.1

      Nameservers:

        Addresses: [8.8.8.8, 8.8.4.4]
Here is what it does:
-
-
- Addresses: list of IP addresses (you can have multiple entries)
- Gateway4: default gateway for outgoing traffic.
- Nameservers: DNS servers (Examples to test configuration: public Google DNS, open-source software.)
Server IPs (Production): Users can add their preferred secure DNS IPs, e.g., 8.8.8.8/8.8.4.4 or your internal organizational DNS]
- The renderer can be NetworkManager or networkd depending on your system type.
-
-
- Once the changes are made, save the file (Ctrl + O, Enter, Ctrl + X). If you want to test before applying permanently, use the below command, which gives you additional 120 seconds to confirm. That means if anything breaks, it will revert automatically.
sudo netplan try
To apply the configuration, use the following command:
sudo netplan apply
-
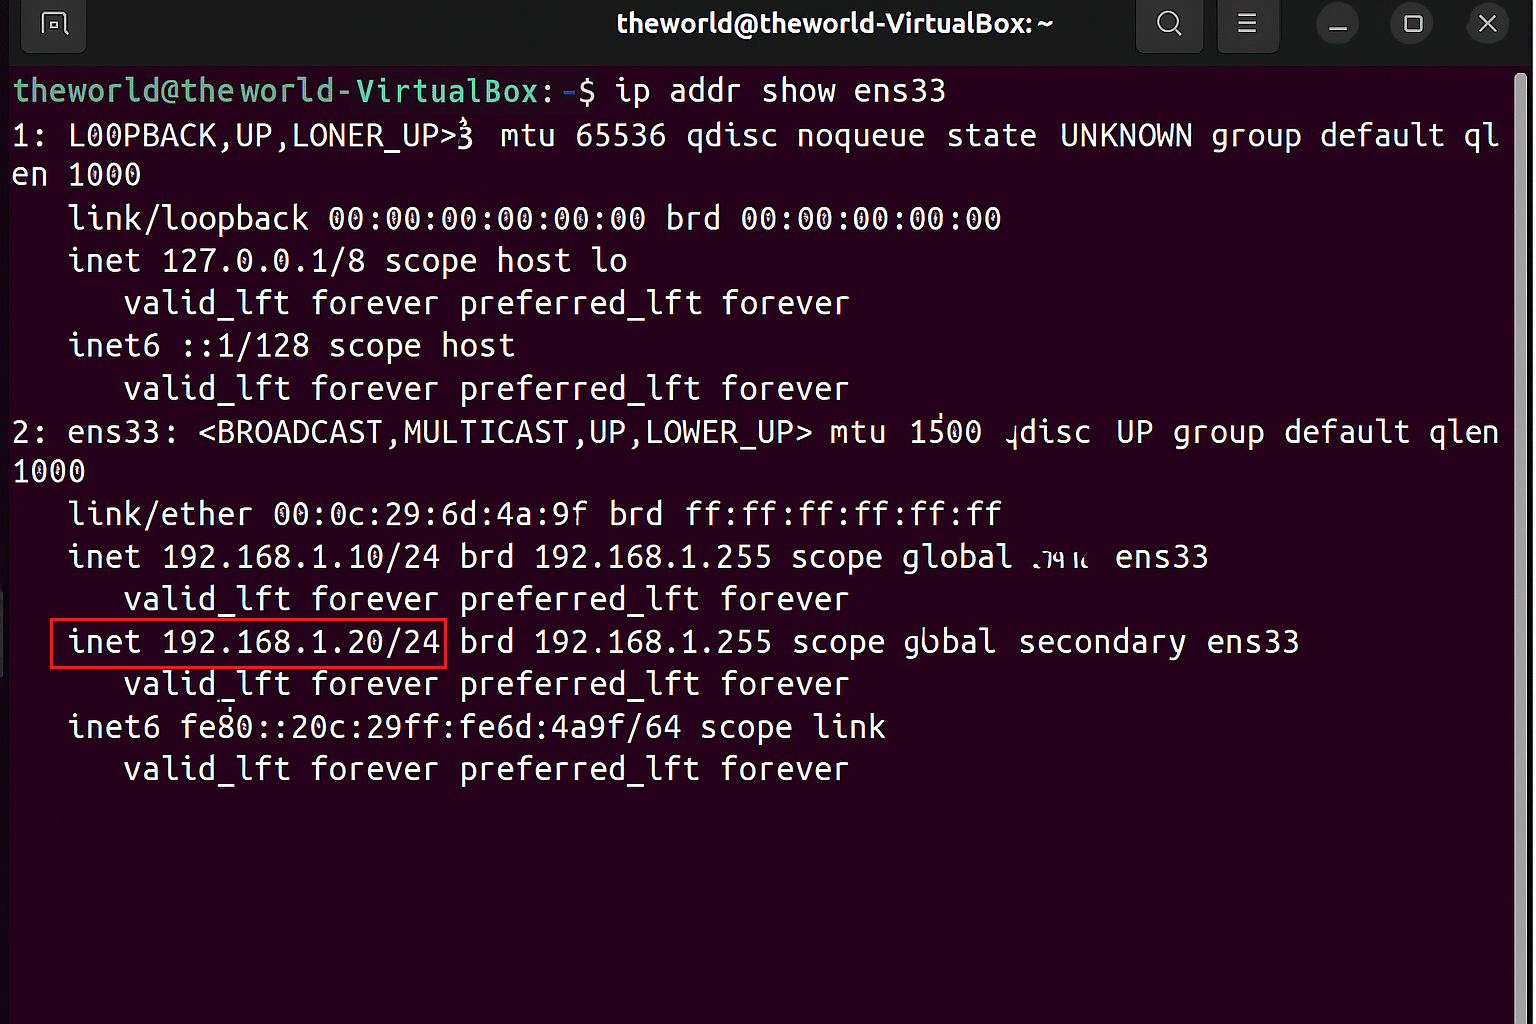
- To verify the changes and to check whether both IPs are active, use:
ip addr show ens33
- To verify the changes and to check whether both IPs are active, use:
You will see something like:
1: lo: <LOOPBACK,UP,LOWER_UP> mtu 65536 qdisc noqueue state
UNKNOWN group default qlen 1000
link/loopback 00:00:00:00:00:00 brd 00:00:00:00:00:00
inet 127.0.0.1/8 scope host lo
valid_lft forever preferred_lft forever
inet6 ::1/128 scope host
valid_lft forever preferred_lft forever
2: ens33: <BROADCAST,MULTICAST,UP,LOWER_UP> mtu 1500 qdisc fq_codel
state UP group default qlen 1000
link/ether 00:0c:29:6d:4a:9f brd ff:ff:ff:ff:ff:ff
inet 192.168.1.10/24 brd 192.168.1.255 scope global ens33
valid_lft forever preferred_lft forever
inet 192.168.1.20/24 brd 192.168.1.255 scope global secondary ens33
valid_lft forever preferred_lft forever
inet6 fe80::20c:29ff:fe6d:4a9f/64 scope link
valid_lft forever preferred_lft forever
Configuring multiple IP addresses is a vital skill for managing a versatile Linux server. The use of modern tools like ip for temporary changes and structured configuration management (like Netplan) for permanent persistence ensures a reliable outcome. You can now confidently utilize IP aliasing to expand the functionality and security of your Kamatera cloud server, knowing your network setup is stable and correctly configured for the long term.
-