


In this guide, we’ll walk through how to deploy NextCloud, a powerful open-source platform for file sharing, collaboration, and personal or enterprise cloud storage. It gives users full control over their data while offering features like file syncing, secure sharing, calendar, contacts, and productivity tools. Let’s dive into the step-by-step guide for setting up NextCloud on Kamatera.
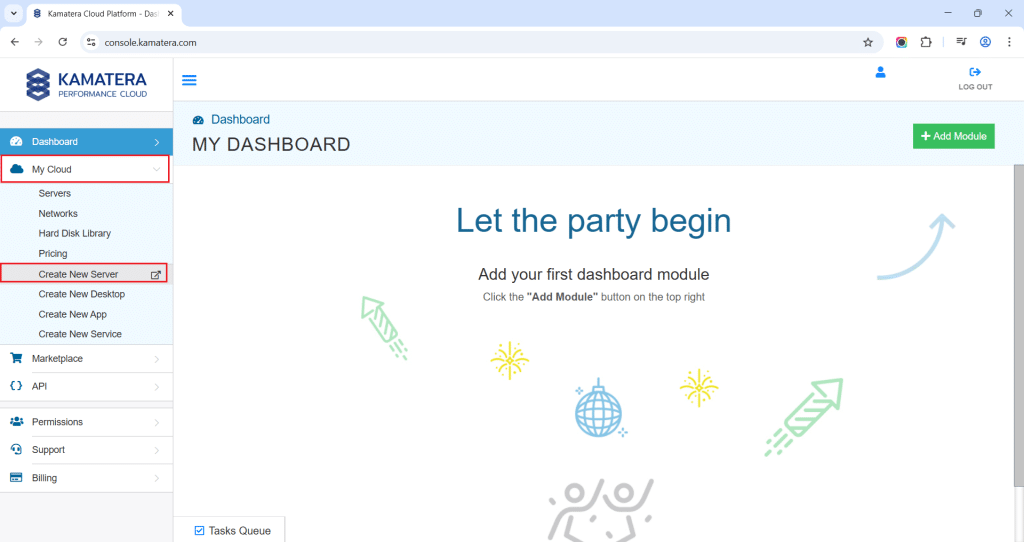
Log in to the Kamatera console
The first step in deploying NextCloud on Kamatera is to log in to your Kamatera cloud management console.
Set up your server
Once logged in, you will be presented with the dashboard. This is where you’ll manage servers, networking, and storage.
- Expand the My Cloud option on the right bar and choose Create New server.
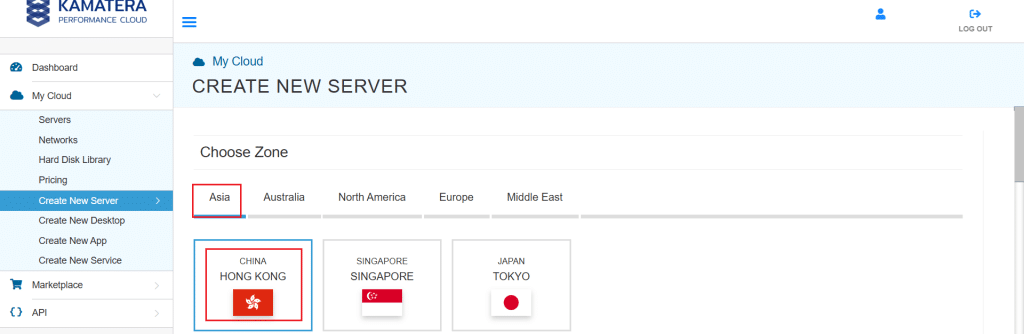
- Under create new server option, choose Zone.
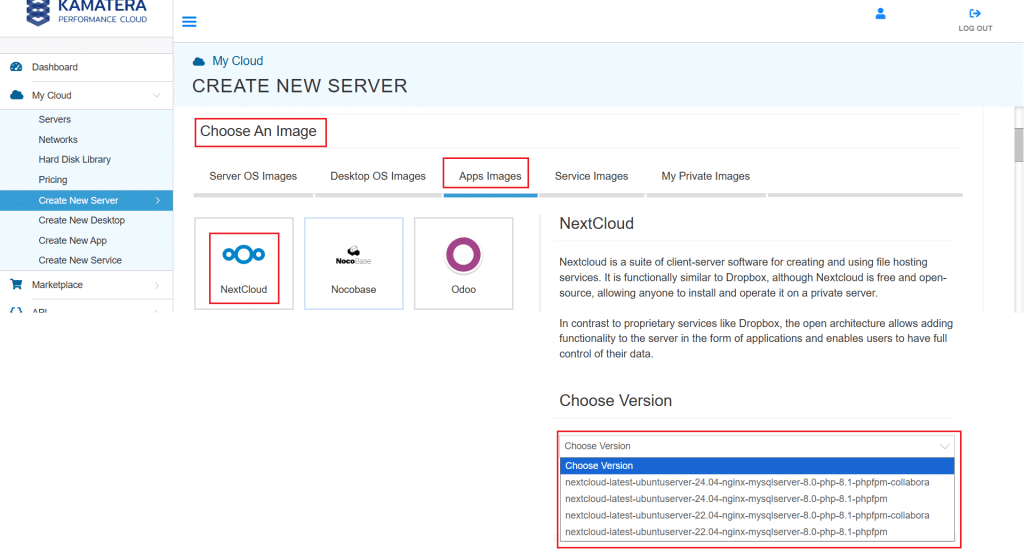
- Scroll down and look for the NextCloud option under the App Images tab. Once selected, choose the version associated with the app image.
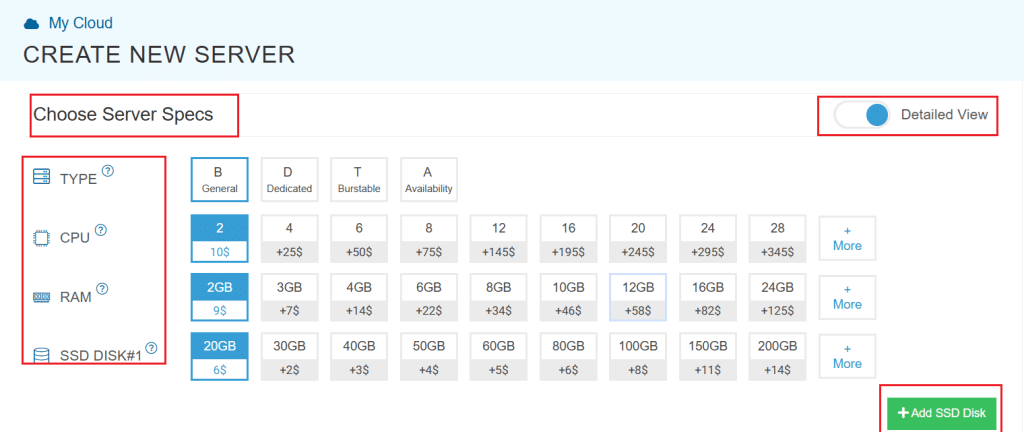
- Once you choose the version, scroll down, and enable the Detailed View toggle and input the server specifications.
- Choose your desired server type, CPU, RAM, and disk storage. Click on the help button to learn more about the settings. You can add more disk storage at any time.
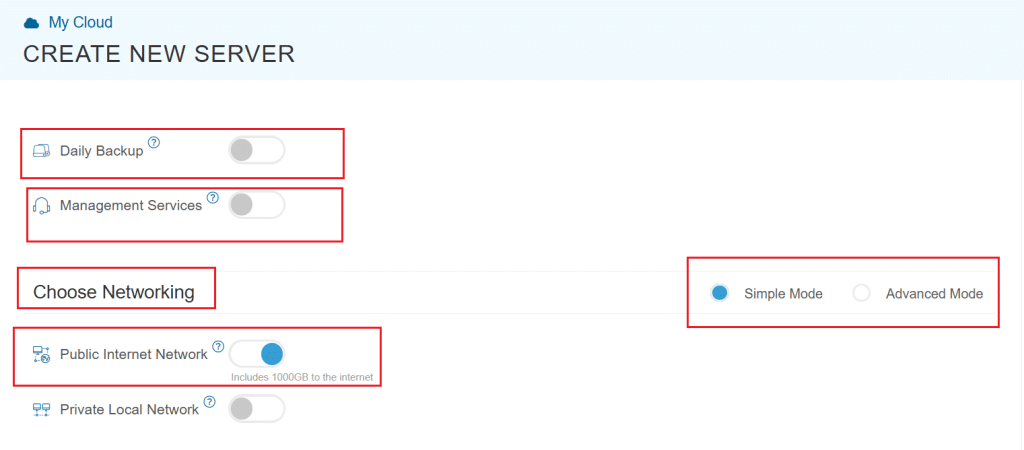
- Enable the Daily backup option, if a daily backup of your server storage is needed.
- Enable Management Services toggle to sign up for a server that is managed by Kamatera’s professional services team.
- Choose Networking option, either simple or advanced mode. This section lets you define how your server will connect to the internet and how much outbound data it can use per month.
- Simple Mode – Choose between WAN or LAN.
- Advanced Mode – NIC #1 (Network Interface Card)
-
- WAN (selected): This means your server will be accessible from the internet. It will get a public IP.
- The other options (LAN, Private, etc.) are only needed for internal or isolated setups, which are not relevant for a public-facing NextCloud instance.
Advanced configuration options
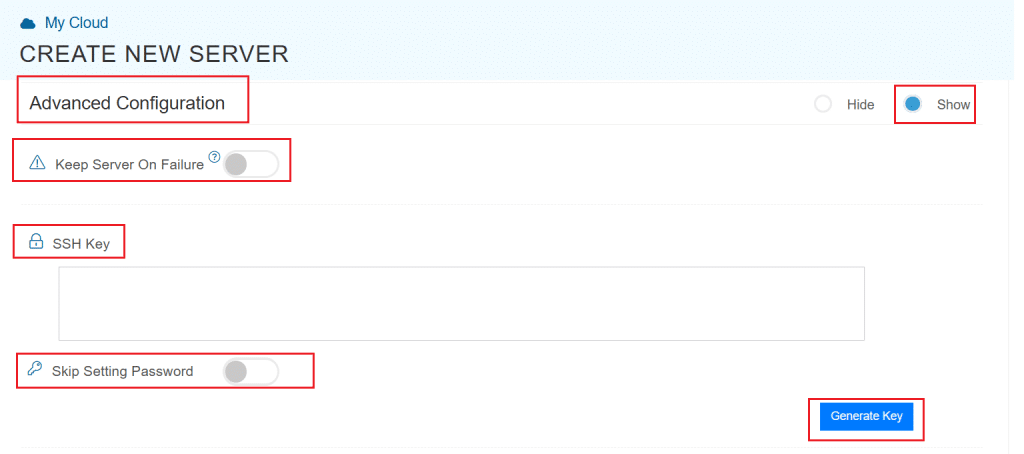
- Proceed to Advanced Configuration, if required.
-
- Keep Server On Failure. This option controls what happens if something goes wrong while setting up your server for example, if a startup script fails. If this setting is OFF (default), Kamatera will automatically delete the server if the setup fails. It becomes useful if you want to avoid paying for a broken setup. But you won’t be able to debug what went wrong. If this setting is ON, Kamatera will keep the server running, even if something fails during the initial setup. This lets you log in, investigate the issue, fix problems manually, and retry setup if needed.
Recommended for most users:
Keep it OFF unless you’re running custom scripts or complex configurations. For basic setups like Nextcloud, the default (OFF) is usually fine.
- SSH key: Allows you to securely connect to the server without a password (recommended for better security).
- Skip Setting Password: If enabled, your server will only allow SSH key login—no password access.
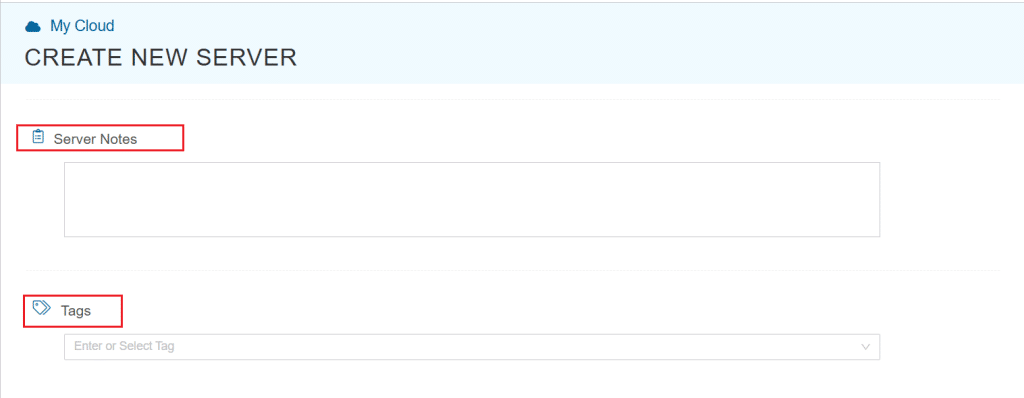
You can click “Generate Key” if you don’t already have one. Input further server notes and tags if necessary.
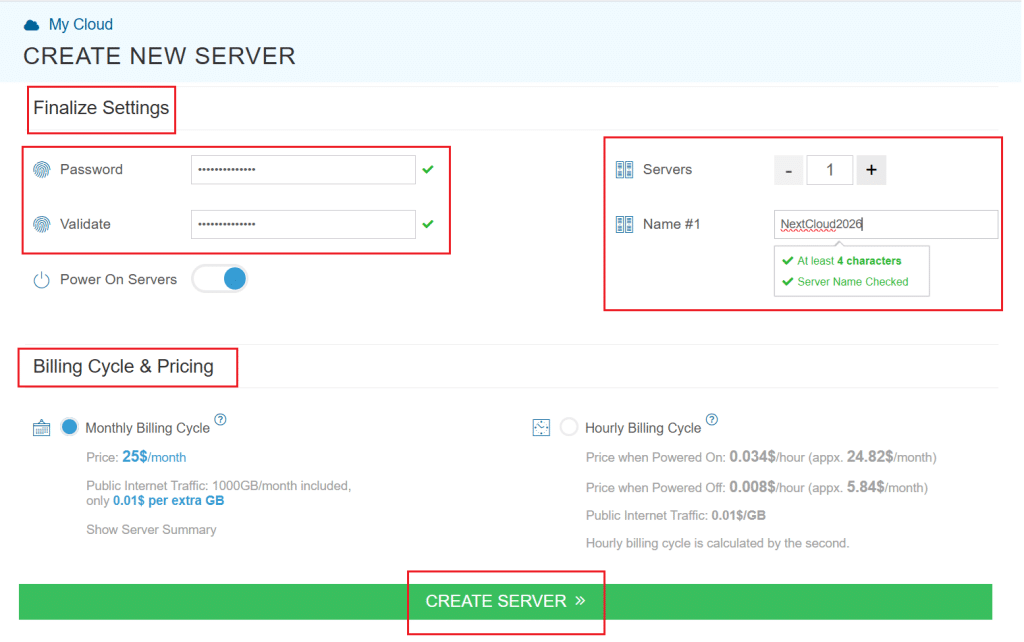
- Finally, choose a strong password, select the number of servers, and input a server name.
- Once all details are inputted, choose billing cycle and click on Create server button.
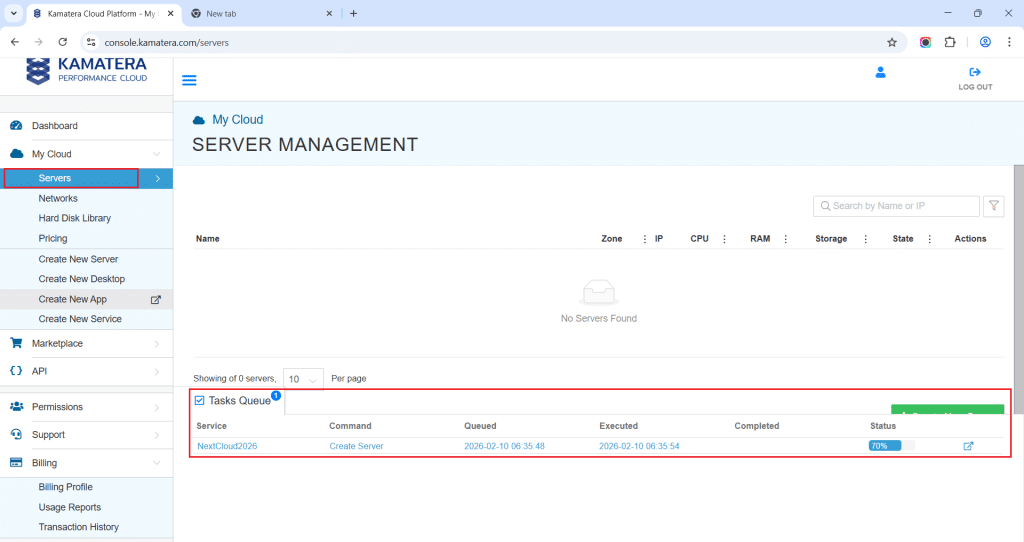
You can check the server creation progress under Server > Task Queue.
Note: NextCloud web interface is available at port 443.
Once created, the server will be visible under the same Servers panel.

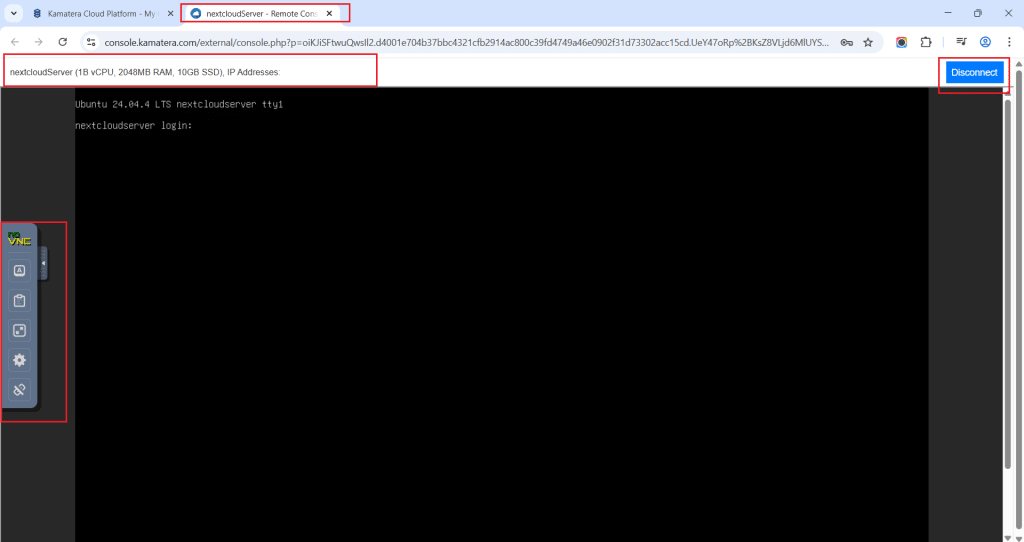
To open the remote server further, click on Connect and Open Remote Console, and it will open the remote machine in a separate window where the user can access the console of the remote machine as well. To disconnect the remote server, click Disconnect, which will disconnect the remote session.
Conclusion
Deploying Nextcloud on Kamatera gives you a secure, scalable, and cost-effective private cloud solution. With just a few configuration steps—choosing the right server specs, storage, networking, and image—you can get a fully functional Nextcloud instance running in minutes. Whether you’re setting it up for personal use or team collaboration, Kamatera’s flexibility makes it easy to grow and adapt as your needs evolve.