


In this guide, we’ll walk through how to securely deploy Vaultwarden on a Kamatera VPS, to transform it into a fully private password manager with hardened access controls. By self-hosting Vaultwarden on Kamatera’s high-performance cloud infrastructure, you gain full ownership of your vault data. But with that control comes the responsibility to secure it properly. This article emphasizes critical protections such as HTTPS encryption, restricted user signups, and strict firewall configurations, so that your Vaultwarden instance is protected from the moment it goes live.
Security objectives
When self-hosting Vaultwarden, especially on a public VPS like Kamatera, it’s critical to secure the deployment from the very beginning. The following list details the key security protections in this guide.
1. HTTPS (encrypted access)
All communication between users and the Vaultwarden server must be encrypted using HTTPS. This prevents credentials and vault data from being exposed over the network. We’ll configure a secure reverse proxy using Caddy or NGINX with Let’s Encrypt TLS certificates.
2. Restricted signups
In order to prevent unauthorized users from creating accounts, the following measures will be taken:
- Public signups will be disabled
- Invitation-only registration will be enabled
- The admin interface will be protected using a strong token and optional IP restrictions.
3. Firewall rules
Only required ports should be publicly accessible:
- Allow:
- Port 22 (SSH) only from trusted admin IPs whenever possible
- Port 80/443 only if the Vaultwarden service must be internet-facing
- Block: Vaultwarden’s internal service port (e.g., 8080) and all other unused ports
- Optional: Restrict SSH access to your own IP for added security
These measures form the foundation of a hardened Vaultwarden instance that is secure by design and resilient against common threats.
Install Vaultwarden securely
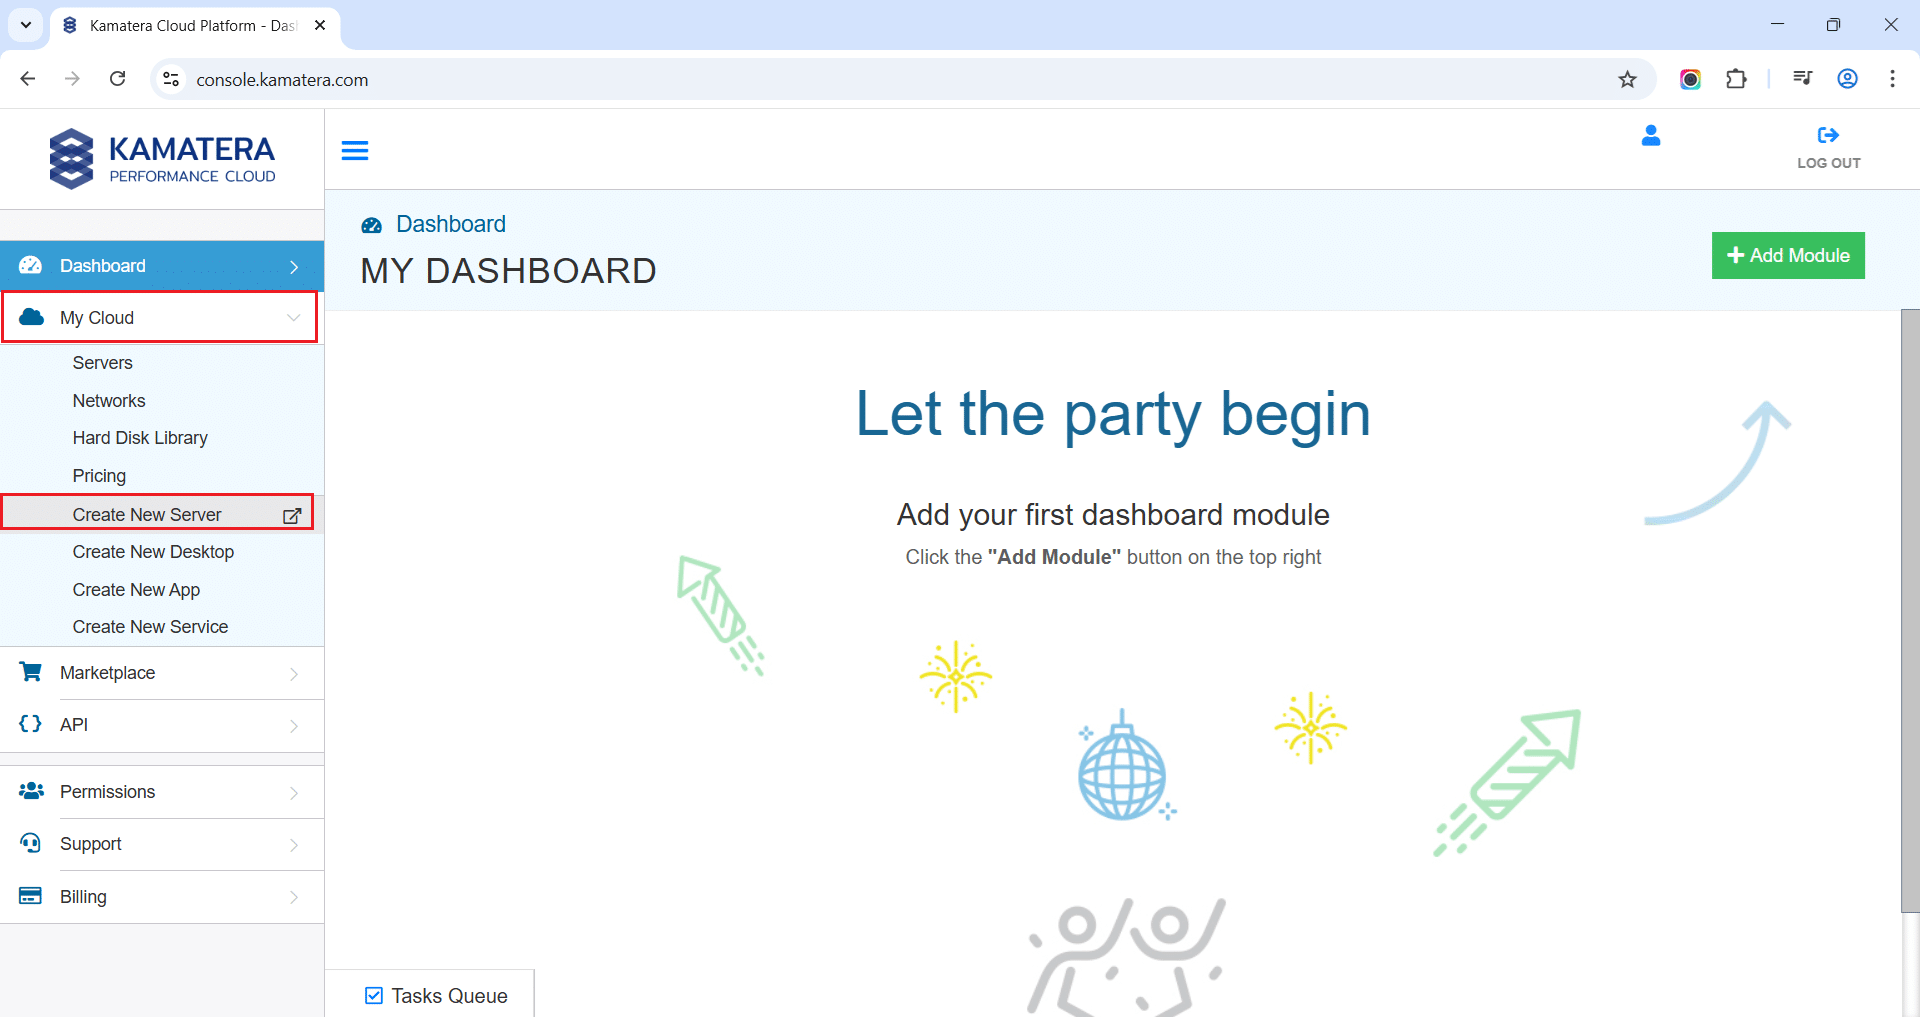
Log in to the Kamatera cloud console
The very first step in deploying Vaultwarden on Kamatera is to log in to your Kamatera console, where you can manage your cloud server.
Configure your cloud
Once logged in, you will be presented with the dashboard. This is where you’ll manage servers, networking, and storage.
- Expand the My Cloud option on the right bar and choose Create New server.
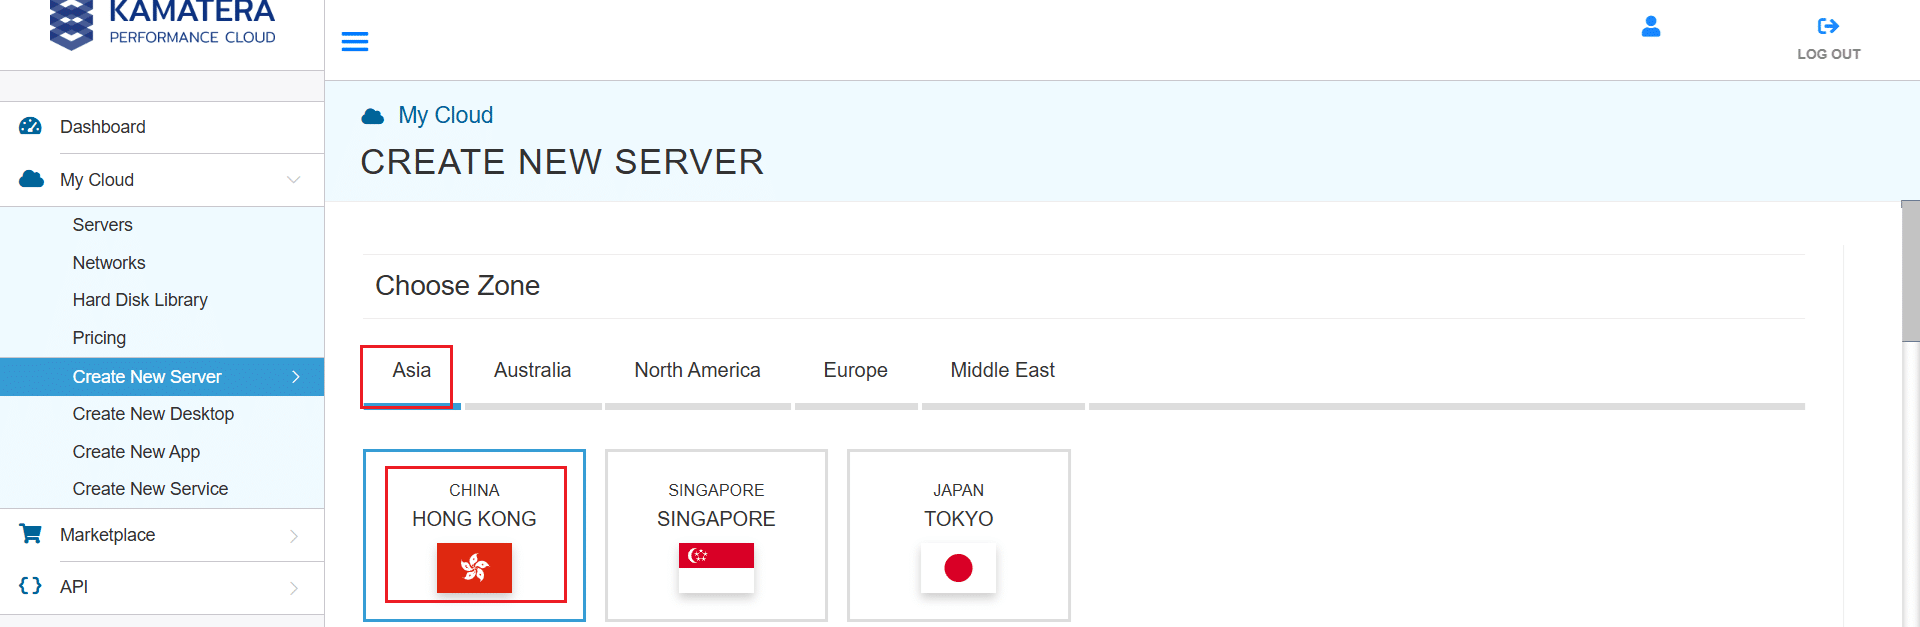
2. Under create new server option, choose Zone.
3. Scroll down and find Vaultwarden, under the App Images tab. Select it and choose the version associated with the app image.

4. Once you choose the version, scroll down, and enable the Detailed View toggle and input the server Specifications.
5. Choose the server type, CPU, RAM, and disk storage that you need. Click on the help button to learn more about the settings. You can always add more disk storage if you need it.
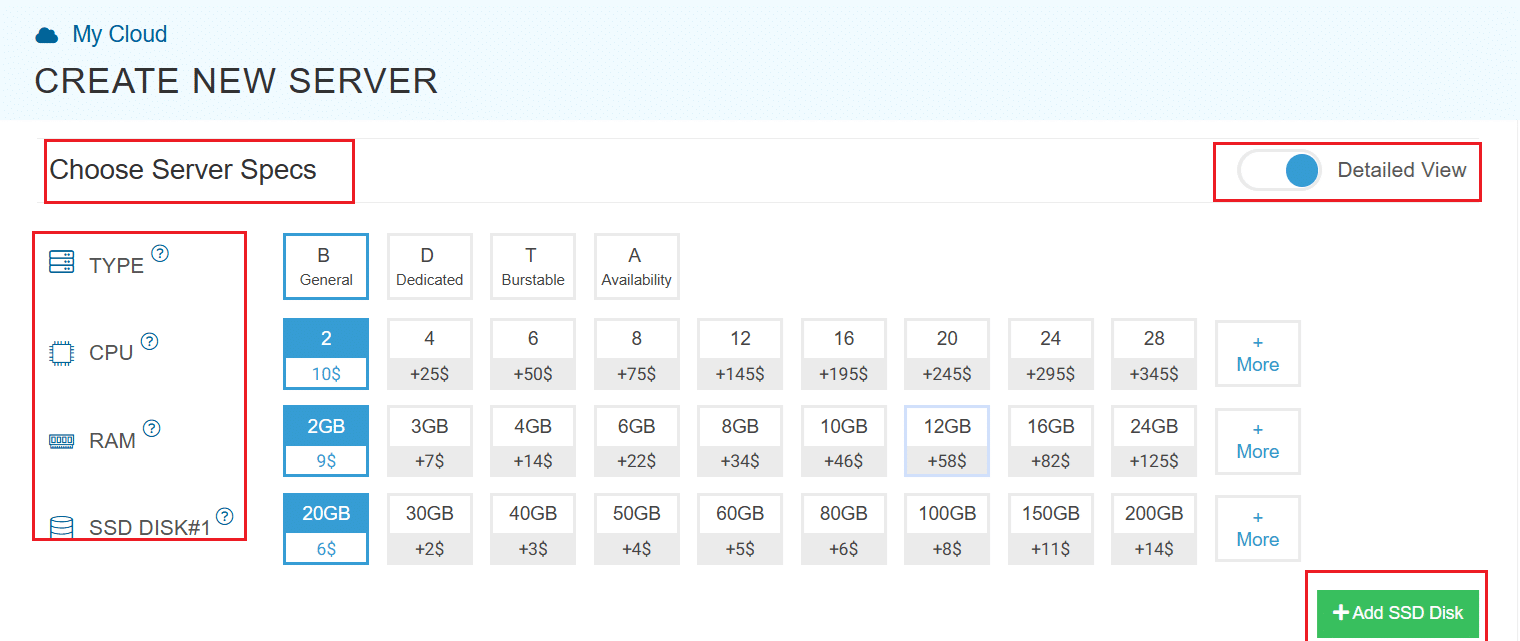
6. Enable Daily backup option if you need a daily backup of your server storage.
7. Enable Management Services toggle to have your server managed by Kamatera’s professional services team.
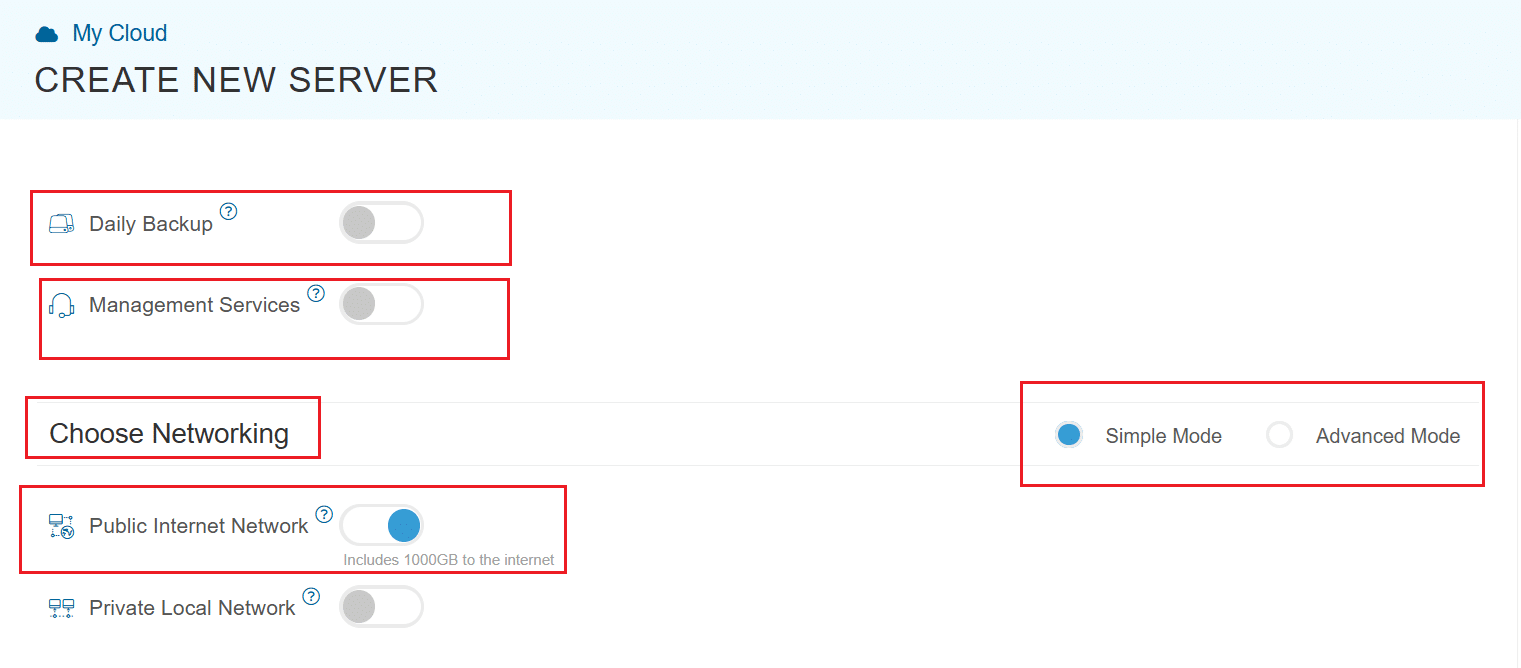
8. Choose Networking option, either simple or advanced mode. This section lets you define how your server will connect to the internet and how much outbound data it can use per month.
- Simple Mode: Choose between WAN or LAN.
- Advanced Mode: NIC #1 (Network Interface Card)
- WAN (selected): This means your server will be accessible from the internet. It will get a public IP.
- The other options (LAN, Private, etc.) are only needed for internal or isolated setups, which are not relevant for a public-facing Vaultwarden instance.
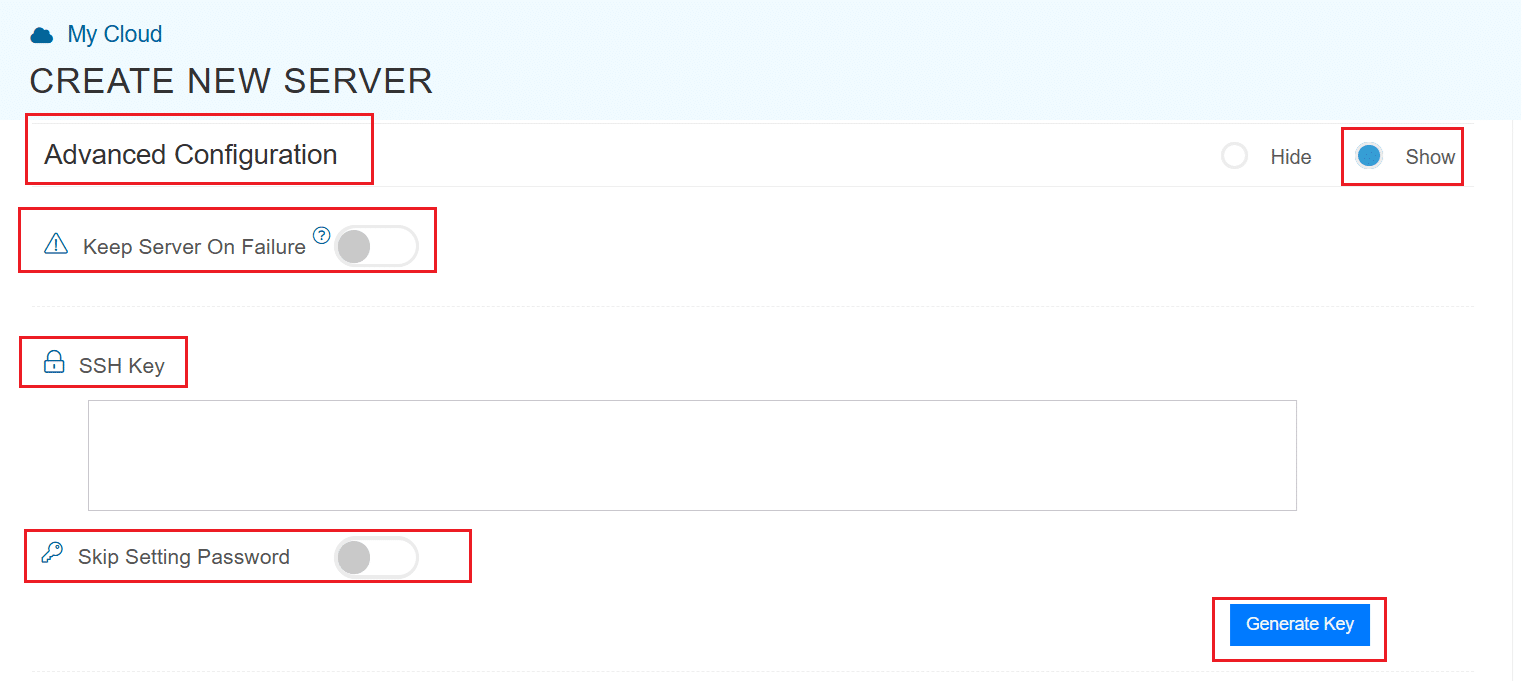
9. Proceed to Advanced Configuration, if required.
- Keep Server On Failure: This option controls what happens if something goes wrong while setting up your server for example, if a startup script fails. If this setting is OFF (default), Kamatera will automatically delete the server if the setup fails. It becomes useful if you want to avoid paying for a broken setup, but you won’t be able to debug what went wrong. If this setting is ON, Kamatera will keep the server running, even if something fails during the initial setup. This lets you log in, investigate the issue, fix problems manually, and retry setup if needed.
Recommended for most users:
Keep it OFF unless you’re running custom scripts or complex configurations. For basic setups like Vaultwarden, the default (OFF) is usually fine.
- SSH key: Allows you to securely connect to the server without a password (recommended for better security).
- Skip Setting Password: If enabled, your server will only allow SSH key login—no password access.
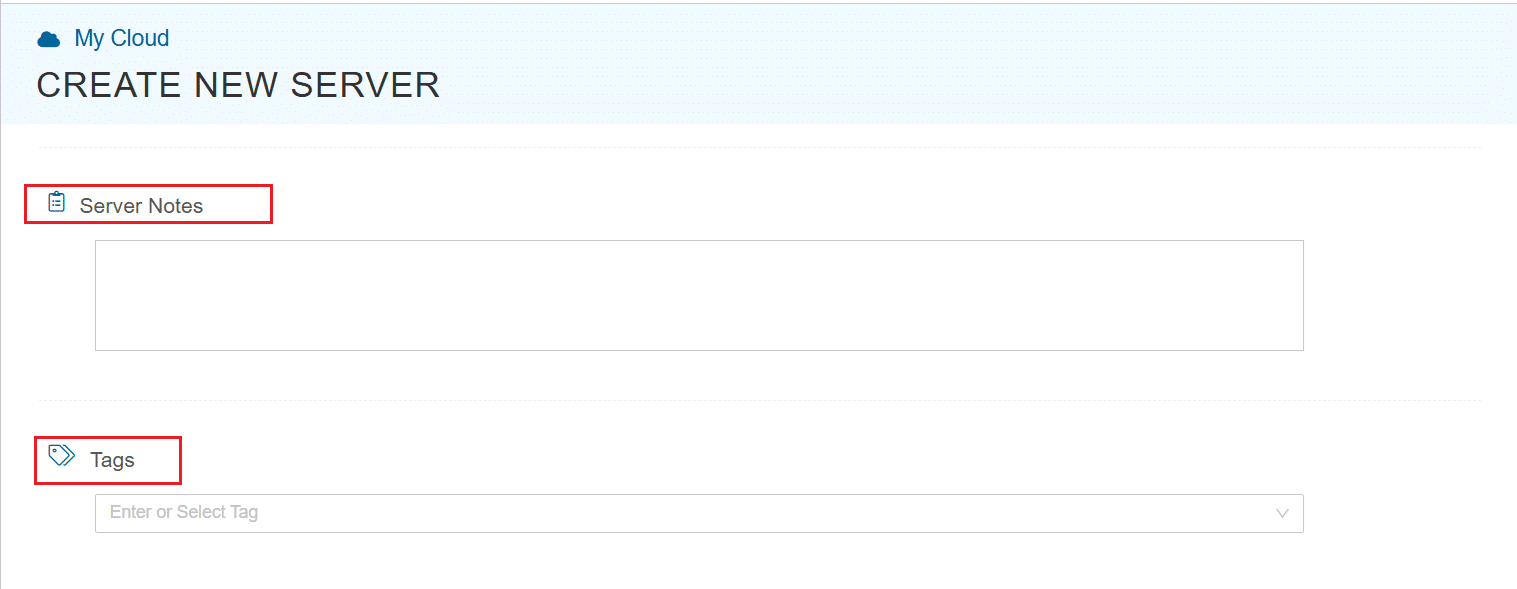
You can click “Generate Key” if you don’t already have one. Input further server notes and tags if necessary.
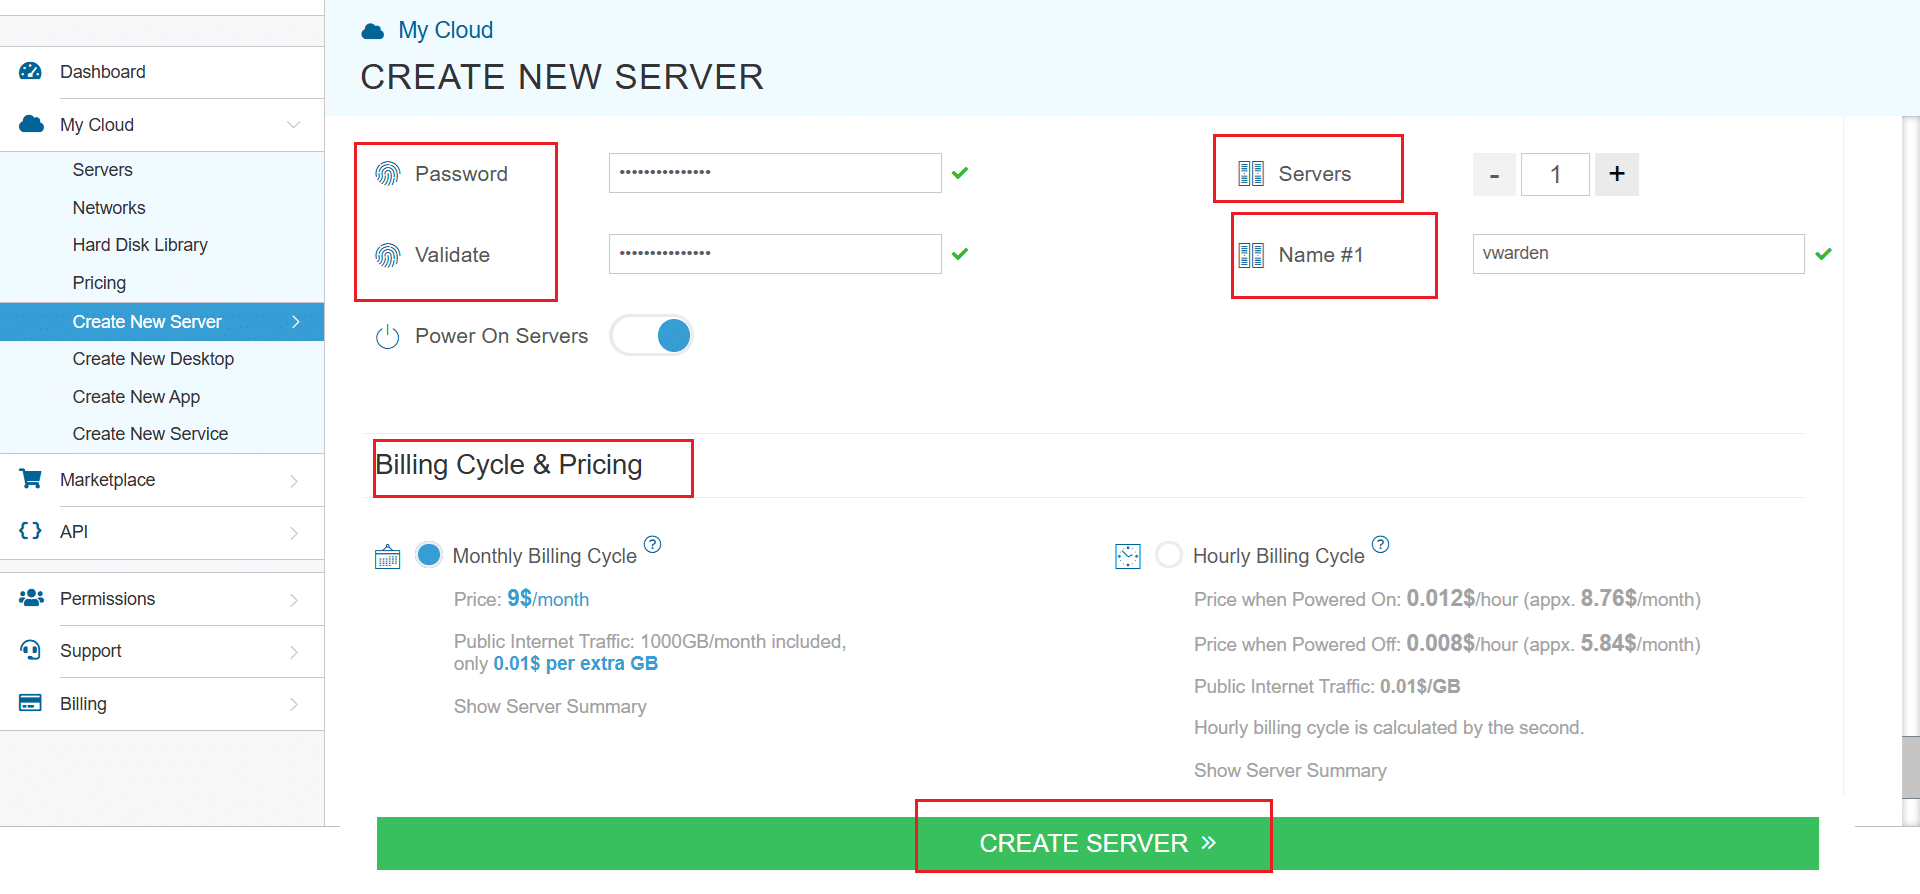
 10. Finally, choose a strong password, select the number of servers, and input a server name.
11. Once all details are inputted, choose billing cycle and click on Create server button.
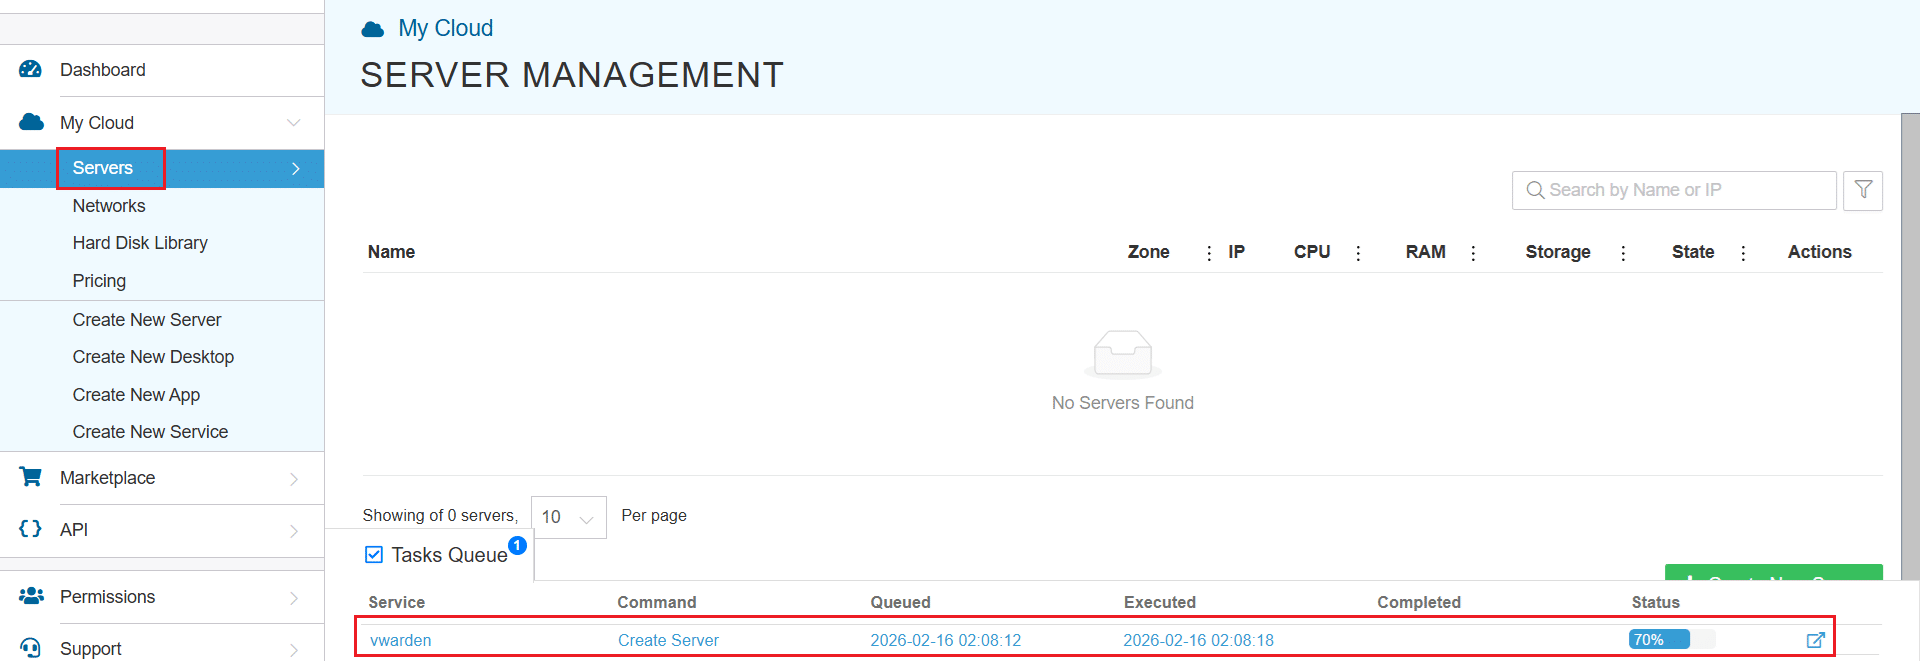
You can check the server creation progress under Server > Task Queue.
Once created, the server will be visible under the same Servers panel.
To access the remote server, click on Connect and Open Remote Console. It will open the remote machine in a separate window, where you can access the console of the remote machine, as well. To disconnect the remote server, click Disconnect, which will disconnect the remote session.
Set up HTTPS with Caddy
We will use Caddy, a web server which makes it easy to enable HTTPS with Let’s Encrypt. It will act as a reverse proxy to forward traffic securely to your Vaultwarden instance running on this server.
1. Create a Caddyfile
Create a new Caddyfile at /etc/caddy/Caddyfile:
sudo nano /etc/caddy/Caddyfile
Paste the following, replacing vault.yourdomain.com with your actual domain:
vault.yourdomain.com {

   reverse_proxy 127.0.0.1:<VAULTWARDEN_PORT>

}
Note:
- Find the listening port on the server using: sudo ss -tulpn | grep -i vault
- Use that port value in <VAULTWARDEN_PORT>.
If you’re testing without a real domain, you can use localhost.
Save and exit (Ctrl + O, Enter, Ctrl + X).
2. Install and configure Caddy as a reverse proxy
Install Caddy (if not already installed):
sudo apt update && sudo apt install -y caddy
Place your Caddyfile:
sudo nano /etc/caddy/Caddyfile
Reload Caddy:
sudo systemctl reload caddy
3. Restart the services
Restart Caddy to apply the new reverse proxy configuration:
sudo systemctl restart caddy
If Vaultwarden is managed as a service on this image, restart it using:
sudo systemctl restart vaultwarden
If vaultwarden is not a systemd service on your image, skip this step and proceed to testing.
4. Test HTTPS
- Open your browser
- Go to: https://vault.yourdomain.com
- You should see the Vaultwarden login screen with a padlock icon in the address bar
Optional: Add HSTS or Redirect HTTP
Caddy already redirects HTTP to HTTPS by default. You can optionally enable HSTS by editing your Caddyfile:
vault.yourdomain.com {

  reverse_proxy 127.0.0.1:<VAULTWARDEN_PORT>

  header {

    Strict-Transport-Security "max-age=31536000; includeSubDomains; preload"

  }

}
Save, and run:
sudo systemctl reload caddy
Restrict signups and admin access
Since our focus is on security best practices, this section ensures that:
- Only invited users can register
- The admin interface is protected
These settings must be configured in the Vaultwarden configuration used by your Kamatera prebuilt image. Below is how to verify they’re active.
1. Disable public signups
Configure these in the Vaultwarden configuration used by the Kamatera prebuilt image:
SIGNUPS_ALLOWED=false

INVITATIONS_ALLOWED=true
This ensures:
- Users cannot register freely
- Only invited users (via email link) can create accounts
To test:
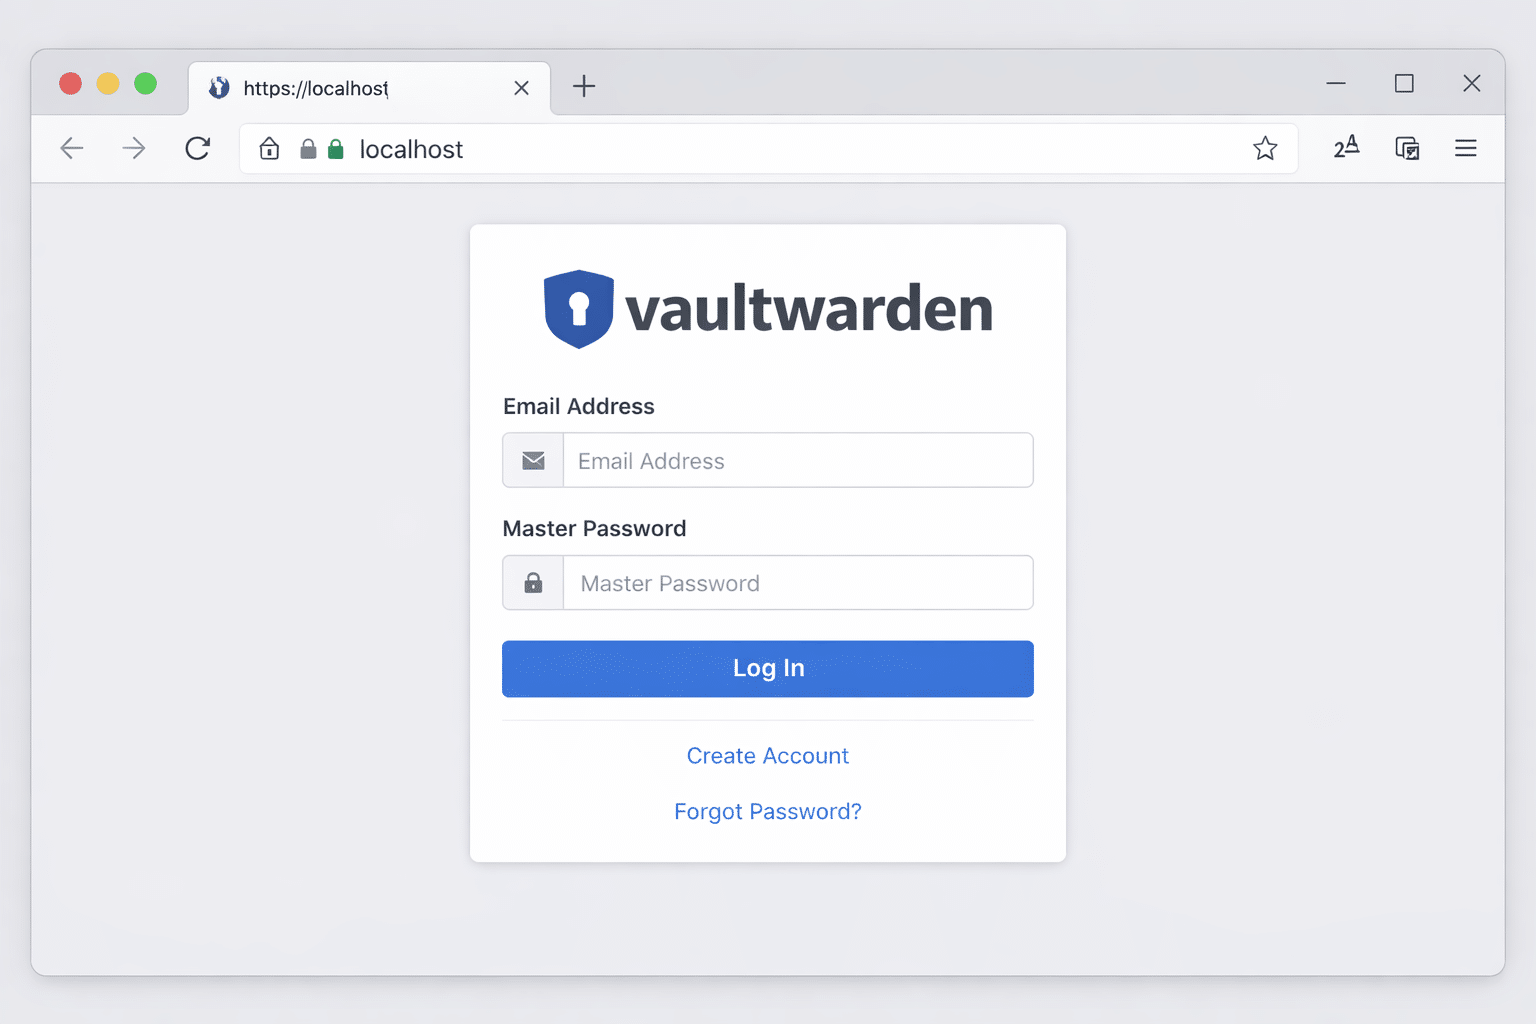
- Open your Vaultwarden instance (https://localhost)
- Confirm there is no “Create Account” or “Sign Up” option visible on the login page
2. Protect admin interface
Configure this in the Vaultwarden configuration used by the Kamatera prebuilt image:
ADMIN_TOKEN=your-long-secure-token
To test:
- Visit: https://localhost/admin
- It should ask for your admin token
- Paste the token (from your .env file)
- You’ll enter the admin dashboard with options to manage settings and users
Best practice: Hide admin panel from the internet (optional)
For production use, you should:
- Access /admin only from a specific IP range (if using Nginx)
- Never expose it publicly if not needed
This is optional for local use.
Firewall configuration
Best practice: restrict inbound access to trusted IPs whenever possible. At minimum, allow SSH (22) only from your office/VPN/public admin IP(s). Expose 80/443 publicly, only if the Vaultwarden service must be internet-facing.
A properly configured firewall ensures that only required ports are accessible, and everything else is blocked. This is critical when hosting Vaultwarden on any public or private server.
We’ll use UFW (uncomplicated firewall), a simple and effective tool for managing firewall rules on Ubuntu.
1.Install UFW (if not installed)
sudo apt install ufw
2. Allow only required ports
These are the ports Vaultwarden (with Caddy) needs:
sudo ufw allow from <YOUR_TRUSTED_PUBLIC_IP>/32 to any port 22 proto tcp
Replace <YOUR_TRUSTED_PUBLIC_IP> with your office/VPN static IP. If you have multiple admin IPs, add one rule per IP. Do not enable UFW until you confirm SSH access is working from the allowed IP.
sudo ufw allow 80/tcp
sudo ufw allow 443/tcp
3. Enable the firewall
Now enable UFW (this may ask for confirmation):
sudo ufw enable
4. Check firewall status
Confirm your rules are active:
sudo ufw status
Expected output:
| To | Action | From |
|---|---|---|
| 22/tcp | ALLOW | <YOUR_TRUSTED_PUBLIC_IP> |
| 80,443/tcp | ALLOW | Anywhere |
| 80,443/tcp (v6) | ALLOW | Anywhere (v6) |
Basic hardening best practices
These are additional security steps you should follow to harden your Vaultwarden setup:
1. Disable Root SSH Login (optional but recommended)
Edit the SSH config file:
sudo nano /etc/ssh/sshd_config
Find this line:
PermitRootLogin yes
Change it to:
PermitRootLogin no
Then restart SSH:
sudo systemctl restart ssh
2. Use SSH Key Authentication
If not already done:
- Generate SSH key pair on your local machine
- Add your public key to /home/youruser/.ssh/authorized_keys
- Disable password-based login for extra protection (optional)
3. Protect sensitive files
Make sure the Vaultwarden config file used by your prebuilt image is locked down (owner-only read/write).
4. Keep system updated
Run this regularly:
sudo apt update && sudo apt upgrade -y
Backup strategy (quick mention)
Back up Vaultwarden’s persistent data:
What to back up:
- Vaultwarden data directory used by the prebuilt image (contains database + attachments)
- Vaultwarden configuration files you edited on the server (if any)
- Reverse proxy configuration (example: /etc/caddy/Caddyfile)
How:
You can use rsync, tar, or a cron job to copy these to another location or external disk.
Example:
sudo tar -czvf vaultwarden-backup.tar.gz <VAULTWARDEN_DATA_DIR> /etc/caddy/Caddyfile
Replace <VAULTWARDEN_DATA_DIR> with the actual data directory used by the Kamatera Vaultwarden prebuilt image.
Automate it via cron if needed.
Testing the deployment
Here’s a quick checklist to verify your deployment:
- Can you access Vaultwarden at https://localhost?
- Is the connection encrypted (even self-signed)?
- Is the sign-up button hidden? (SIGNUPS_ALLOWED=false)
- Does /admin ask for an admin token?
- Do only ports 22, 80, and 443 show in sudo ufw status?
- Is the Vaultwarden config file used by the prebuilt image restricted to owner-only access?
Conclusion
You’ve successfully deployed Vaultwarden securely on Kamatera using the Vaultwarden prebuilt image and HTTPS with Caddy.
Key protections included:
- HTTPS (even for localhost)
- Signup restriction and admin token
- Firewall rules via UFW
- Restricted administrative access and hardened server configuration
- Extra hardening (root SSH disabled, file permissions, updates)
- Basic backup steps
This setup forms a strong baseline for production-grade deployment when paired with a real domain and external access.