


Arch Linux is a lightweight and highly customizable Linux distribution designed for advanced users who prefer full control over their system setup. It follows a rolling-release model, providing access to the latest software updates and system components without the need for major version upgrades.
Installing Arch Linux on a Kamatera server gives you a clean, minimal base to build upon, which is perfect for developers, or system administrators who want a fully tailored Linux environment in the cloud. This guide walks you through the steps to install Arch Linux using a Server OS image on the Kamatera cloud platform.
Create an account on Kamatera
Go to console.kamatera.com and sign up for an account by providing the following information:
- Verify Your Email: Click on the verification link sent to your email by Kamatera.
- Password: Enter your password.
- Repeat Password: Re-enter your password and click Create Account.
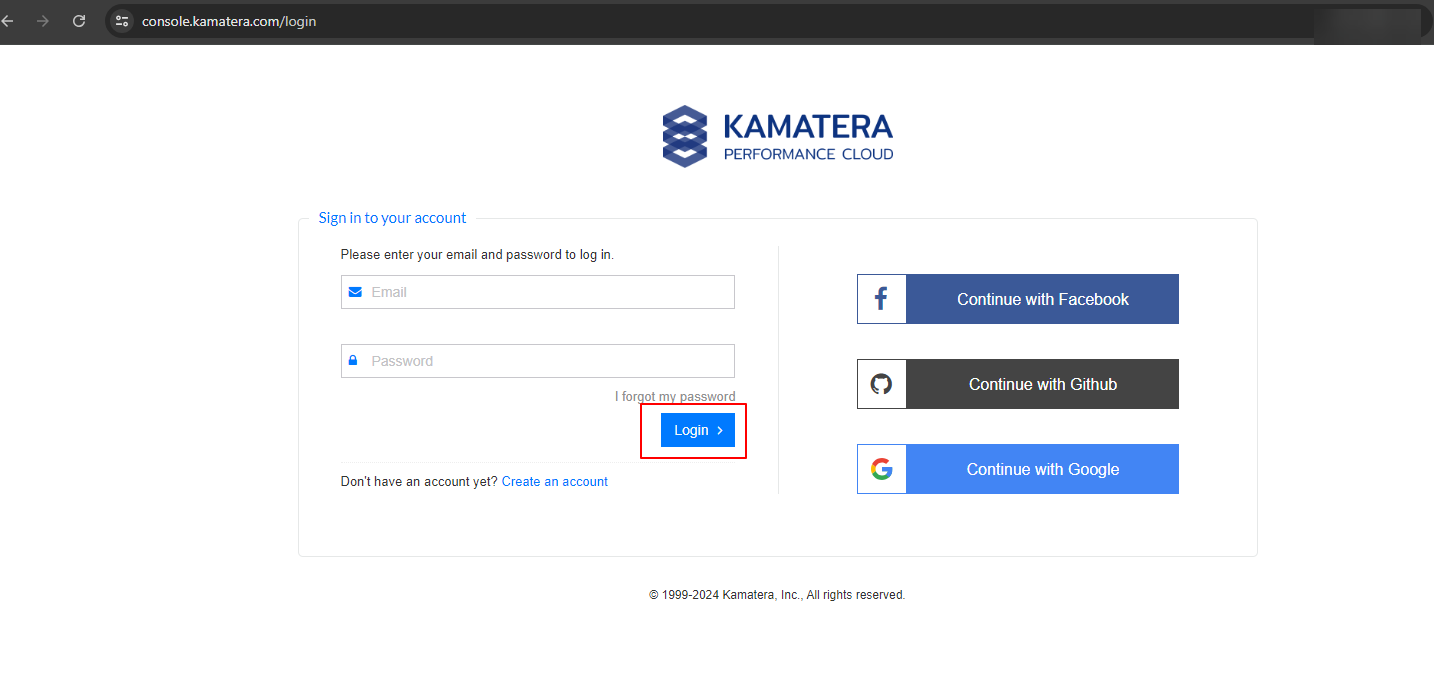
Access the Kamatera management console
- Enter your username and password and click Login to access Kamatera Management Console.
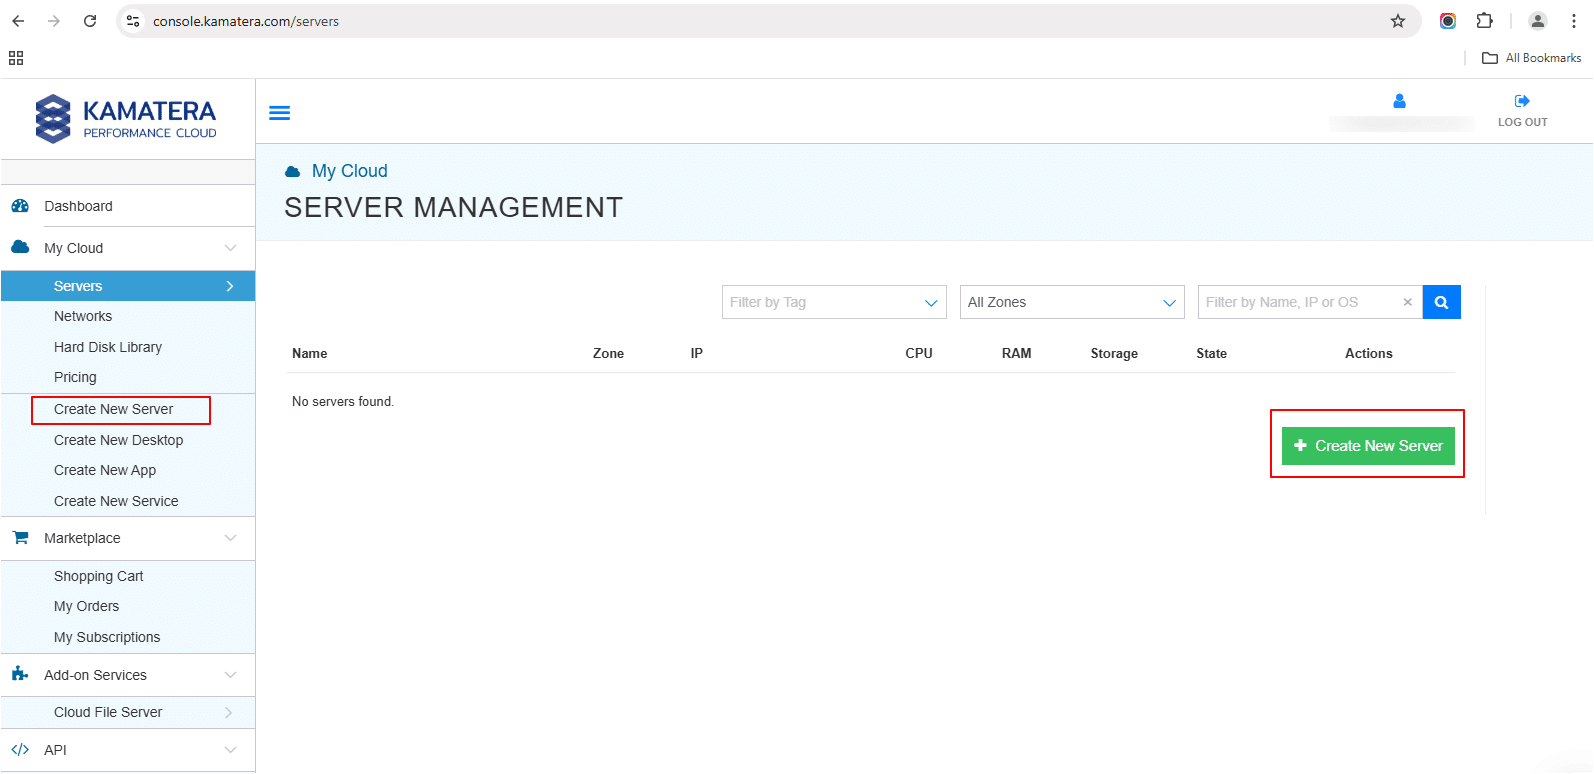
Navigate to My Cloud on the left-hand side, select the Servers and click on Create New Server. Otherwise, click on +Create New Server in the middle pane.
Under Choose Zone, select the zone from the following options:
- Asia
- North America
- Europe
- Middle East
Note: For this setup, we used the Asia server domain to set up the Arch Linux Server.
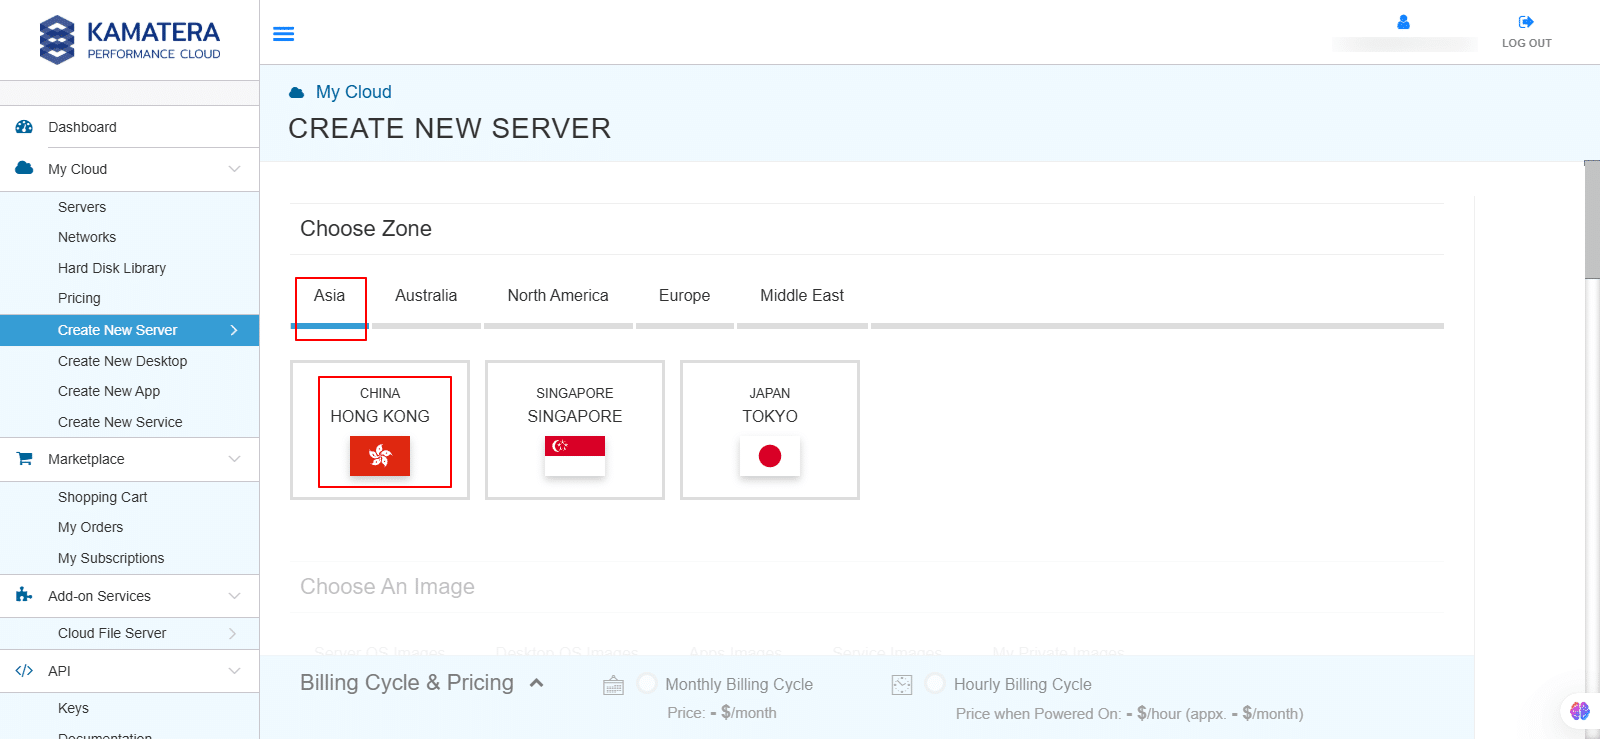
Choose an image
Kamatera offers a variety of app and server images to help users set up preconfigured resources. Users can explore options such as
- Server OS images
- Desktop OS images
- App images
- Service images
- My private images
Choose Server OS Images and select Arch Linux. Then, choose the latest version of Arch Linux from the drop-down menu.

Toggle the Detailed view button to enable you to view the detailed description, including the price.
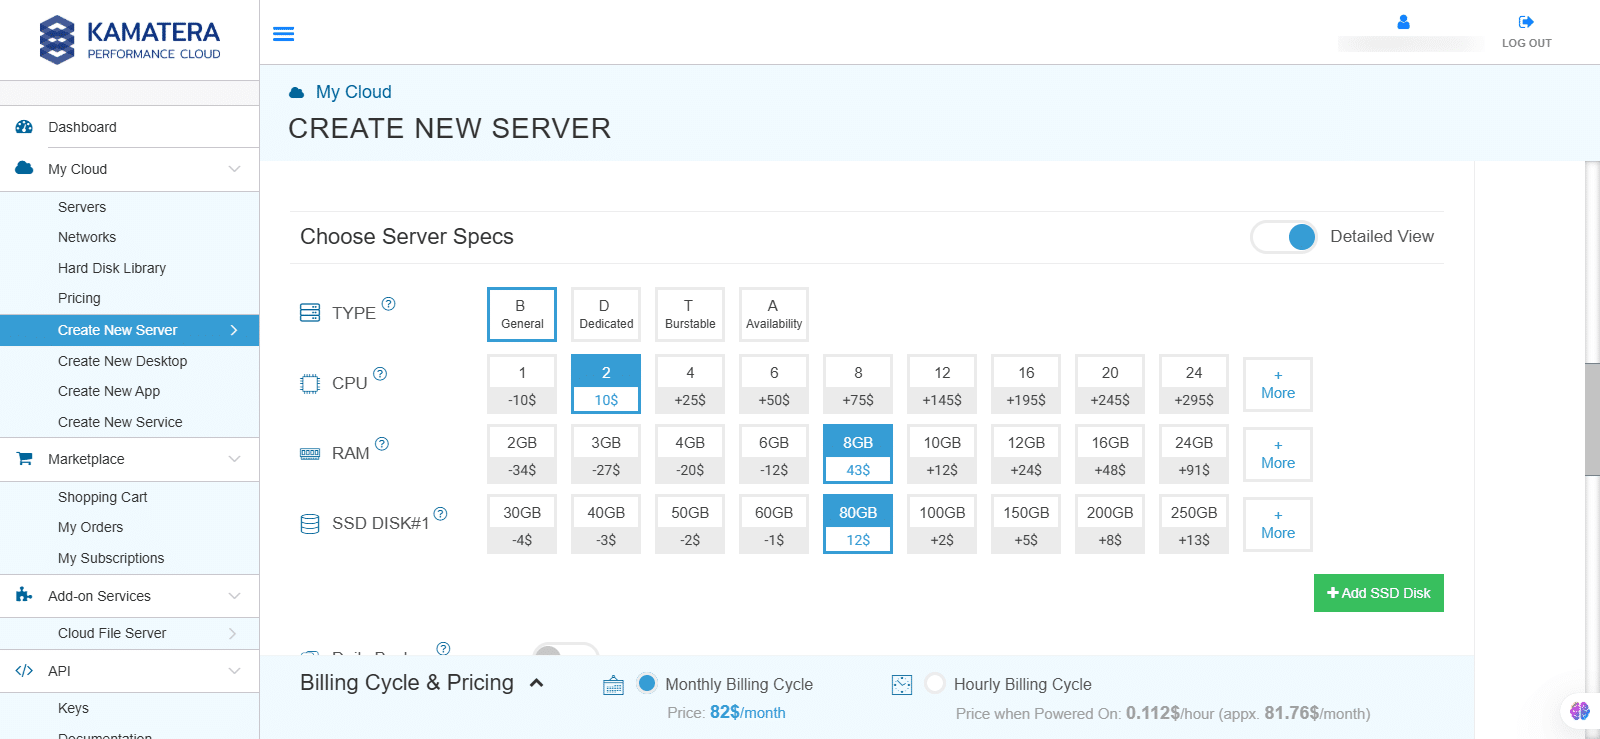
Configure your server
| Field | Description |
| Type | Type B-General Purpose: Server CPU are assigned to a dedicated physical CPU thread with reserved resources guaranteed.
Type D-Dedicated: Server CPU are assigned to a dedicated physical CPU Core (2 threads) with reserved resources guaranteed. Type T-Burst: Server CPU are assigned to a dedicated physical CPU thread with reserved resources guaranteed. Exceeding an average usage of 10% will be extra charged for CPUs usage consumption. Type A-Availability: Server CPUs are assigned to a non-dedicated physical CPU thread with no resources guaranteed. Note: More information on CPU types is available on the My Cloud- Pricing page. |
| CPU | Choose the number of vCPUs that will be installed on the server. Type B/T can be configured with up to 104 vCPUs per server. Based on Intel’s latest Xeon Processors, 2.7 GHz+. |
| RAM | Choose the amount of RAM that will be installed on the server. Type B/T/D can be configured with up to 512GB RAM per server. |
| NVMe SSD DISK | Choose NVMe SSD Storage Size. You can add up to 15 NVMe SSD disk. NVMe SSD storage includes unlimited IOPS and unlimited storage bandwidth, free of charge. |
| Daily Backup | Toggle the switch to enable extended daily backups of your server’s storage to external backup storage. |
| Managed services | Toggle the switch to enable managed services to the server’s operating system by Kamatera’s technical support team. |
Choose networking
Users can select the network they wish to use, whether it’s a public Internet network or a private local network.
- Simple mode
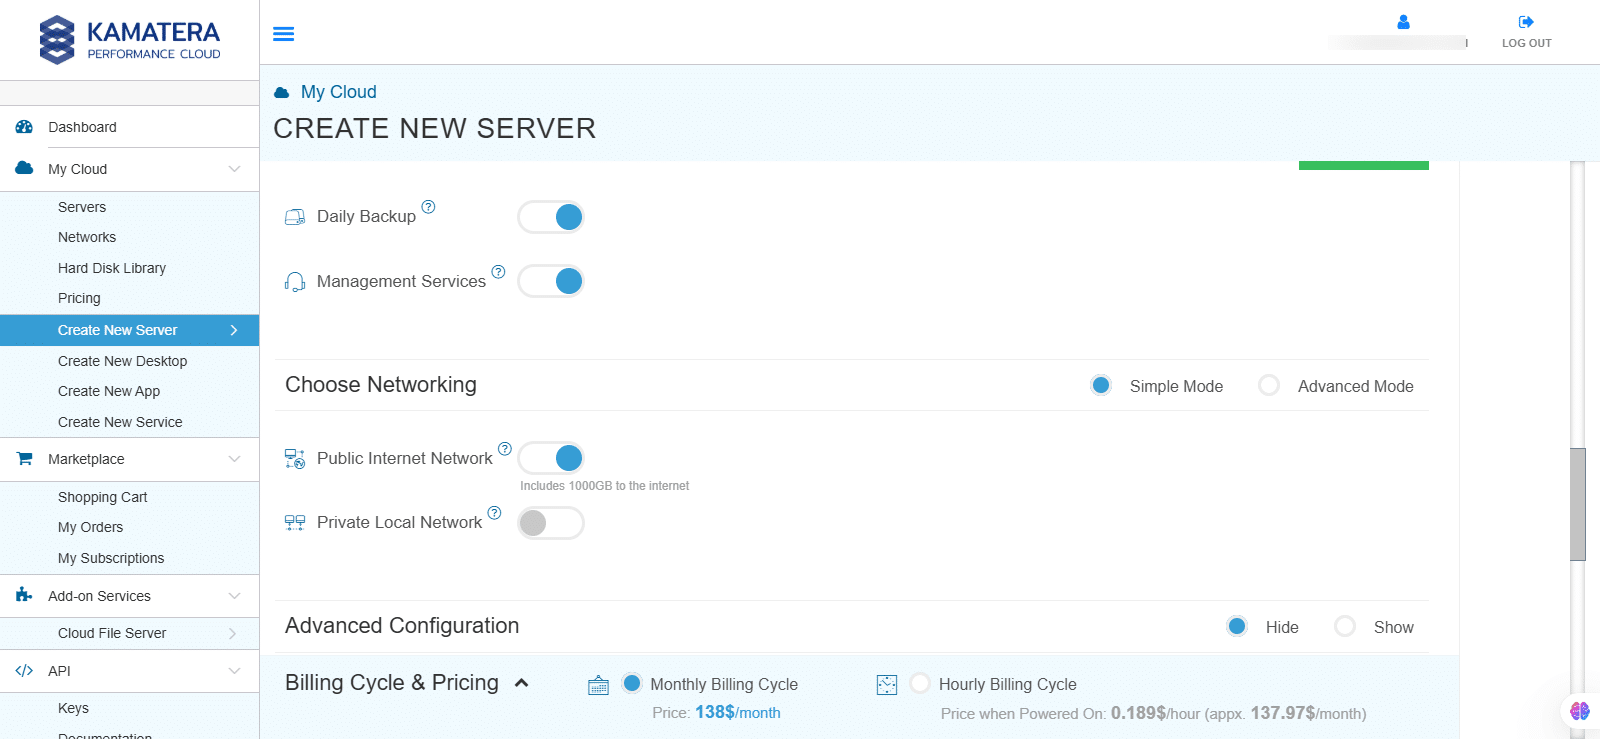
| Field | Description |
| Public Internet Network | Check to connect the server to a network interface connected to Public Internet Network. |
| Private Local Network | Check to connect the server to a network interface connected to Private Local Network. |
- Advanced mode
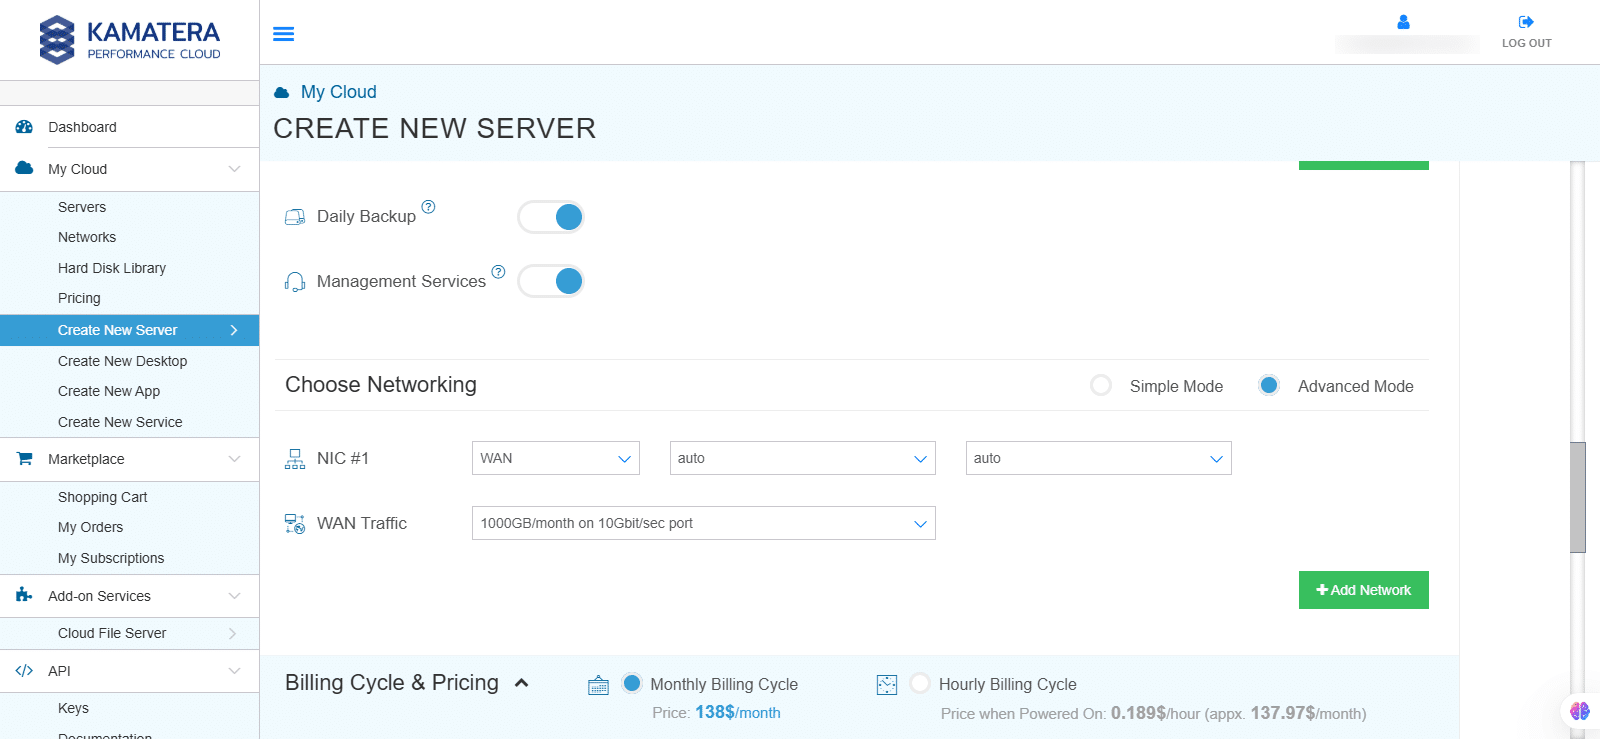
| Field | Description |
| Password | Select password
Password allowed characters: a-z, A-Z,0-9 !@#$^&*()~ and must need the following requirements:
|
| Validate | Re-enter the password to validate. |
| Servers | Select the number of servers the user wants. |
| Name # 1 | Enter the name of the server. |
| Power On Servers | Switch on the toggle button to see the details |
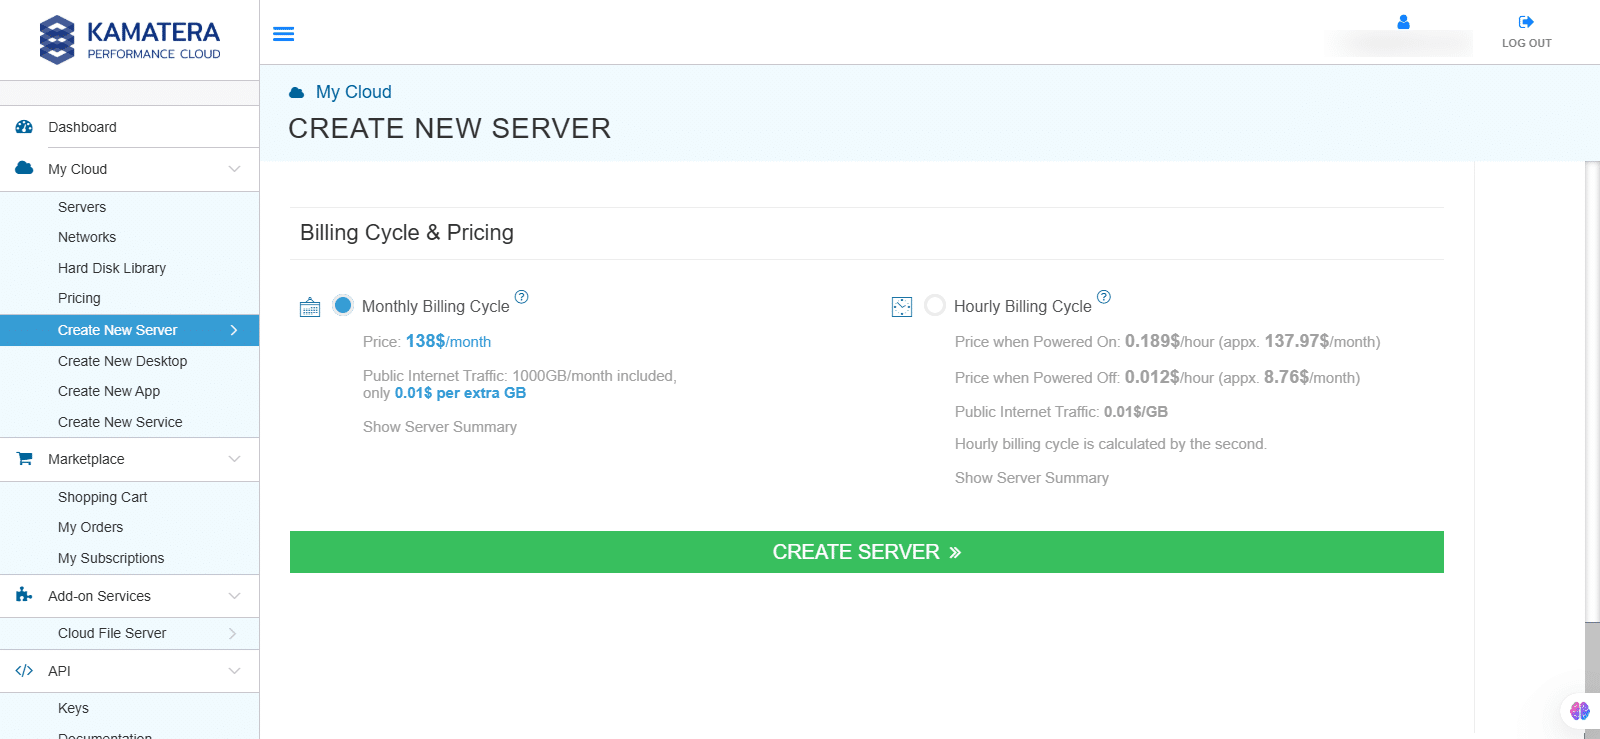
Note: Once the user enters the details in Finalize Settings, they can select either the Monthly Billing Cycle or Hourly Billing, depending on the requirements.
Billing cycle and pricing
You can choose between monthly or hourly billing cycles. Then, click Create Server.
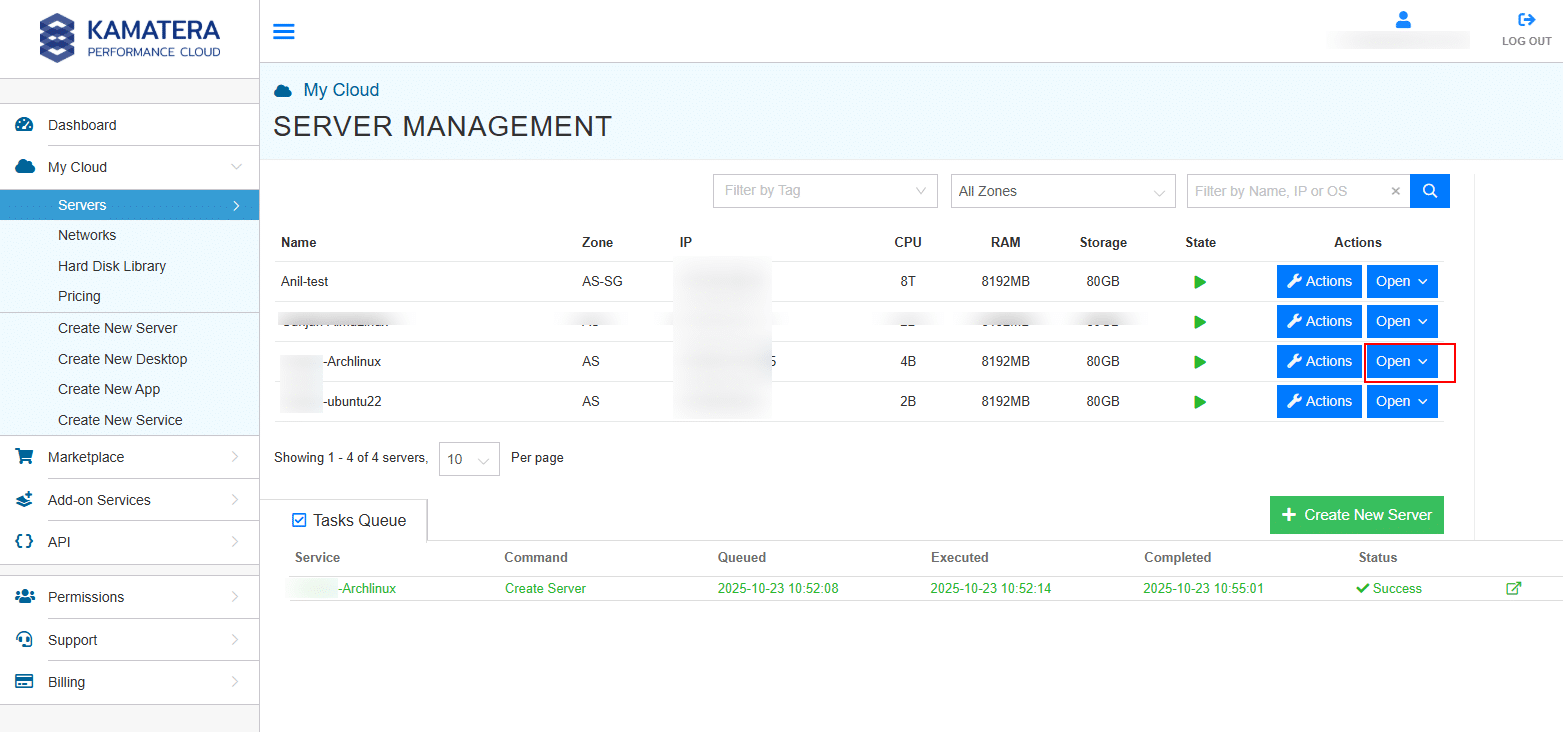
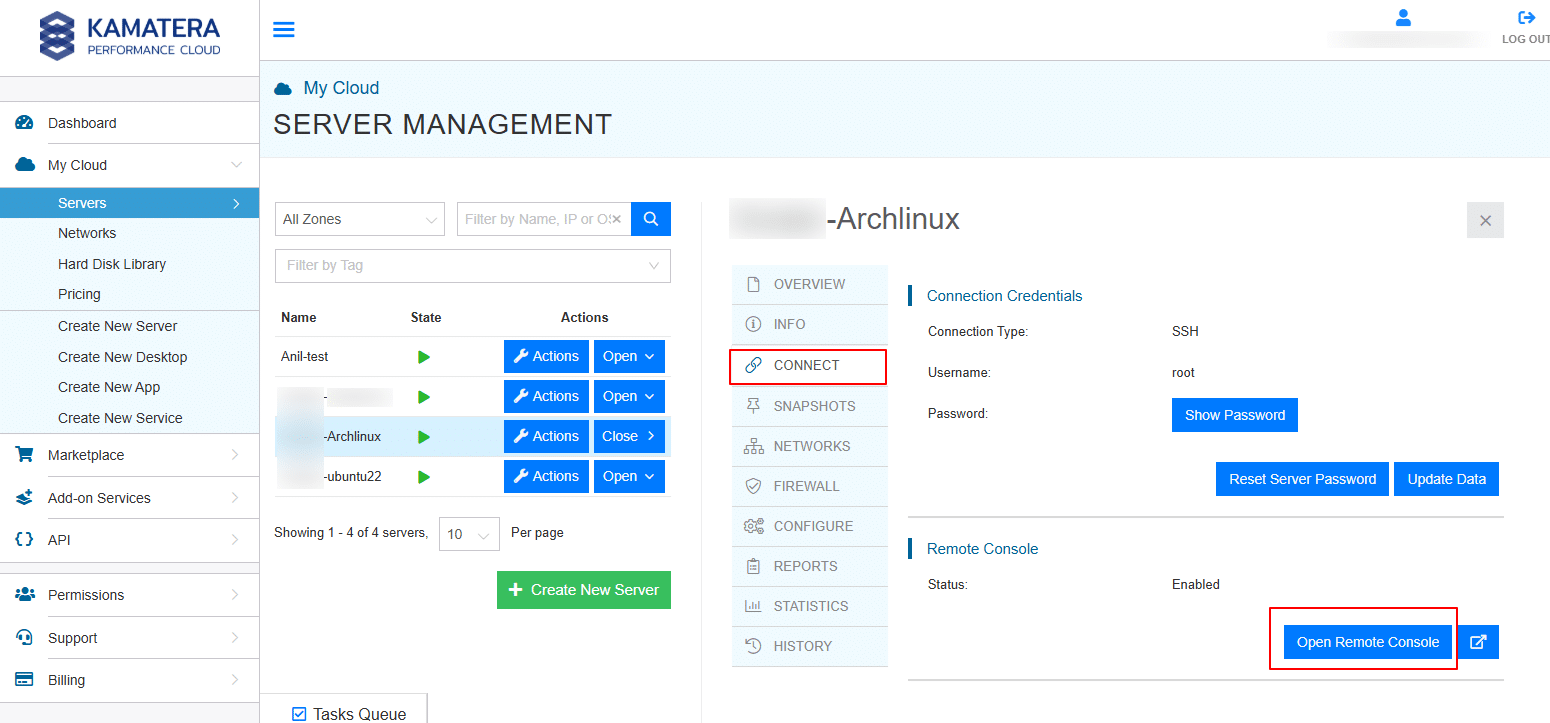
Once the installation is successful, the Arch Linux server is reflected in the Server Management dashboard. Now, click on Open.
Click on Connect, and then click on Open Remote Console.
Log in to your Arch Linux server
A new tab opens connecting to the Arch Linux server. Login with username and password.
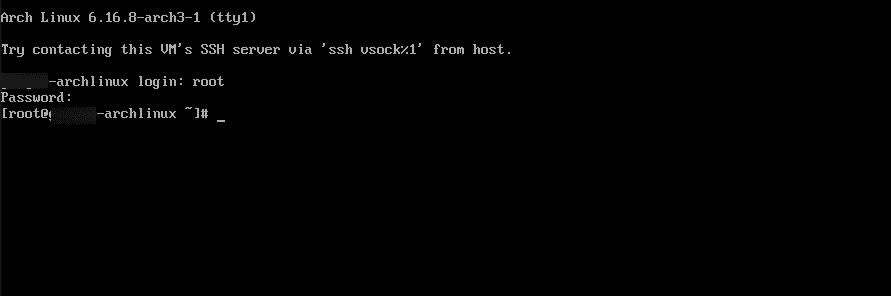
Once the Arch Linux server is created and running, you can connect to it using the SSH credentials provided in the Kamatera console.
When prompted for login, enter the username and password as shown in the screenshot below.
Note: You can find the server’s public IP address, root username, and password under the Connect section in the Kamatera dashboard.

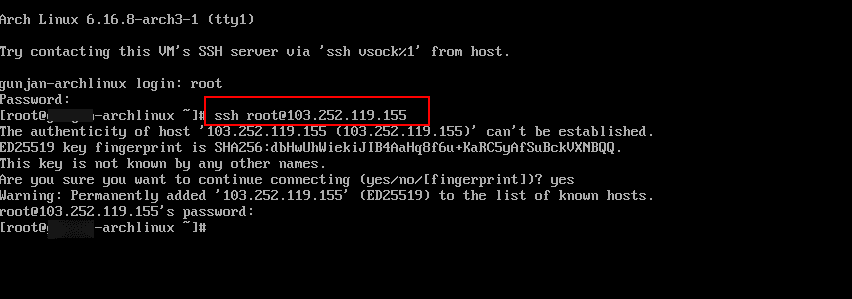
To connect via SSH from a Windows system, run the following command in your terminal or PowerShell:
Command:
ssh username@your_server_ip
When prompted, enter the password to access your server.
If SSH is not installed or running: On the server itself, run the following commands to install, enable, and start SSH:
Command:
pacman -S openssh
Command:
systemctl enable sshd
Command:
systemctl start sshd
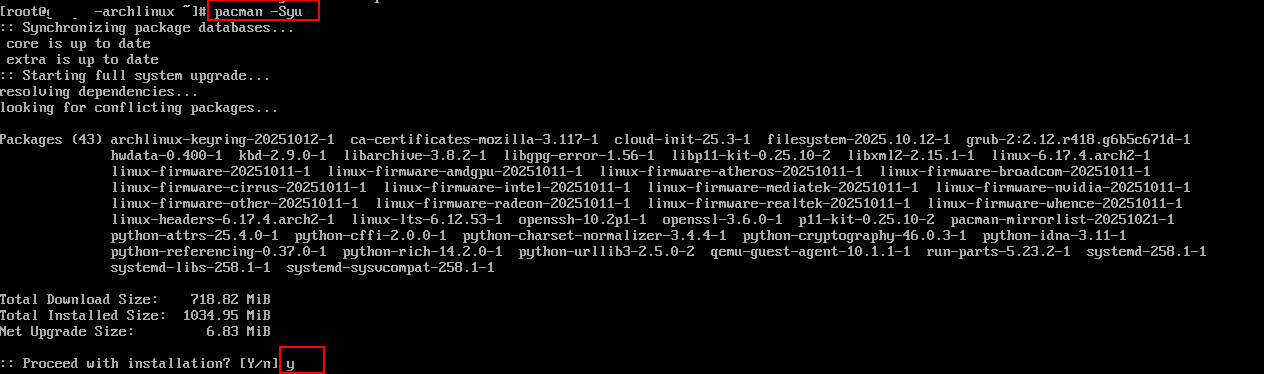
Keep your Arch Linux installation up to date with the latest packages:
Command:
pacman –Syu
When prompted “Proceed with installation?” [Y/n]. Enter “y”.
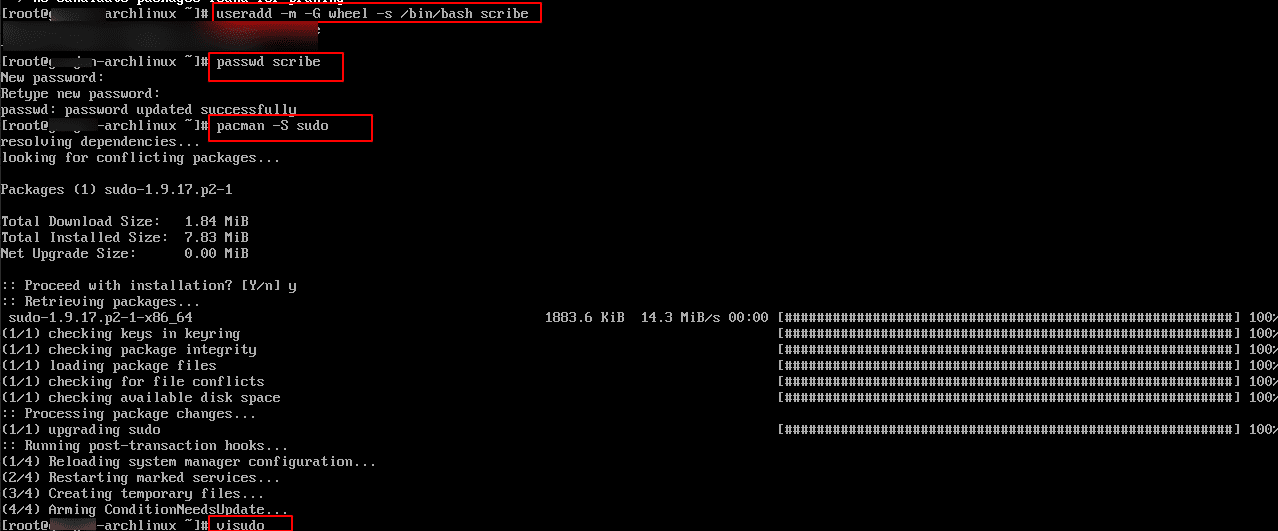
For better security, create a new user and give them sudo privileges:
Commands:
useradd -m -G wheel -s /bin/bash username

passwd username

pacman -S sudo

visudo
Note: After running the visudo command, the file will open in a text editor. To allow sudo access:
- Find the following line: %wheel ALL=(ALL) ALL
- Uncomment it by removing the # at the start.
If you plan to use Arch Linux as a remote workstation, you can install a graphical interface like GNOME, KDE, or XFCE:
Command:
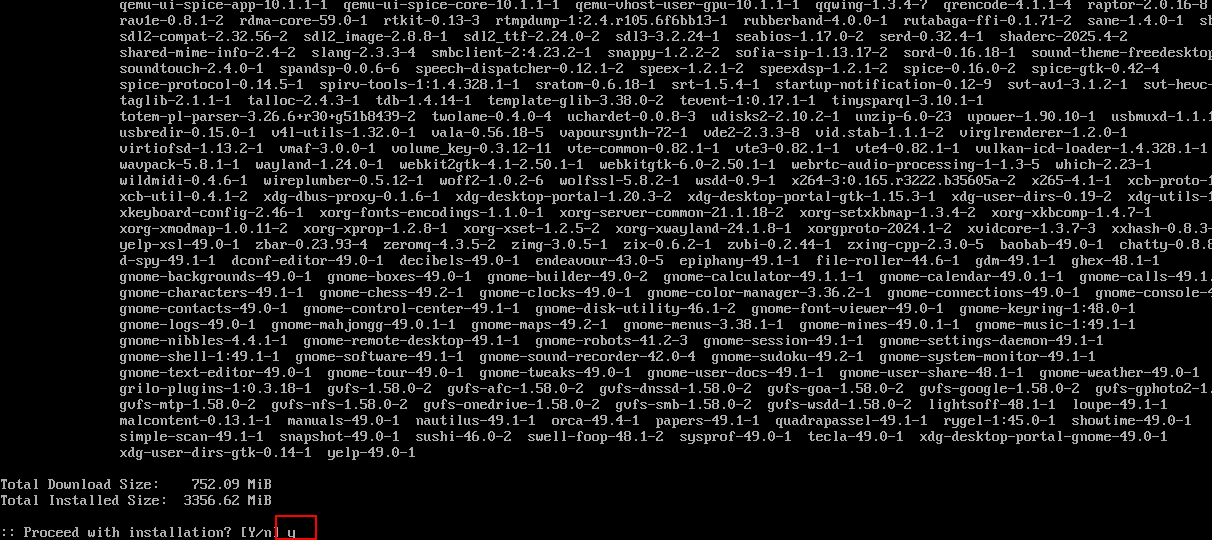
pacman -S gnome gnome-extra
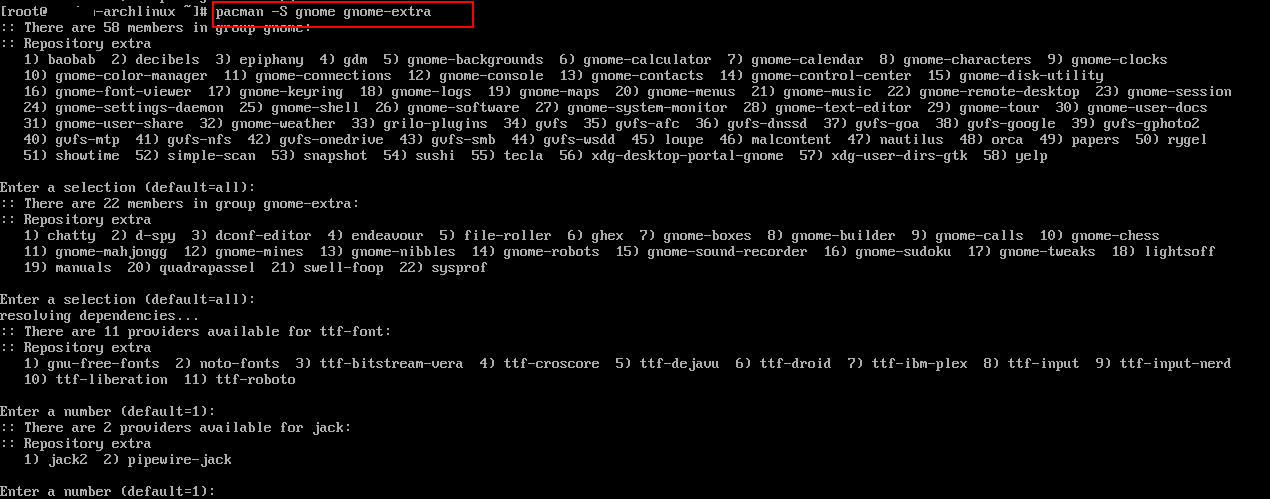
When prompted “Proceed with installation”, enter “y”.
Then, run the below commands to enable and run gdm:
Command:
systemctl enable gdm
Command:
systemctl start gdm
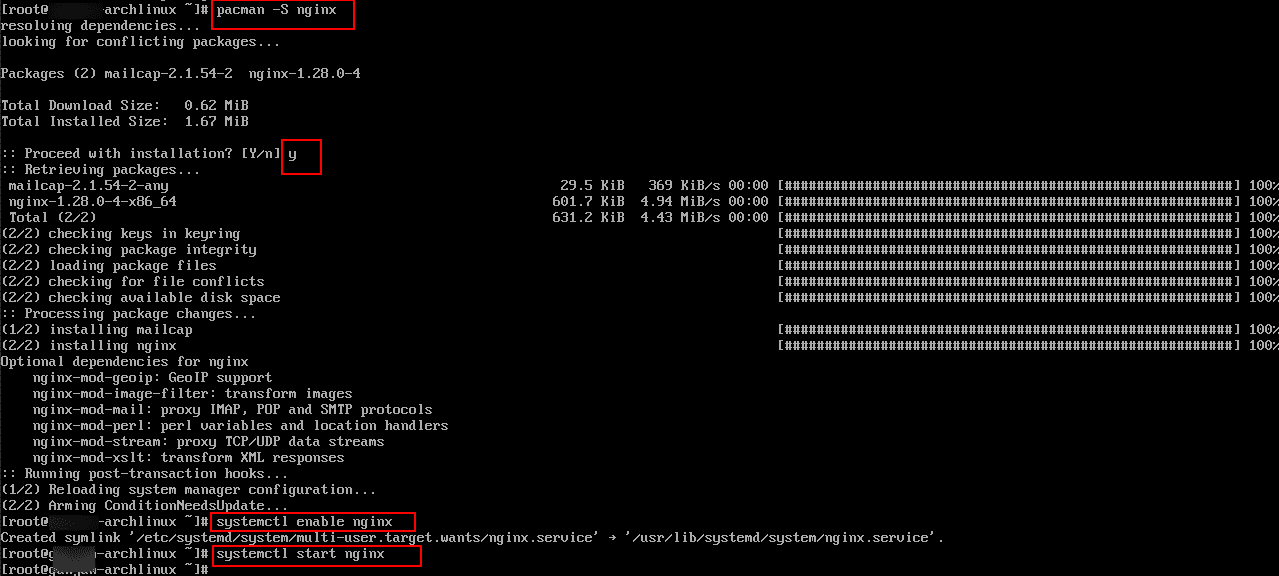
You can install popular web technologies to host websites or applications:
- Apache or Nginx (Web Server):
Command:
pacman -S nginx
When prompted “Proceed with installation?” [Y/n]. Enter “y”. Then run the below commands one by one.
Command:
systemctl enable nginx
Command:
systemctl start nginx
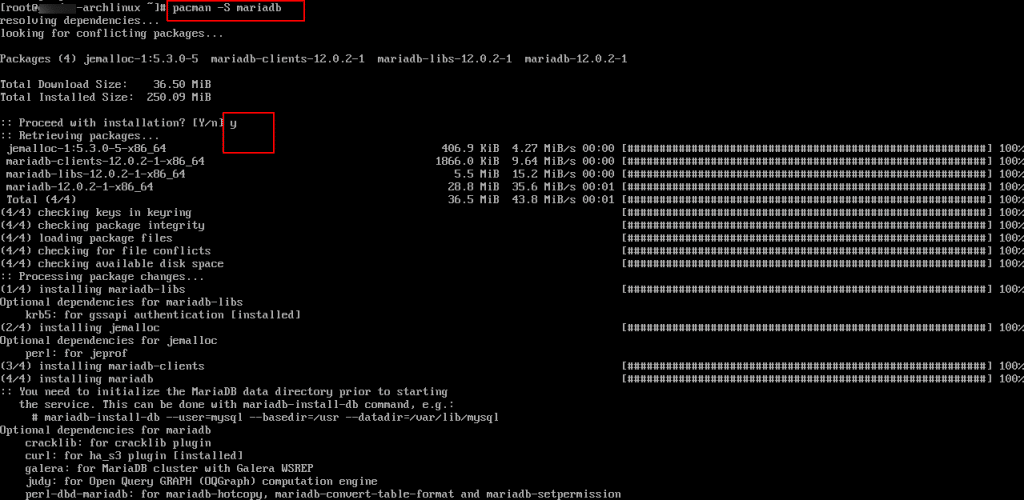
- MariaDB or PostgreSQL (Database):
Command:
pacman -S mariadb
When prompted “Proceed with installation?” [Y/n]. Enter “y”.
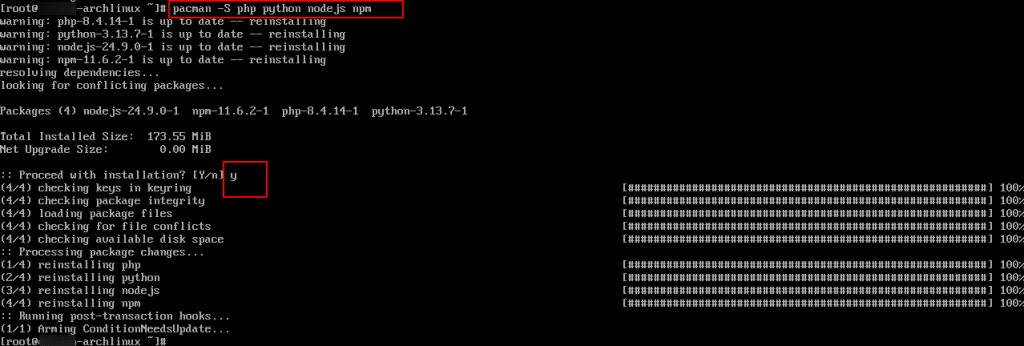
- PHP, Python, or Node.js (Application Runtimes):
Command:
pacman -S php python nodejs npm
When prompted “Proceed with installation?” [Y/n]. Enter “y”.
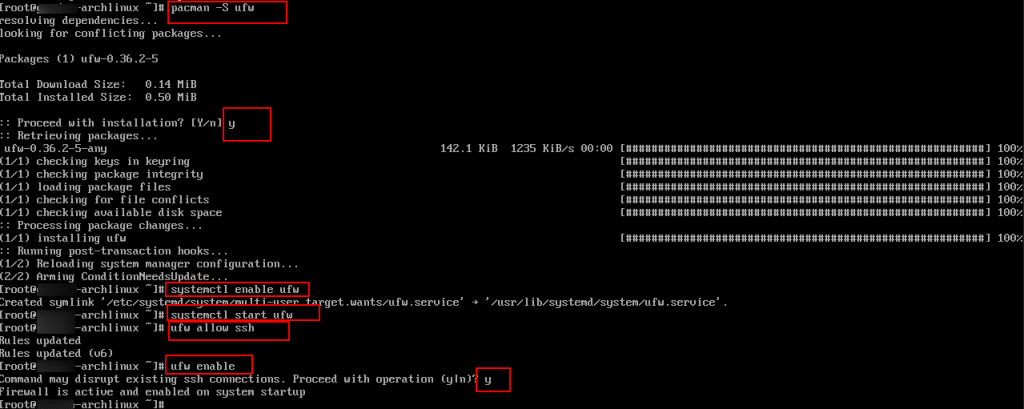
Secure your server
Secure your server using ufw (Uncomplicated Firewall):
Command:
pacman -S ufw
When prompted “Proceed with installation?” [Y/n]. Enter “y”. Now, run the below commands one by one:
Command:
systemctl enable ufw
Command:
systemctl start ufw
Command:
ufw allow ssh
Command:
ufw enable
And that’s it! By installing Arch Linux on a Kamatera server, you gain a powerful, flexible, and minimal cloud environment that can be tailored to your exact needs. Whether you’re setting up a web server, development environment, or testing platform, this combination of Kamatera’s scalable infrastructure and Arch Linux’s customizability provides the ideal foundation for performance, control, and reliability.