


High availability and data consistency are critical requirements for modern applications that rely on relational databases. Galera Cluster is a synchronous multi-master replication system for MySQL and MariaDB that provides fault tolerance, load balancing, and real-time data synchronization across multiple nodes. It’s an ideal solution for organizations seeking to eliminate single points of failure and ensure continuous database availability.
This guide walks you through the process of configuring a Galera Cluster for MySQL on Kamatera, a flexible and scalable cloud infrastructure platform. You’ll learn how to provision virtual machines, install and configure the necessary software, and establish a fully functional MySQL cluster with automatic failover and data redundancy. Note: It’s important to verify the servers are in the same LAN/whitelisted to each other.
First, let’s create an account on Kamatera.
Go to console.kamatera.com and sign up for an account by providing the following information:
- Verify your email: Click the verification link sent to your email by Kamatera.
- Password: Enter your password.
- Repeat password: Re-enter your password and click Create Account.

Enter your username and password and click Login to access Kamatera Management Console.

Navigate to My Cloud on the left pane, select Servers, and click on Create New Server. Alternatively, you can click on Create New Server on the right pane.

Choose the zone from the following options:
- Asia
- North America
- Europe
- Middle East
Note: For this setup, we used the Asia server domain to set up the Ubuntu server.

Choose an image
Kamatera offers a variety of app and server images to help users set up preconfigured resources. Users can explore options such as:
- Server OS images
- Desktop OS images
- App images
- Service images
- My private images
In this, select App Images and select Ubuntu.

Under Choose Version, from the drop-down menu, select the latest version of Ubuntu.
Note: Always select the latest version.
Once the version is selected you can see message as: “Ubuntu Server version 22.04 LTS (Jammy Jellyfish) 64-bit”.
Toggle the Detailed view button to enable you to view the detailed description, including the price.
For this use case, we used the server specifications you see below. You can choose whatever server specs work for your project.

Choose Server Specs
| Field | Description |
| Type | Type B-General Purpose: Server CPU are assigned to a dedicated physical CPU thread with reserved resources guaranteed.
Type D–Dedicated: Server CPU are assigned to a dedicated physical CPU Core (2 threads) with reserved resources guaranteed. Type T-Burst: Server CPU are assigned to a dedicated physical CPU thread with reserved resources guaranteed. Exceeding an average usage of 10% will be extra charged for CPUs usage consumption. Type A-Availability: Server CPUs are assigned to a non-dedicated physical CPU thread with no resources guaranteed. Note: More information on CPU types is available on the My Cloud-Pricing page. |
| CPU | Choose the number of vCPUs that will be installed on the server. Type B/T can be configured with up to 104 vCPUs per server. Based on Intel’s latest Xeon Processors, 2.7 GHz+. |
| RAM | Choose the amount of RAM that will be installed on the server. Type B/T/D can be configured with up to 512GB RAM per server. |
| NVMe SSD DISK | Choose NVMe SSD Storage Size. You can add up to 15 NVMe SSD Disk. NVMe SSD Storage includes unlimited IOPS and unlimited storage bandwidth, free of charge. |
| Daily Backup | Toggle the switch to enable extended daily backups of your server’s storage to external backup storage. |
| Managed services | Toggle the switch to enable managed services to the server’s operating system by Kamatera’s technical support team. |
Choose networking
Users can select the network they wish to use, whether it is a public Internet network or a private local network.
Simple mode

| Field | Description |
| Public Internet Network | Check to connect the server to a network interface connected to Public Internet Network. |
| Private Local Network | Check to connect the server to a network interface connected to Private Local Network. |
Advanced mode

| Field | Description |
| NIC #1 | Select WAN from the options available in the drop-down menu.
Select auto from the options available in the drop-down menu.
Select auto from the options available in the drop-down menu.
|
| WAN Traffic | Select 5000 GB per month on 10 Gbit per second port. |
Advanced configuration
- Hide: to hide the advanced configuration.
- Show: to see the advanced configuration.

| Field | Description |
| Install Script | Enter the script here to execute once the server is created.
Note: For Windows system use Power Shell. |
| Keep Server On Failure | Do not terminate server if Start up Script or provisioning sails |
| Server Notes | Enter any server notes to be noted. |
| Tags | Select the tags from the drop-down menu and click Add Tag. |
Finalize settings
Finalize settings by setting the password, re-validating it, selecting the number of servers, specifying the server’s name, and enabling the Power On Servers option.

| Field | Description |
| Password | Select password
Password allowed characters: a-z, A-Z,0-9 !@#$^&*()~ and must need the following requirements:
|
| Validate | Re-enter the password to validate. |
| Servers | Select the number of servers the user wants. |
| Name # 1 | Enter the name of the server. |
| Power On Servers | Switch on the toggle button to see the details |
Billing cycle and pricing

Note: The Server Summary displays the location, operating system (including server specifications), add-on services, servers, and pricing.
Click Create Server.
When you click on Tasks Queue, you will see the Ubuntu2 and Ubuntu3 are downloading. Once it is complete, you will get a success message.
Once the installation is successful, you will see the message Success beside the server’s name. Ubuntu2 and Ubuntu3 servers are reflected in the Server Management dashboard.
Click Open beside the Ubuntu2 and Ubuntu3.

A new screen shows up. The Overview tab in the center is selected by default and it displays information like Power state, Guest OS, Zone, Public Internet (WAN), Server ID of the server and Configuration-Number of CPU. Memory Size, Disk 1.
Click on Connect to connect to the server.

Now, click on Open Remote Console to open a new terminal.

Note: For this use case, we created two servers: Ubuntu2 and Ubuntu3. Ubuntu2 serves as the master node/server, and Ubuntu3 acts as a secondary node.
In the terminal, enter the Username and Password that you mentioned while creating a server (step-7).
Note: Similarly, login to another server (Ubuntu3) that you recently installed.

Connect to the Server
You first need to connect to your Kamatera server.
Use the following command on your local machine (Linux, macOS, or Windows with PowerShell or WSL):
Command:
ssh root@your-server-ip
Replace your-server-ip with the public IP address of your Kamatera server (e.g., xxx.xx.xxx.xx).
Note: Similarly, connect to other servers by running the above command.

Update each server/node
After connecting to the server, run the following command
Command:
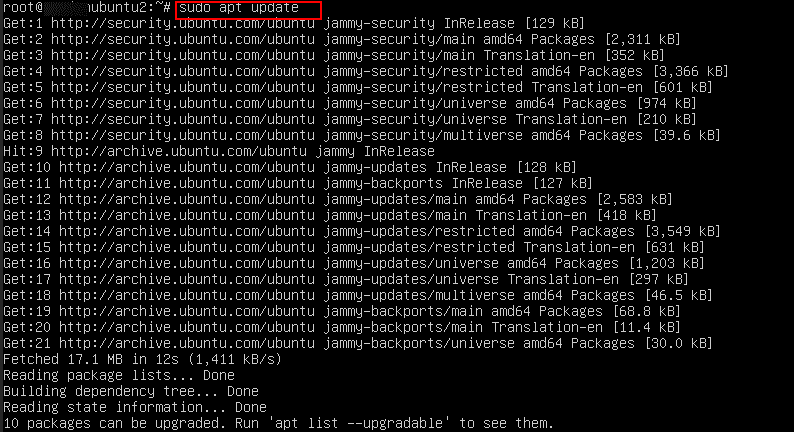
sudo apt update
This command will update the list of available packages and their versions.
Note: Run this command on all servers.
After running the above command, you will see output similar to the following screen:
Install MySQL (on all servers/nodes)
Command:
sudo apt install mariadb-server -y
This command installs the MariaDB database server on your system. The -y option automatically answers ‘yes’ to any prompts during the installation process, allowing it to run without manual confirmation. The sudo at the beginning runs the command with administrative (root) privileges, which are required to install software.
Note: Run this command on all servers.

Check the version of MySQL by running the below command
Command:
mysql --version
Also check the configuration file by running the below command
Command:
sudo find /etc -type f -name “50-server.cnf”
This command searches for a file named 50-server.cnf inside the /etc directory and its subfolders. It uses sudo for permission, find to look for files (-type f), and -name to match the exact filename. This file is commonly used in MariaDB for server configuration.
Note: Similarly, do the same for other servers.

After finding out the path of the file, go to nano editor by running the below command
Command:
sudo nano /etc/mysql/mariadb.conf.d/50-server.cnf
This command opens the file 50-server.cnf (a MariaDB configuration file) using the nano text editor. The file is located in /etc/mysql/mariadb.conf.d/, and it contains server settings like networking, storage engine, and Galera cluster options. You use sudo to open it with admin rights so you can edit and save changes.
Note: Run the above command on other servers also.

When the nano editor opens, edit the main MySQL configuration file on each server.
Add the following in the file (adjust for each server!):
Note: Add this file on all the servers.
| [mysqld]
## Required MySQL settings
binlog_format=ROW

default_storage_engine=InnoDB

innodb_autoinc_lock_mode=2

bind-address=0.0.0.0

## Enable Galera

wsrep_on=ON

wsrep_provider=/usr/lib/galera/libgalera_smm.so

## Cluster name (same for all)

wsrep_cluster_name="galera_cluster"

## List of all node IPs

wsrep_cluster_address="gcomm://10.0.0.1,10.0.0.2,10.0.0.3"
## Replication method wsrep_sst_method=rsync ## Node-specific info (adjust per node) wsrep_node_name=”Ubuntu2″ wsrep_node_address=”10.0.0.1″ |
Note:
- In wsrep_cluster_address line, replace 10.0.0.1, etc. with the private IPs of your servers.
- Update wsrep_node_name and wsrep_node_address with the current server name and IP address (For example: wsrep_node_name=“Ubuntu2” and wsrep_node_address=”10.0.0.1”).

Secure MySQL on all servers
Command:
sudo mysql_secure_installation
This command runs a security script to help you configure and secure your MariaDB installation. It lets you set a root password, remove anonymous users, disable remote root login, and delete test databases.
When prompted:
Enter current password for root (enter for none): press ‘Enter’
Switch to unix_socket_authentication [Y/n]: press ‘n’
Change the root password? [Y/n]: press ‘Enter’
Now enter your password twice, you will get the success message once the password is reset.
Note: Run this command and follow the instructions on other servers also.

Follow the instructions as shown in the screen below:
When prompted”
Remove anonymous users? [Y/n]: press Enter
Disallow root login remotely? [Y/n]: press Enter
Remove test database and access to it? [Y/n]: press Enter
Reload privilege tables now? [Y/n]: press Enter
Once all the above steps are completed, your MariaDB installation should now be secure.
Note: Repeat this for other servers also.

After the installation is complete, run the below command to check the status of MySQL or MariaDB service.
Command:
sudo systemctl status mysqld.service
This command shows whether the database server is active, inactive, or has any errors.
In the screen below, you can see MySQL or MariaDB service is “active (running)”.
Note: Repeat the same (that is check the status) for other servers also.

Now, run the below command on all servers to stop the MySQL or MariaBD service.
Command:
sudo systemctl stop mysqld.service

Start the Cluster
Command:
sudo galera_new_cluster
This command is used to start a new Galera Cluster for MariaDB or MySQL on the first node/server. It initializes the cluster from scratch (also called a ‘bootstrap’) and should only be run on the first node/server when no other nodes/servers are part of the cluster yet. This command sets up the initial state of the cluster so other nodes can then join it. It requires proper configuration in the MariaDB config file (50-server.cnf) with Galera settings already in place.
Note: The above command should be run only on Master/first server.
Command:
sudo systemctl status mysqld.service
Running sudo systemctl status mysqld.service after sudo galera_new_cluster simply checks whether the MariaDB (or MySQL) service has started successfully as the Master/first node in the Galera Cluster. It shows the current state of the database server- whether it’s active, running as a cluster node, or if there were any errors during startup. This helps confirm that the cluster initialization worked properly.

Start MySQL on other servers/nodes
On all servers, just start MySQL:
Command:
sudo systemctl start mysqld.service
Note: From the above screenshot, you can see the MySQL is active(running) on master/first node/server, now start the MySQL services on other servers also.

Login with root password
Command:
mysql -u root –p
This command is used to access the MySQL or MariaDB server as the root (administrator) user. The -u root specifies the username, and the -p flag tells the system to prompt for the root user’s password. Once you enter the correct password, you’ll be logged into the MySQL shell where you can manage databases, users, and run SQL queries.
Command:
show databases;
This command is used inside the MySQL or MariaDB shell to list all the databases available on the server. It helps you see which databases currently exist and are accessible to the logged-in user.
Note: Run the above 2 commands on all the servers.

When the SHOW DATABASES; command is run, it displays all existing databases on the server. To view the tables within a specific database, first switch to that database using the following command:
Command:
use mysql;
Note: Run the command on all servers and check the databases.

When you run the following command, all the tables in the selected database are displayed:
Command:
show tables;
Note: Run the command on all servers and check the tables.

To know about the members of the cluster
Command:
select * from wsrep_cluster_members;
This command is used to display information about all the nodes currently part of the Galera Cluster. It shows details like node UUIDs, addresses, and status, helping you verify if the cluster is properly formed.
Note: Run the command on all servers.

To know the current state of the Galera Cluster
Command:
select * from wsrep_cluster;
This command is used to retrieve information about the current state of the Galera Cluster. It provides details such as the cluster name, UUID, status, and size, helping you monitor the health and configuration of the cluster.
Note: Run the command on all servers.

On any server/node except the Master server (for example: Ubuntu3 server), run the below command
Command:
wget https://www.mysqltutorial.org/wp-content/uploads/2018/03/mysqlsampledatabase.zip
This command is used to download a sample MySQL database ZIP file from the given URL. wget is a command-line tool that fetches files from the web, and in this case, it retrieves a sample database for practice or testing.

Command:
sudo apt install unzip

Command:
unzip mysqlsampledatabase.zip

Command:
mysql -u root –p

Command:
source mysqlsampledatabase.sql

This command executes all the SQL statements in the mysqlsampledatabase.sql file, creating tables and inserting sample data. You will see output showing the progress of table creation and data import.

Command:
show tables;

Now, go to another server or Master server (for example: the Ubuntu2 server) and log in to MySQL using the following command:
Command:
sudo mysql -u root –p
Then run:
Command:
show databases;
You will see all the databases that were added on the second server (that is Ubuntu3), reflected here as well-confirming that the Galera Cluster is synchronizing data across nodes.
Command:
use classicmodels;
This command switches to the classicmodels database so you can work within it.

Command:
show tables;
Then this command lists all the tables available in that database. Together, these commands let you explore the structure of the imported sample database.
Command:
select * from customers
This command retrieves and displays all the records from the customers table in the currently selected database. This lets you view the full dataset, including all columns and rows, and helps verify that the data was imported correctly.

The results are displayed as shown on the screen below.

To exit the MySQL shell, run the following command:
Command:
exit
This closes your session and brings you back to the terminal (for example: Ubuntu3).
To stop the MySQL (or MariaDB) service on your system, run:
Command:
sudo systemctl stop mysqld
This command stops the database server, which is useful for maintenance, rebooting, or making configuration changes.

Now, go to the master server (in this case, Ubuntu2) and log in to the MySQL service using the following command:
Command:
mysql -u root -p
After entering the password, run the following SQL command to check the cluster status:
Command:
select * from wsrep_cluster_members
This will display a list of all servers/nodes currently connected to the Galera Cluster. If only one server is running, you will see just that node listed—indicating that the other nodes are offline or not connected.

Now, go to another server (Ubuntu3) and completely remove the database files by running:
Command:
sudo rm rf var/lib/mysql/*
This command forcefully deletes all MySQL data files, effectively erasing all databases on that server.
Next, start the MySQL service again:
Command:
sudo systemctl start mysqld
Then, log in to the MySQL service:
Command:
sudo mysql -u root –p
After entering your password, run:
Command: show databases;
You will see that all databases have been removed from this server/node, as the data was deleted.

Bootstrapping the Galera Cluster manually
Command:
SET GLOBAL wsrep_provider_options='pc.bootstrap=true';
This command is used to bootstrap a Galera Cluster manually on a node. This tells the node to start a new cluster instead of joining an existing one, which is useful when all nodes are down or when initializing the cluster for the first time.
Note: This command should be run only on the master node (the first node) when you want to manually bootstrap or start a new Galera Cluster. Running this on other nodes can cause conflicts or errors since only one node should initialize the cluster.

Now, start the MySQL services on other nodes.
- To recover a Galera node after it has stopped, run the following command:
Command:
sudo galera_recovery
This command helps identify the correct state to safely restart the node and rejoin the cluster without data conflicts.
Note: You should run this command on each server individually before starting the MySQL service again to ensure proper recovery and synchronization.

And that’s it! You have successfully configured a Galera cluster on your Kamatera cloud server.